We did a little day trip to Detroit for Small Business Saturday. We started off getting coffee at a local shop – we chose Dessert Oasis, but there are a bunch of places to choose from. Some of my other favorites are Ashe Supply Co., Astro Coffee, Great Lakes Coffee and Madcap.
Across from Dessert Oasis is a little park with benches and cute holiday decor. We drank our drinks there for some festive vibes. Next door is a cute pet shop, City Bark, where we got some good cat gifts.
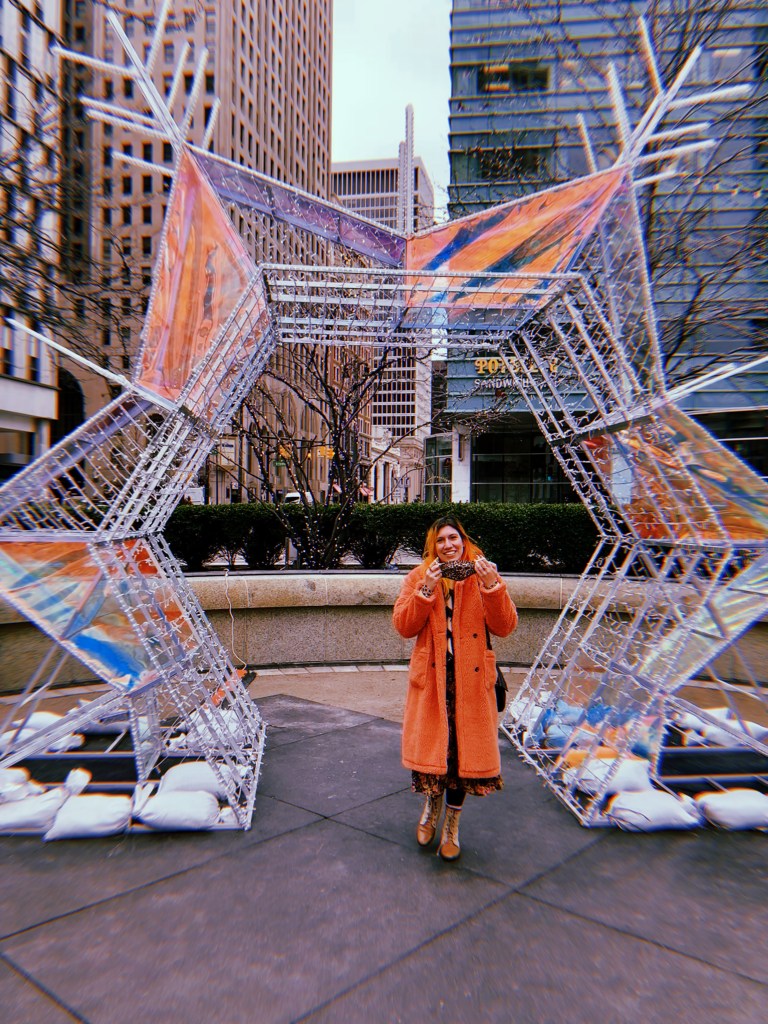
Next we walked over to Campus Martius park to see the tree and all the holiday decor. They have little photo op spots that are fun to take pics in. Usually they have ice skating, but it’s currently closed due to COVID.
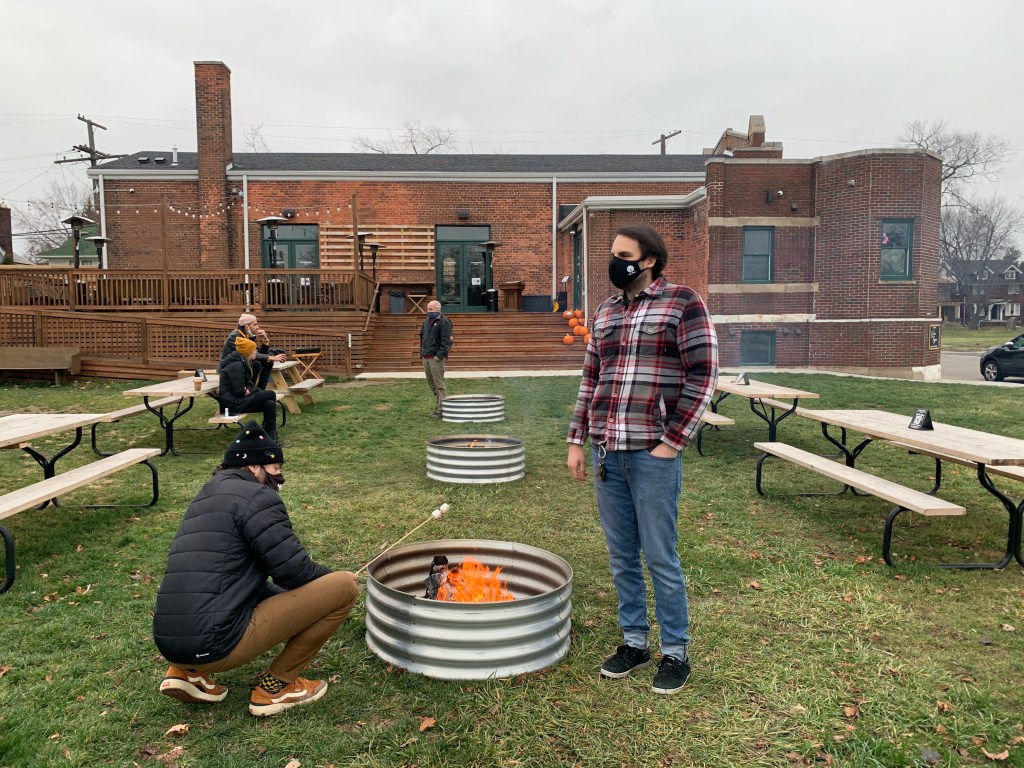
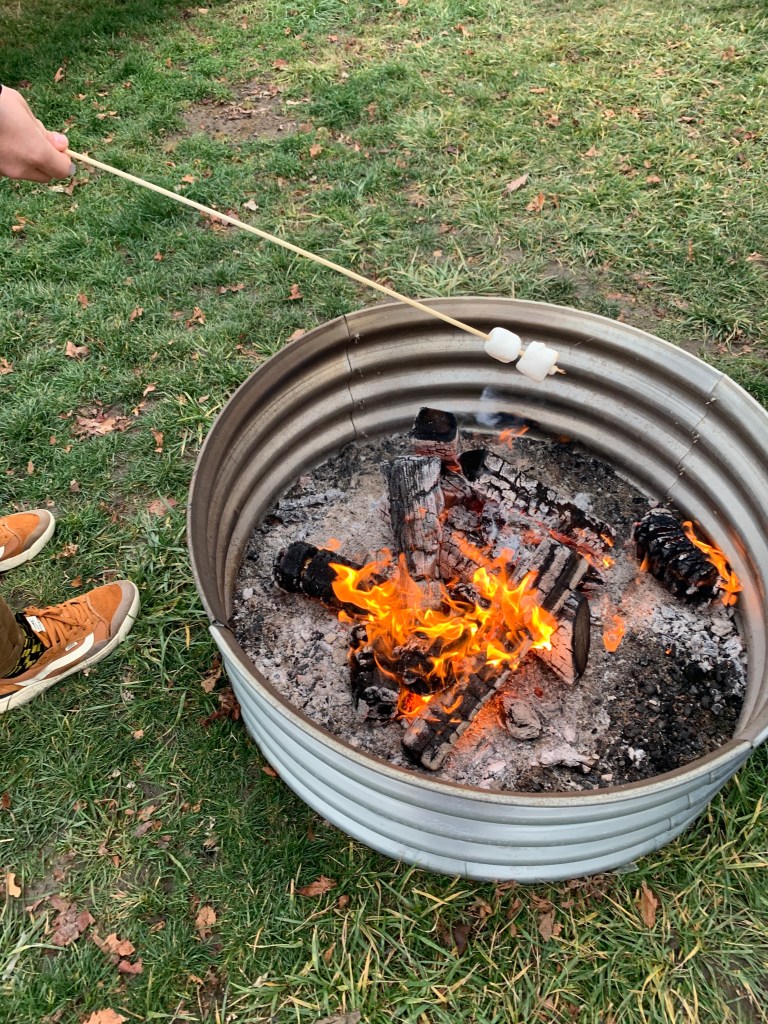
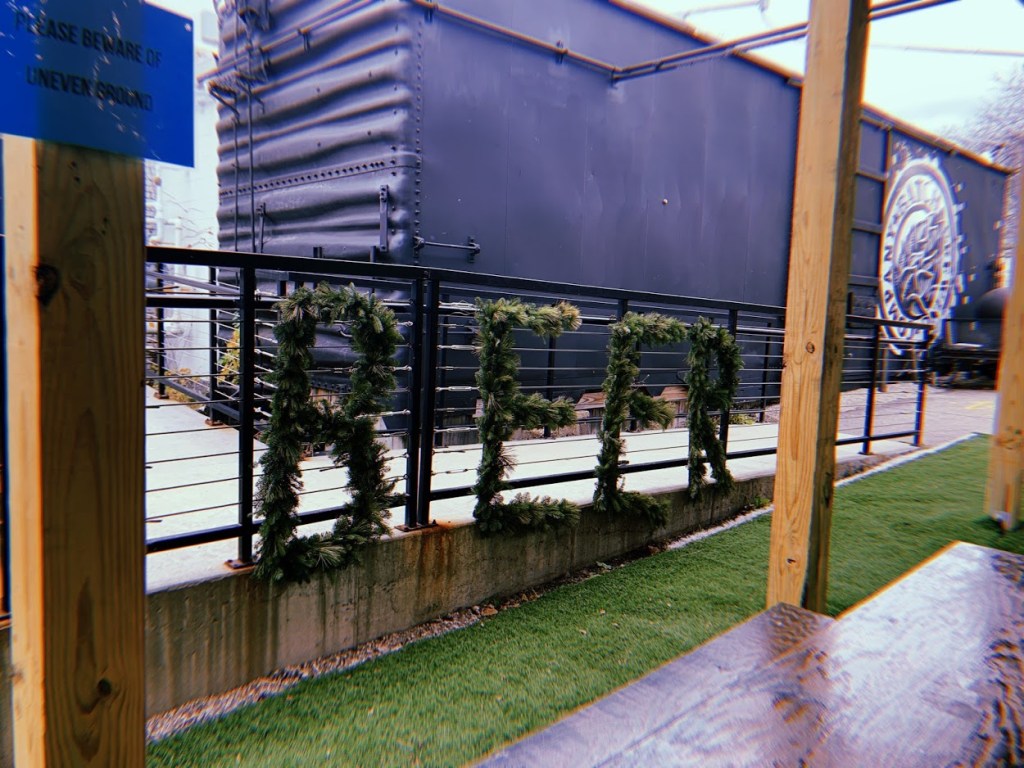
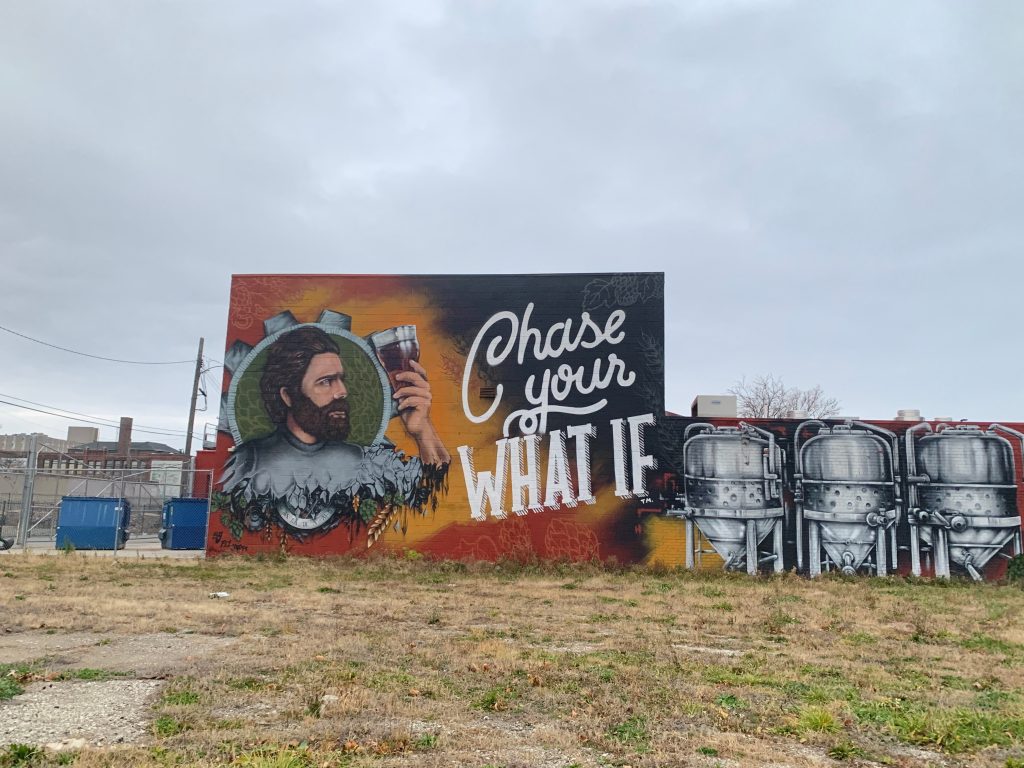
After that, we needed some beer. We stopped by Batch Brewing Company. They have a huge outdoor area with a roof, fires and big heaters. We got a few beers here and enjoyed the warmth. Next, we got lunch at The Congregation. It’s a restaurant/bar/cafe in an old church. We didn’t get to sit inside, but peeked in for the cool views. They have good sandwiches and drink options. They had heaters and fire pits. We even got a s’mores kit to use in one of the fires.
Next, we did more shopping! We went over to Midtown and checked out City Bird, Nest, Third Man Recordsand Nora. All are really cute local shops – great for gifts, especially MI themed gifts. We then got some beer related treats at 8 Degrees Plato and Founders(growler/howler pickup).
Detroit has so many local shopping and dining options – it’s hard to choose! It’s fun and feels good to support all the local places, especially right now.
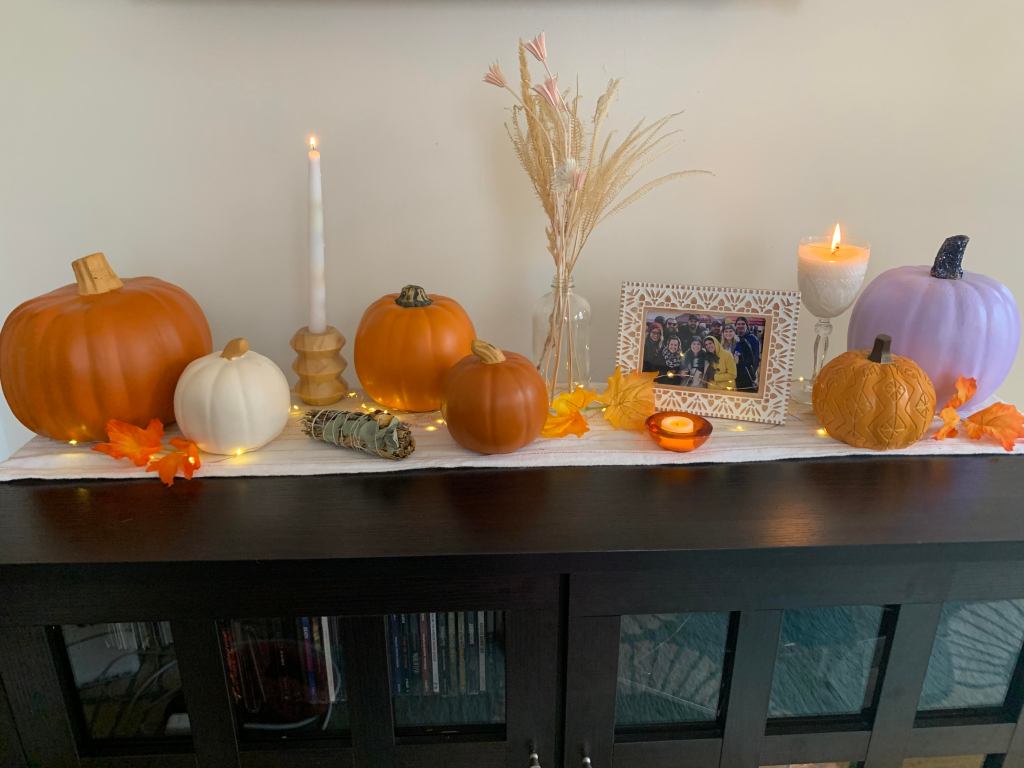
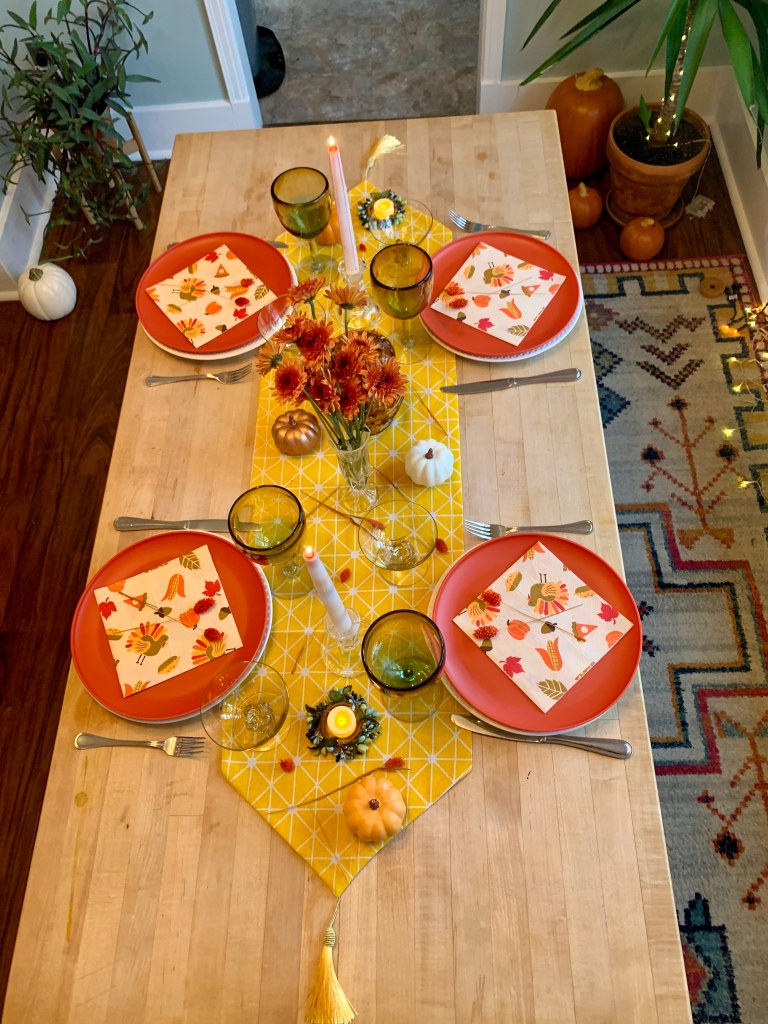
We hosted a small Thanksgiving dinner party this year. I wanted to use things that I already owned for the table to make things easier and more affordable. I stuck with the typical orange, yellow, red color scheme with pumpkins and a couple turkey nods.
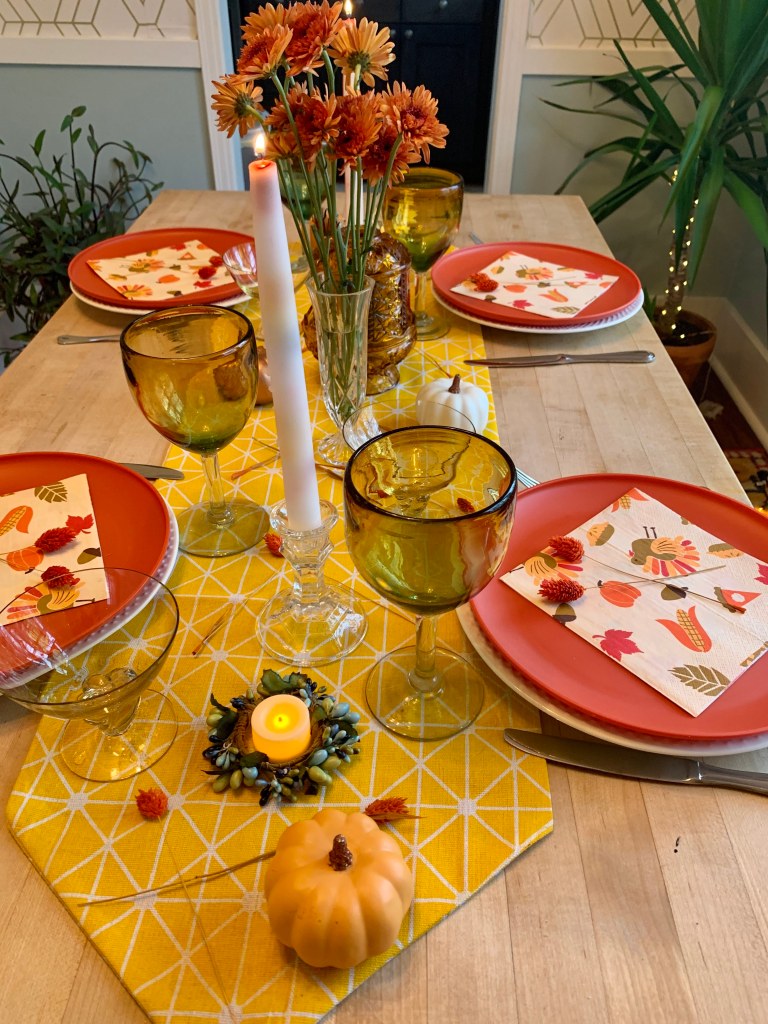
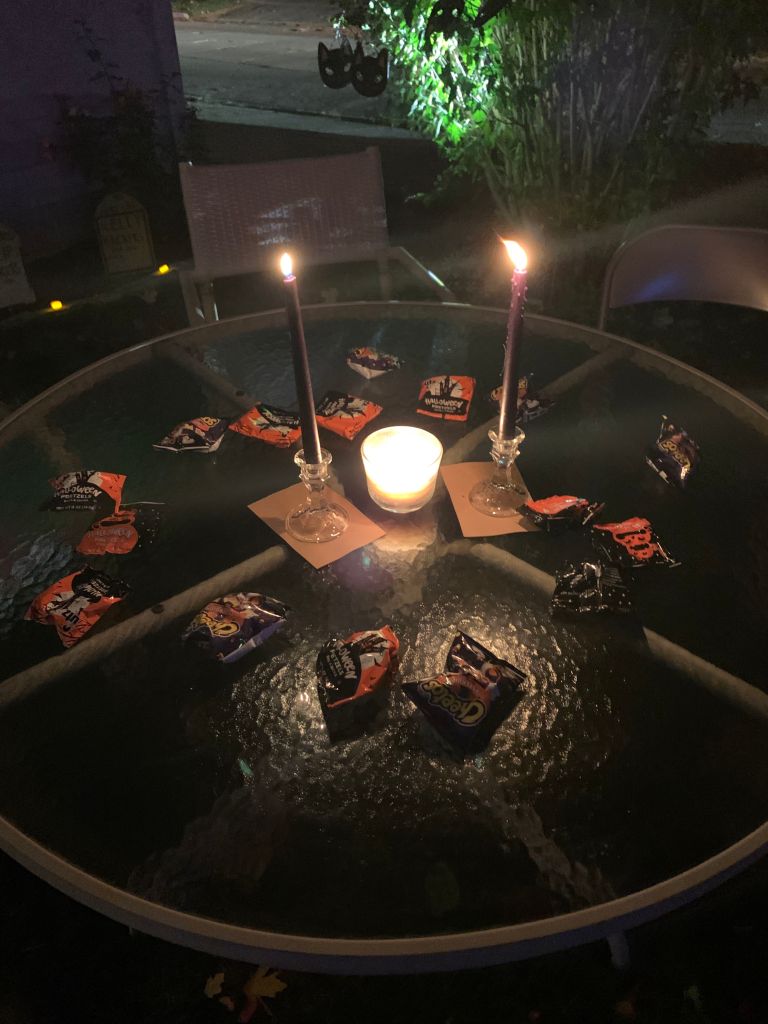
I used a yellow table runner and topped it with mini pumpkins, orange mums and candles. I got a bunch of pumpkins throughout the fall season from Michael’s and Target. I placed larger ones throughout the house and room for a full fall vibe. I used old clear jars for the flower vases and got the candle holders from Salvation Army. I really love the orange glass one in the middle. My favorite candles were these color drip taper candles – as they burn, more colors appear. There’s red, yellow and blue – which mix to create different color drips down the white candle.
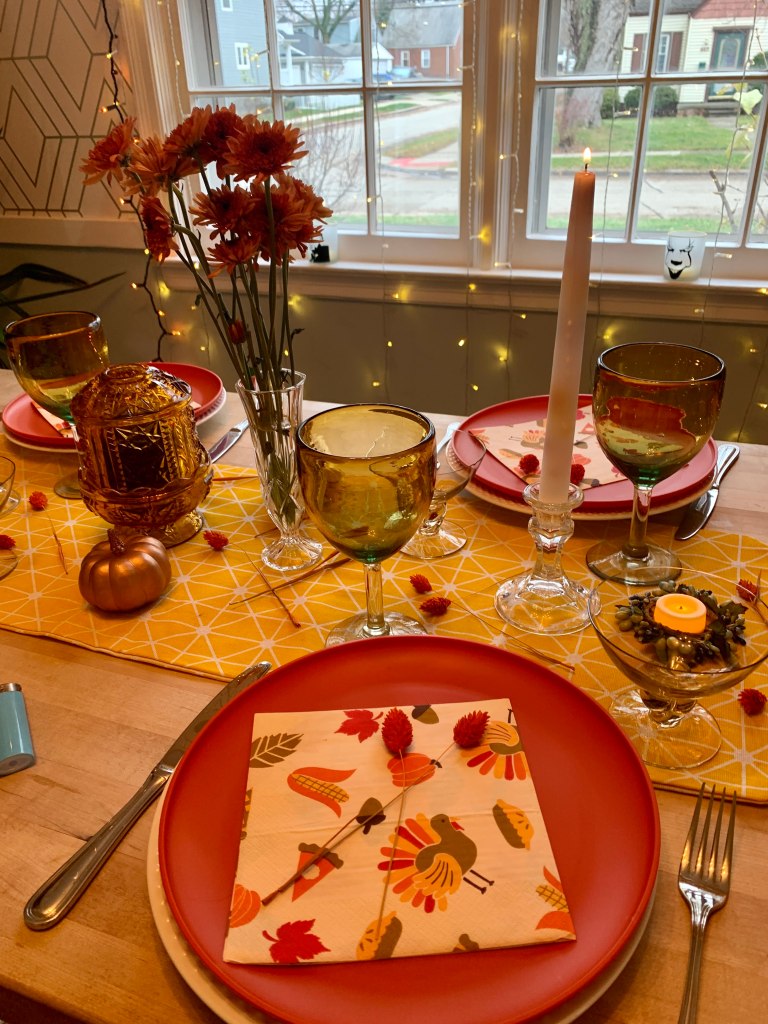
For the place settings, I used my typical hard plastic plates in orange and placed them on top of glass white plates. You could use the plastic for apps/dessert and the glass for actual dinner. I just liked the look of the orange better than white. I found cute turkey napkins in the Target dollar section – I liked these because they weren’t overtly TURKEY – just a few with other fall items. I placed some leftover orange dried flowers on top of the plate/napkin with silverware on the side of each plate. I used yellow cocktail glasses for drinks and fall colored wine goblets as water glasses.
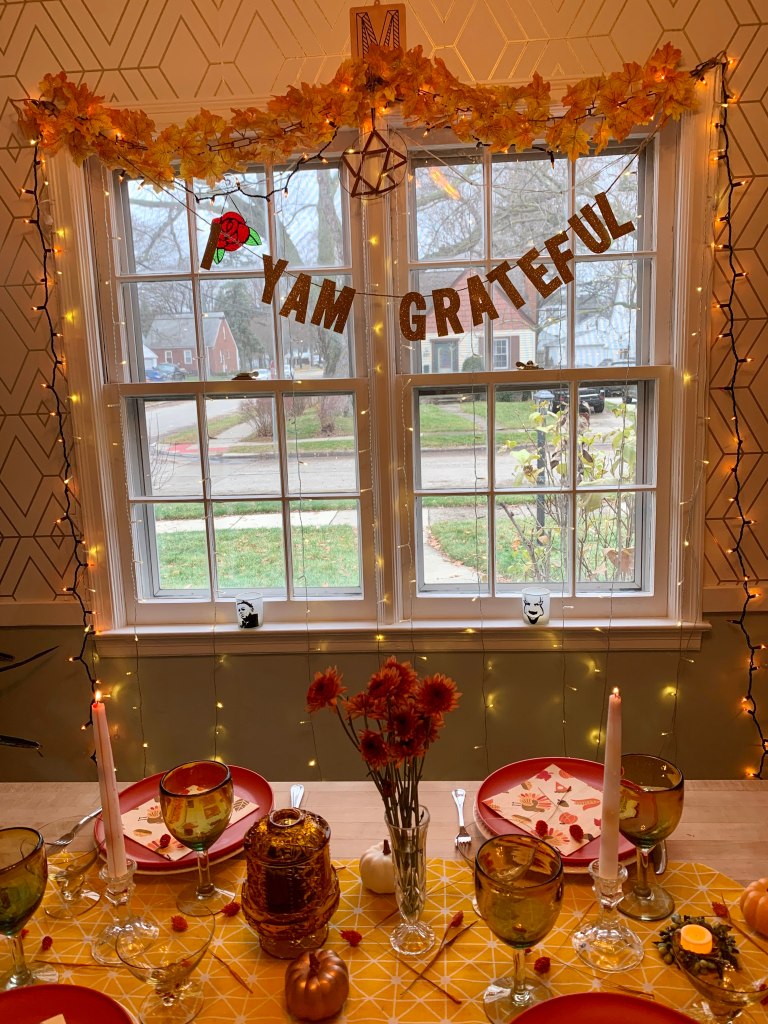
As a backdrop, I used my light curtain over the window and made a garland that said “I yam grateful”. I got a bunch of these leaf garlands and hung them around the house.
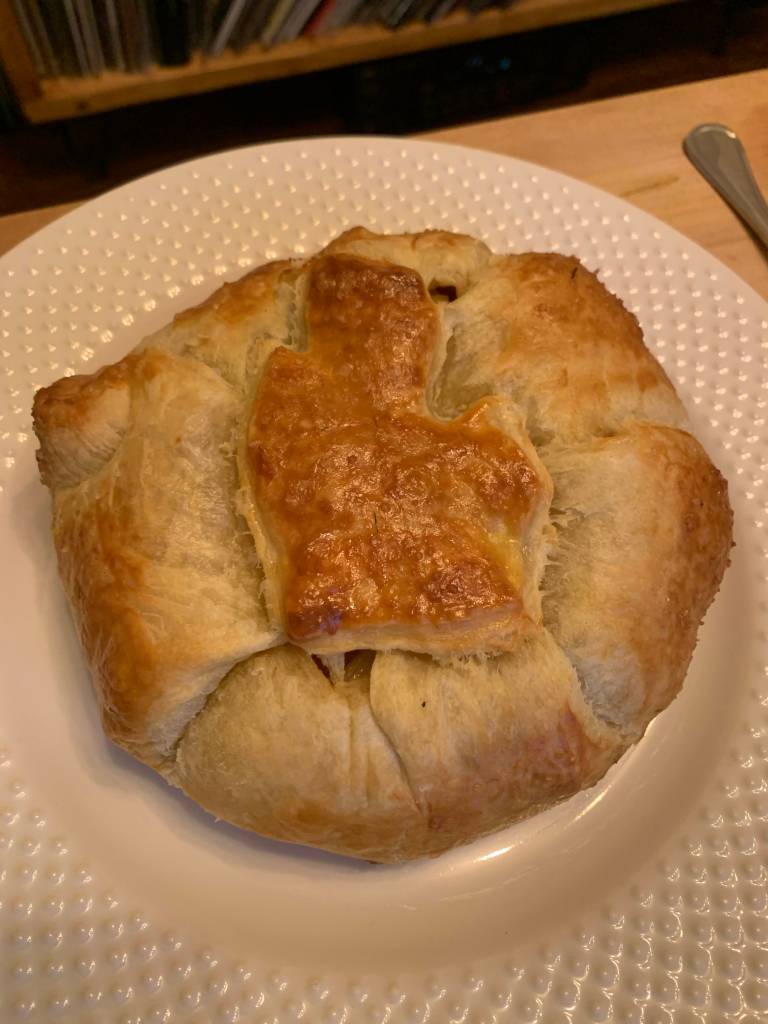
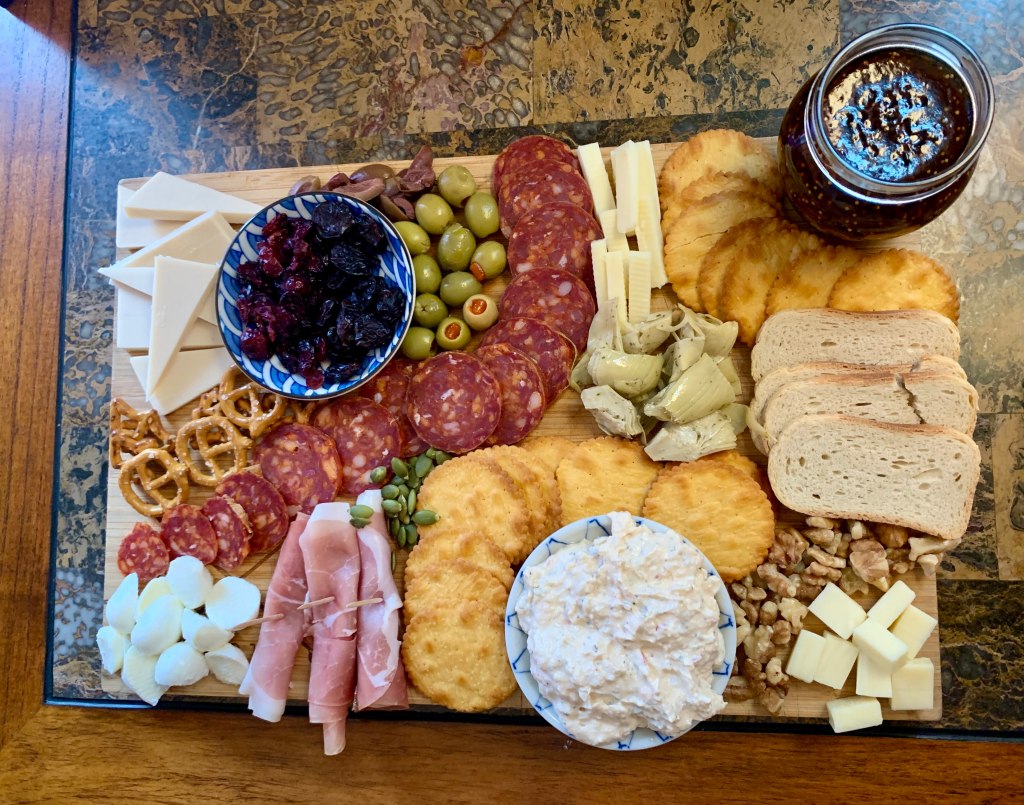
Our menu was pretty basic too. We deep fried a turkey, made mashed potatoes, mac & cheese, roasted asparagus, vegetarian stuffing/gravy and biscuits! We did a cheese board and made a baked brie with a Michigan cutout on top for our appetizers. For dessert we had pecan pie with pecan beer from Epic Brewing.
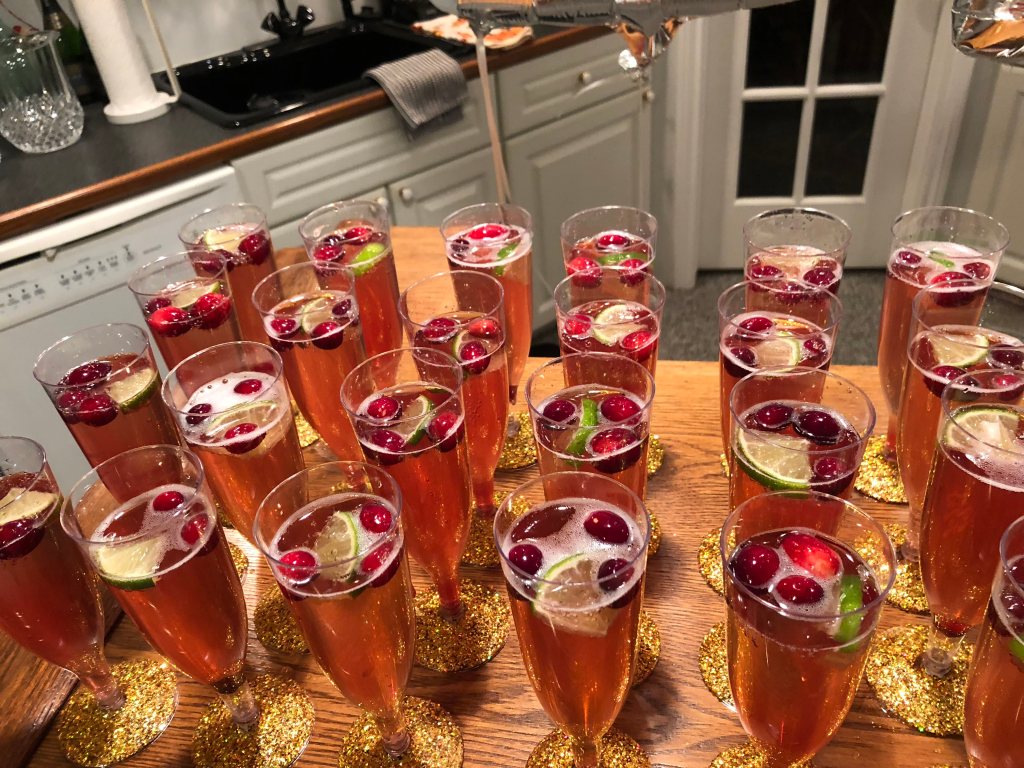
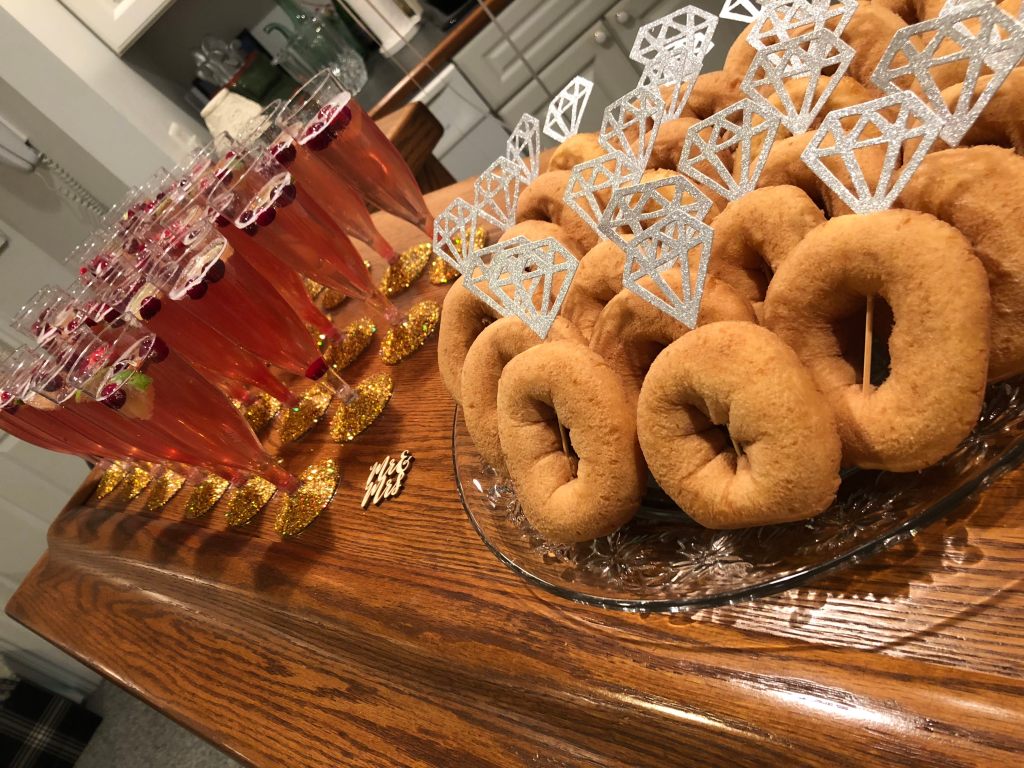
A friend got engaged and wanted to have a party near Thanksgiving when all of her family was in town. So here’s my late fall take on an engagement party!
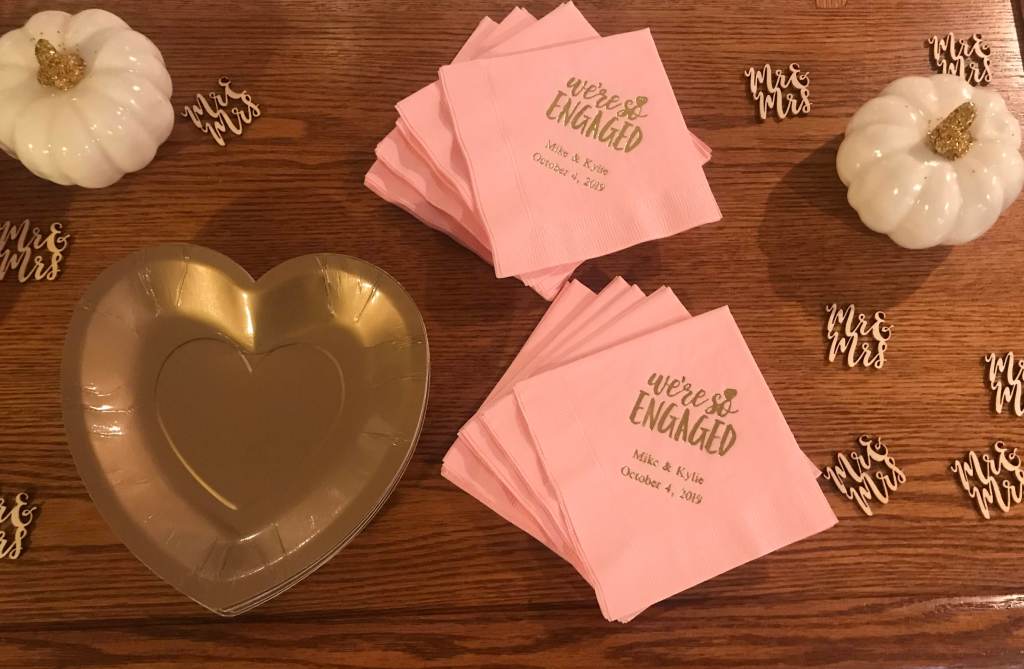
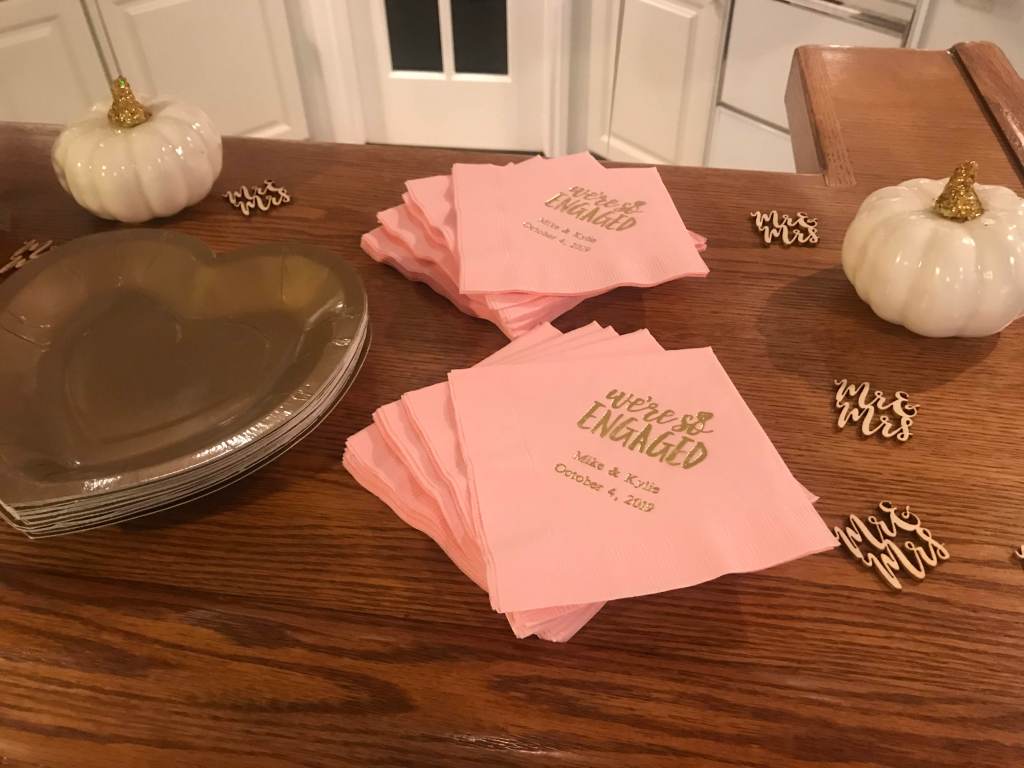
I tried to incorporate classic fall/Thanksgiving items with the usual glitzy bride decorations.
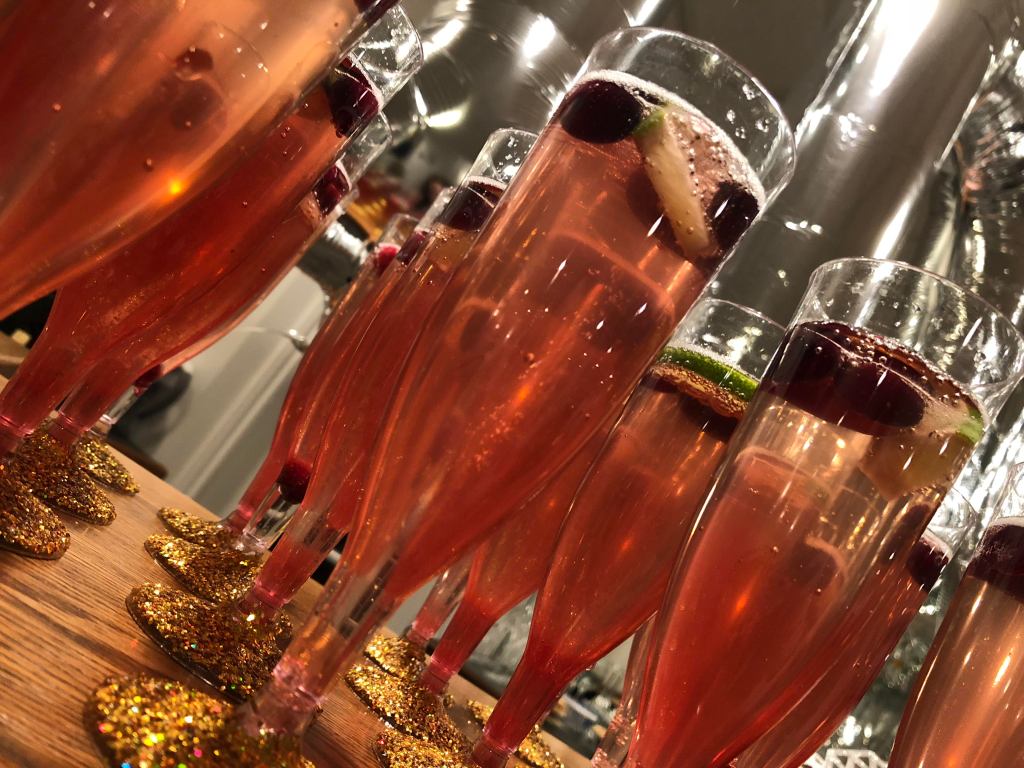
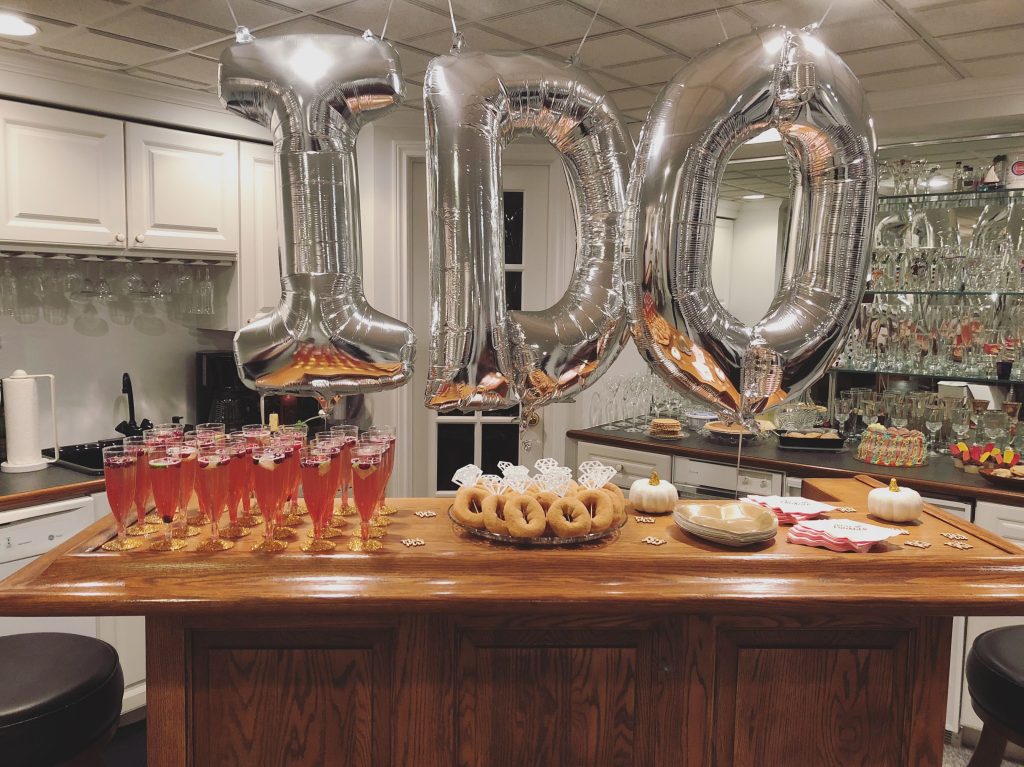
I garnished the champagne with cranberries and lime slices. I got plastic champagne glasses, but obviously go for glass if you can afford it. I used mod podge glue and gold glitter on the bottom of each glass to spruce them up.
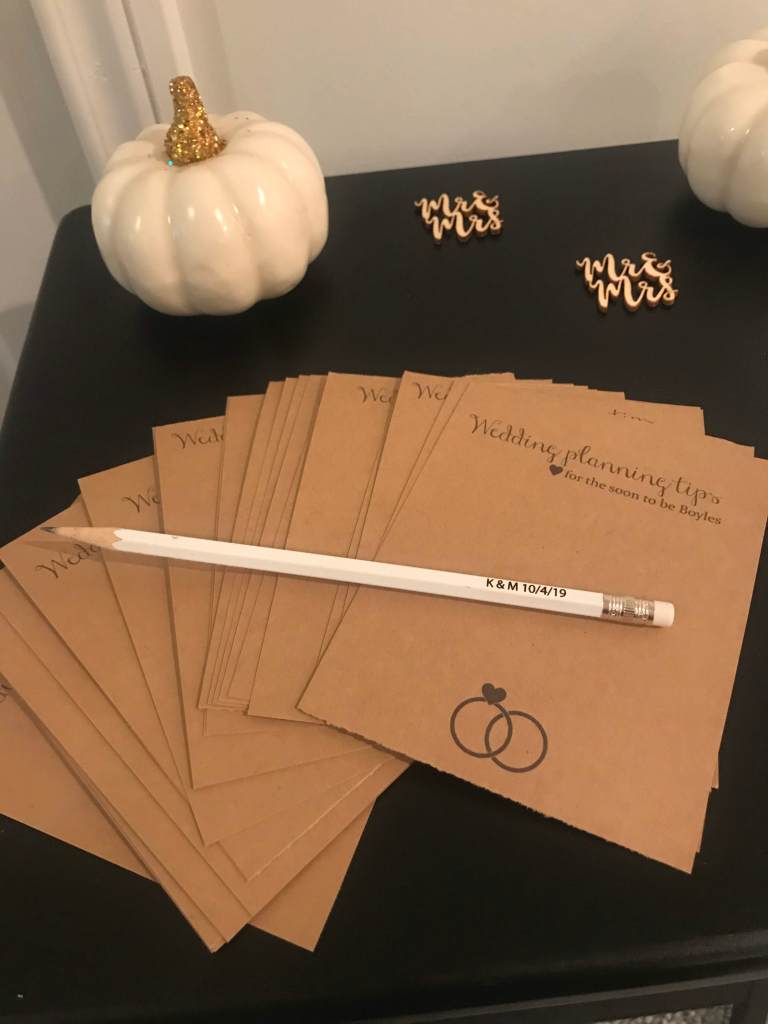
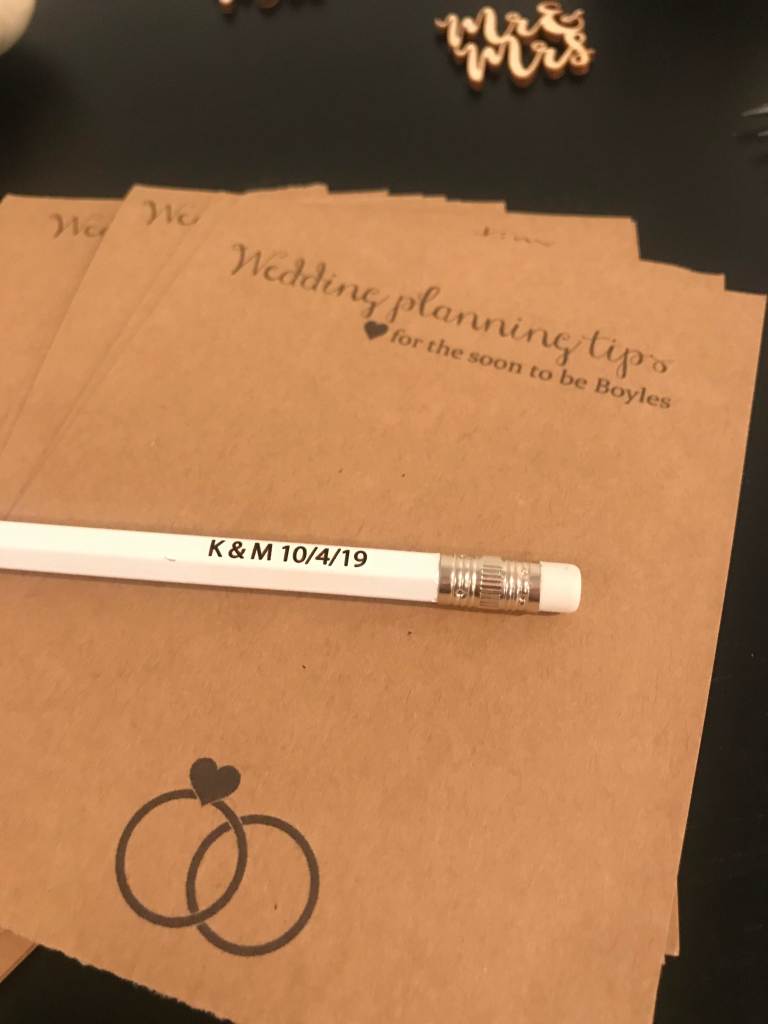
We put out a side table with slips of paper for guests to write down wedding tips for the couple. I made these in InDesign – the top says “Wedding tips for the soon to be Boyles”. I found free heart and ring graphics online. I printed them out on brown kraft paper from Michael’s. We got customized pencils with their initials and wedding date. Guests took home their pencils as another save the date!
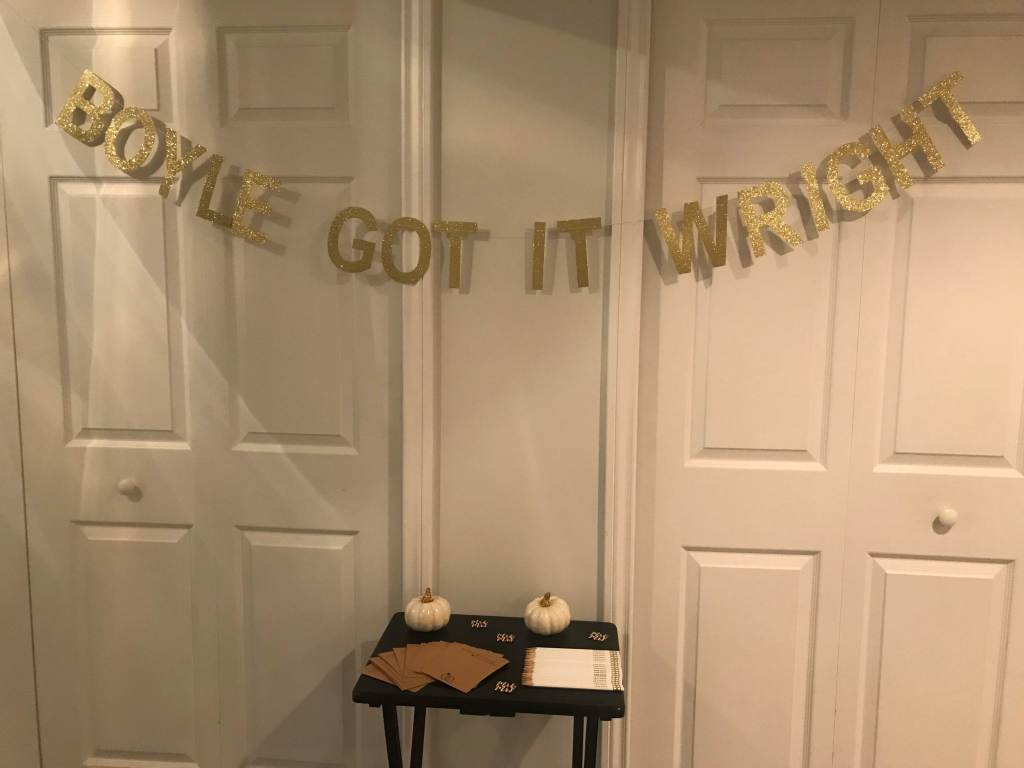
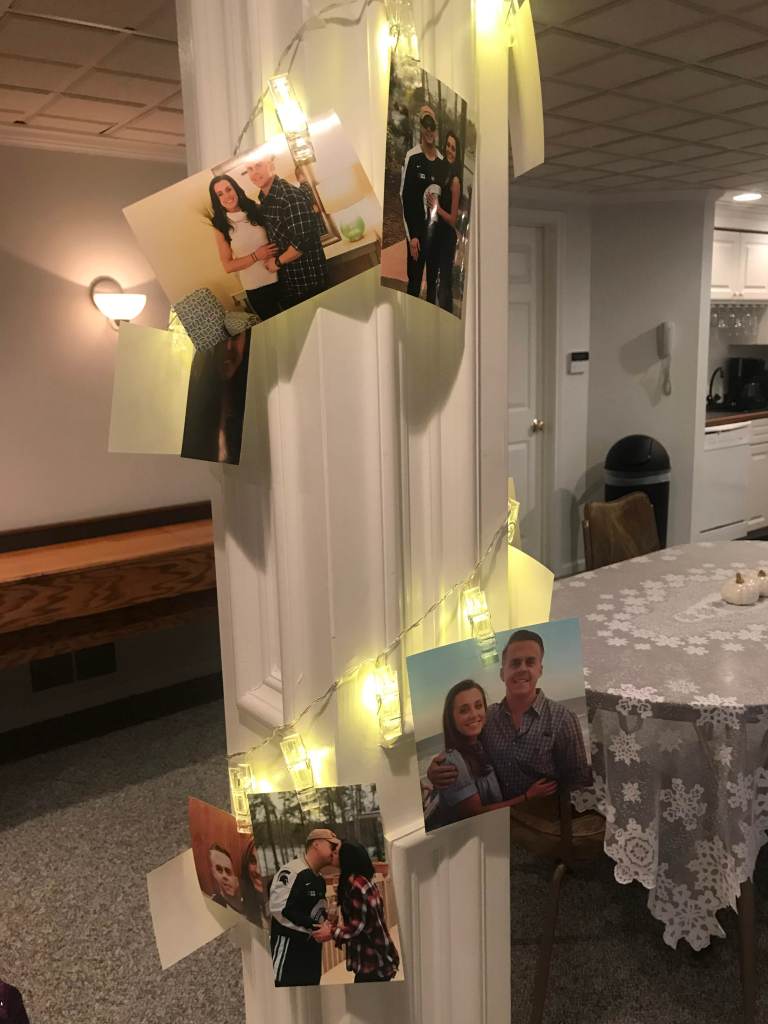
Finally, no party is complete without large letter balloons spelling out something important – in this case I DO. I also got a customized banner with their wedding hashtag. We hung up photos of the couple on fairy lights. A super cute, yet easy night to plan!
2020 is the year of outdoor parties so Halloween was no different. We had a small party at our house and made sure to have social distance rules and individual food and drink items.
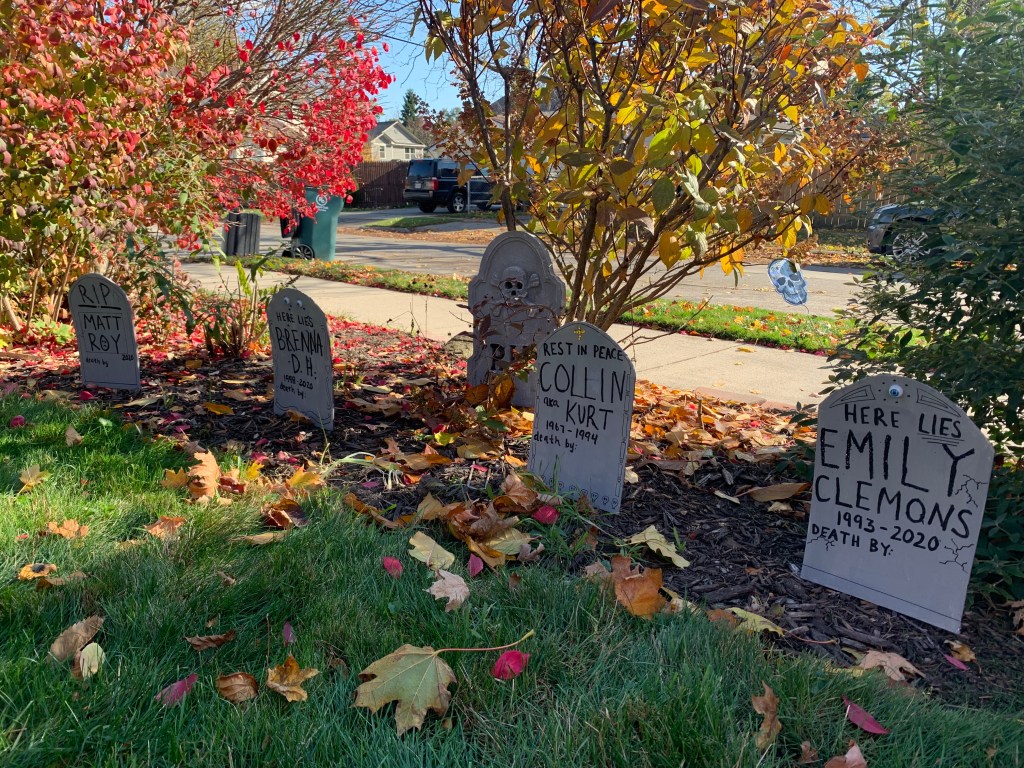
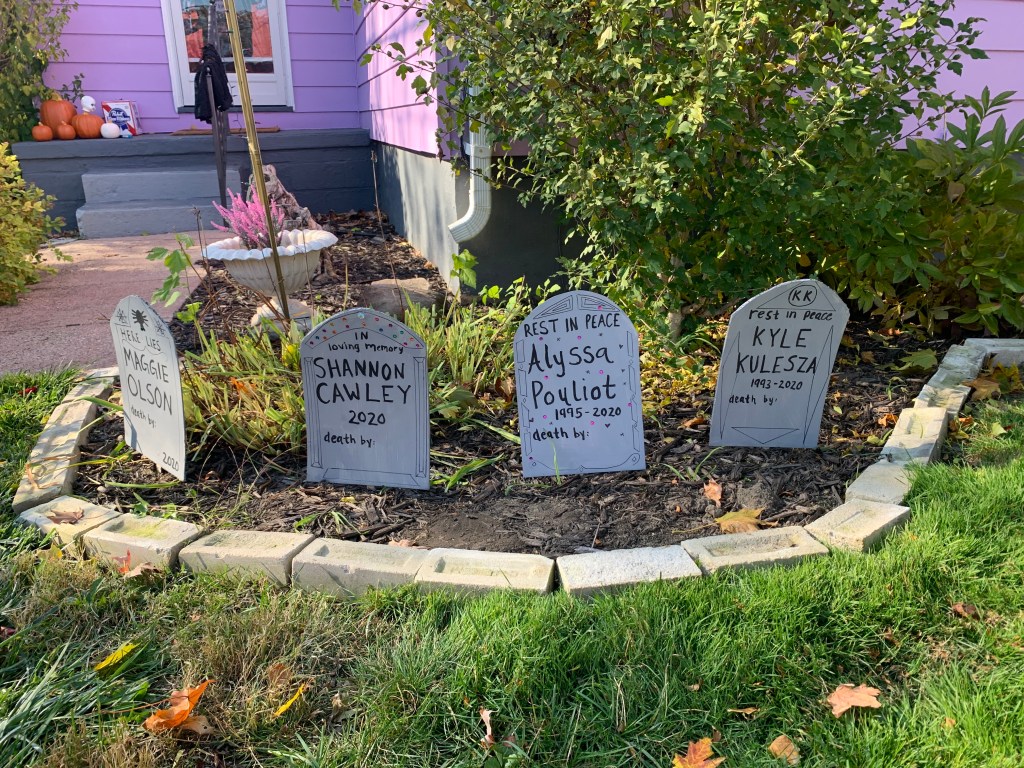
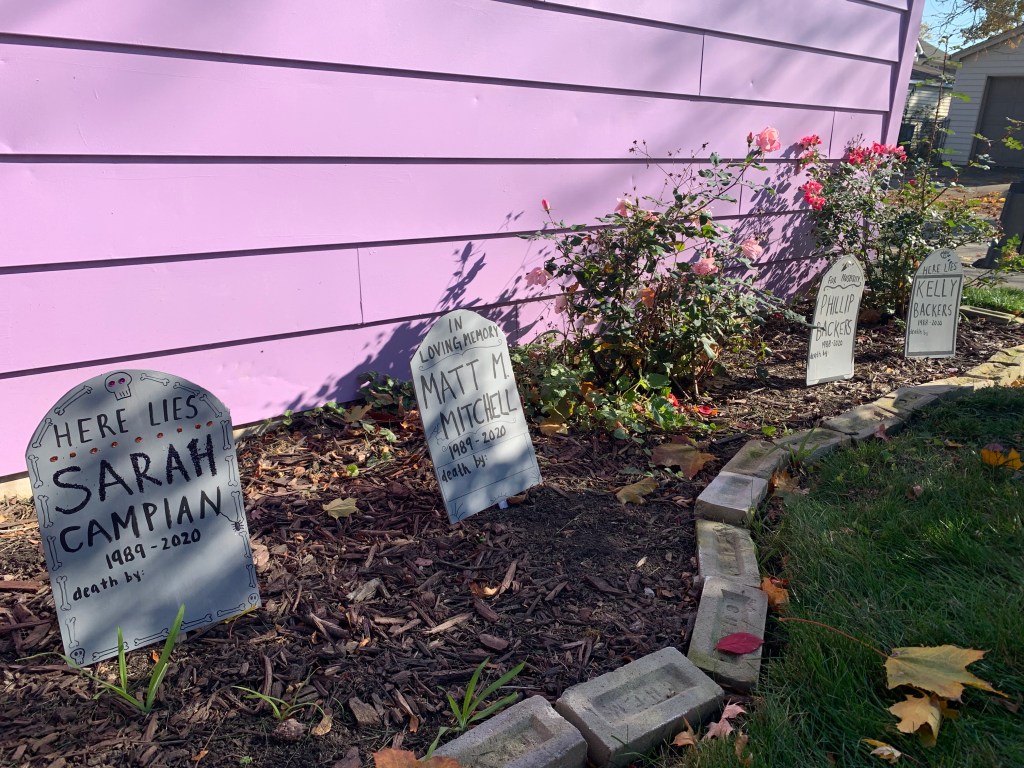
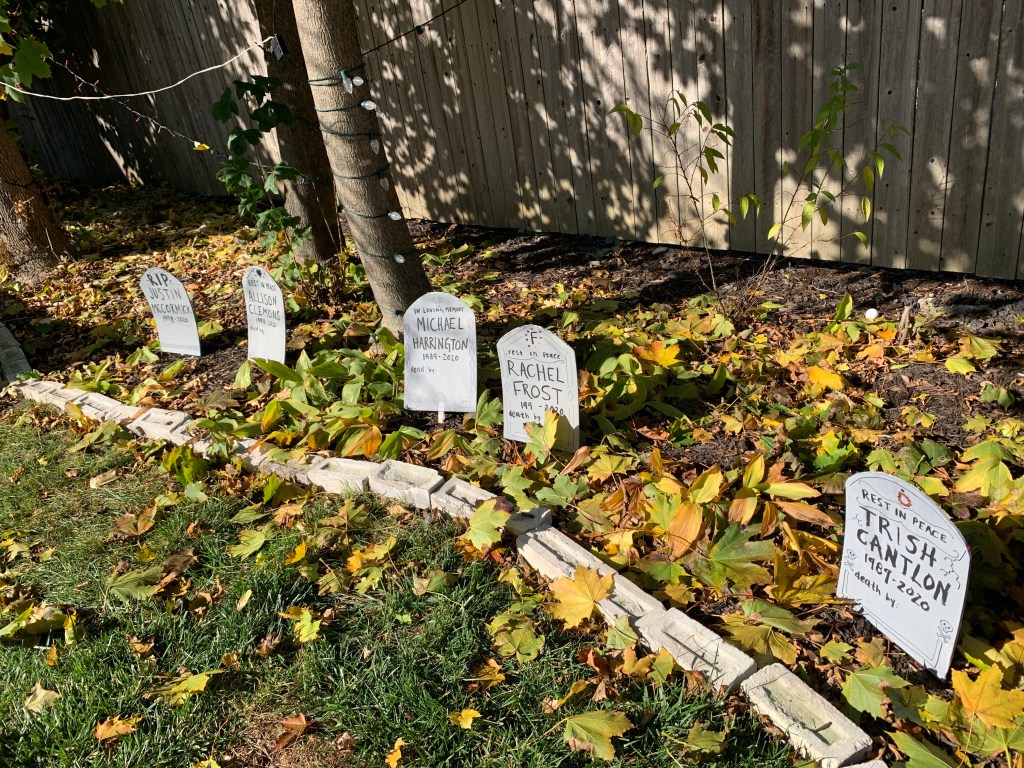
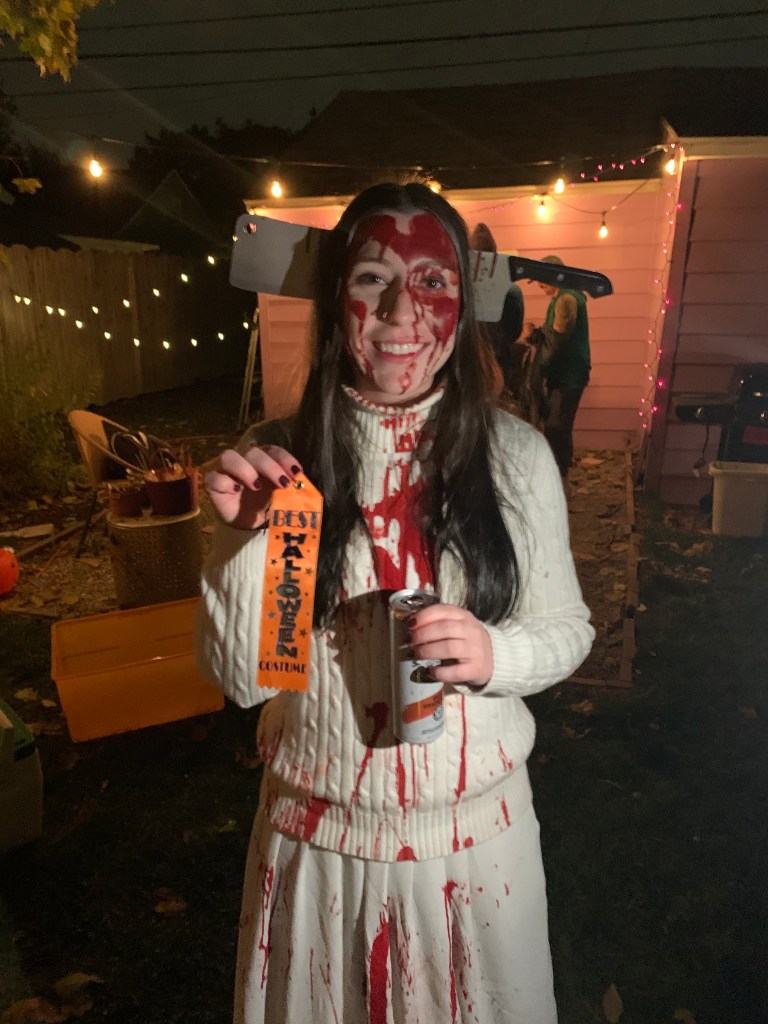
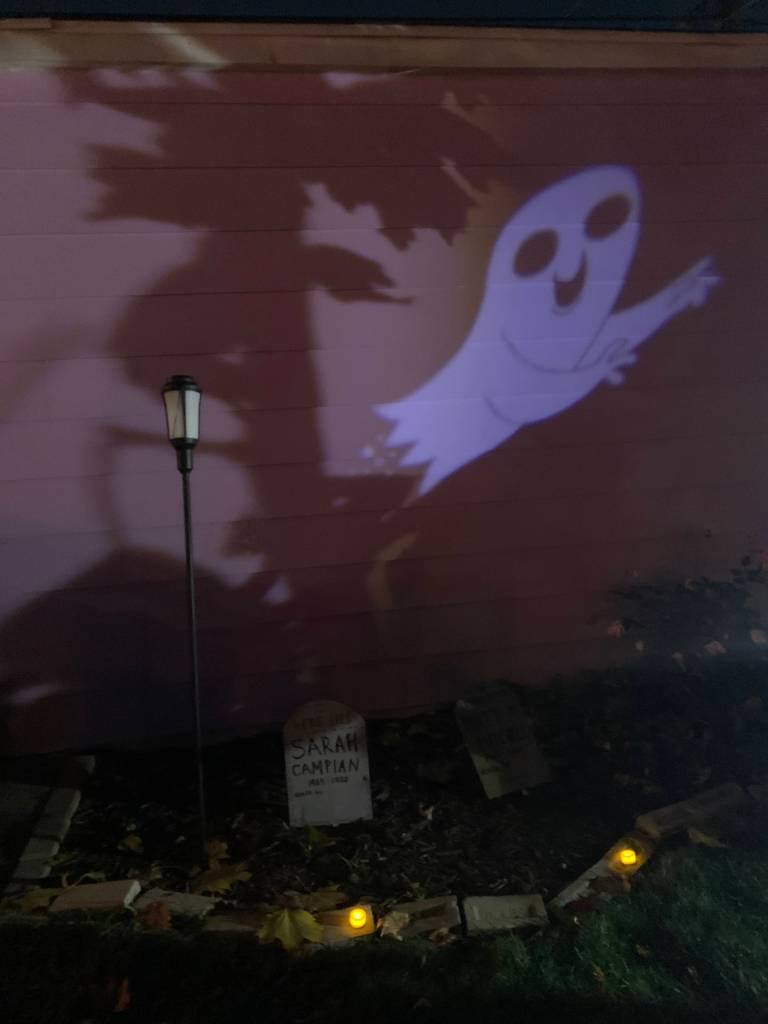
I decided to make it a theme because our friends always have trouble coming up with costume ideas. I chose “how did you die” and everyone had to come dressed as a dead person of some sort. We had everything from a Karen (death by society) who killed a Starbucks worker to some “dead beets” to someone who was electrocuted. I made a headstone for each person at the party and put them around the backyard. I bought craft foam boards, cut them into the headstone shape, painted them gray and then used black paint/marker to write on each one. I also made a banner that said “graveyard party” and we used a fog machine to give the real graveyard vibe.
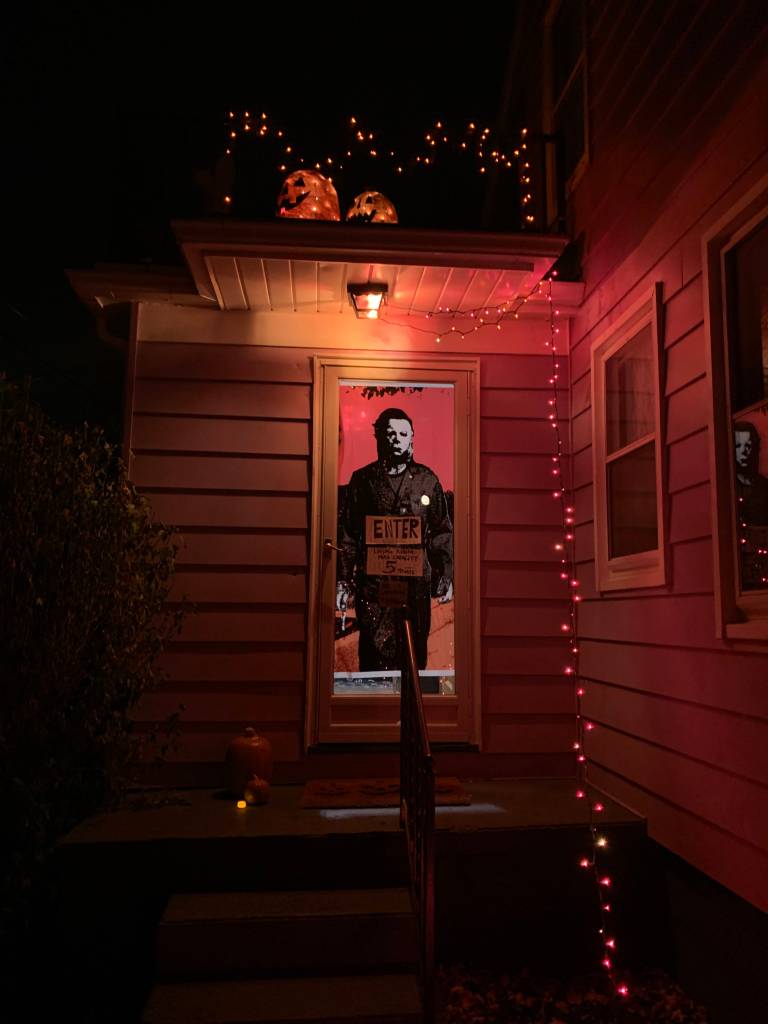
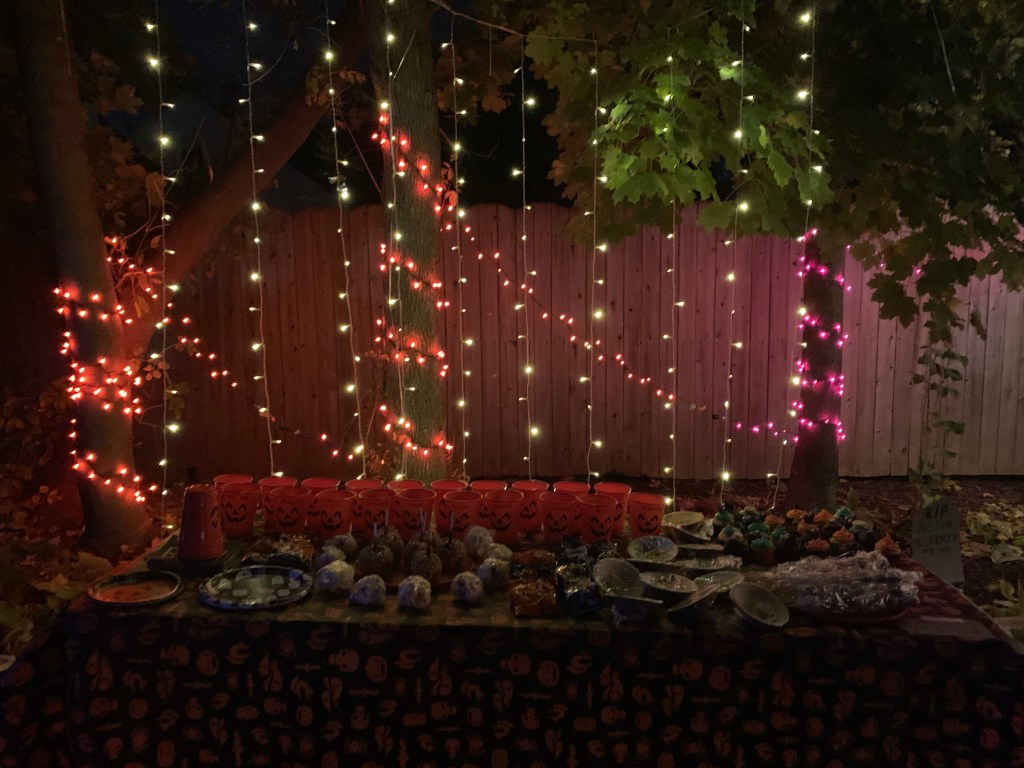
I used a bunch of string lights throughout the yard for decoration and to provide actual light. I got orange, purple and white. I also moved my light curtain outside as well. We placed heaters outside and in the garage.
We made a bunch of different areas to hang out to spread people out.
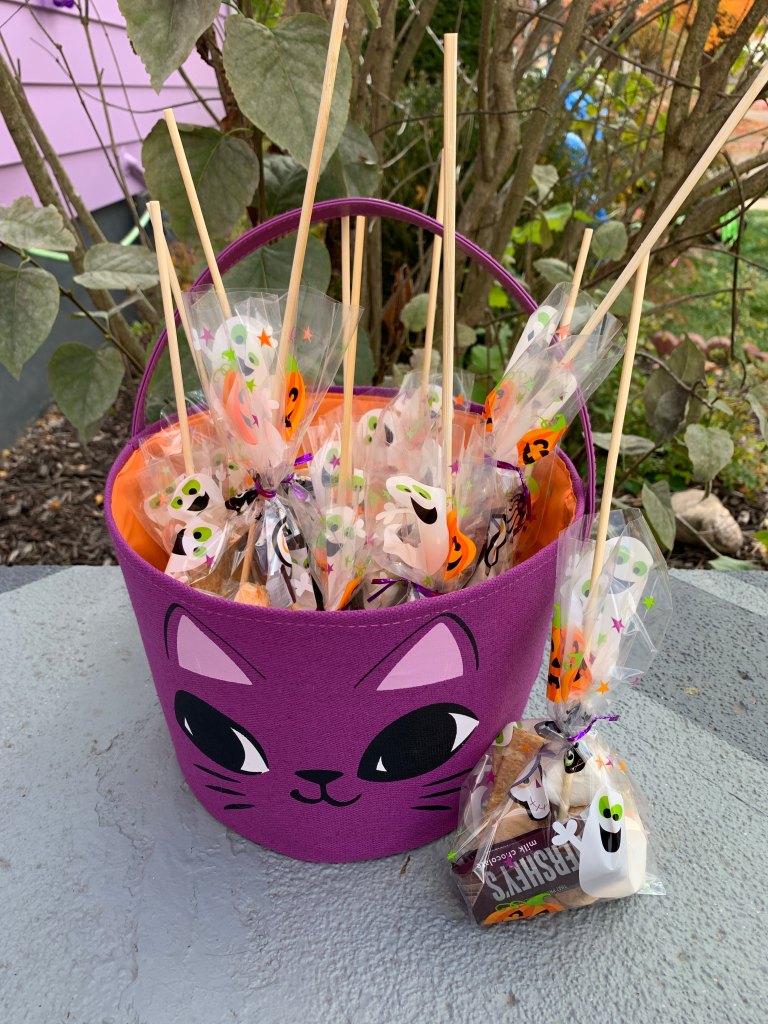
BONFIRE: We put chairs and blankets around the fire. I put together little s’mores kits using plastic bags, mini Hershey bars and pumpkin spice marshmallows.
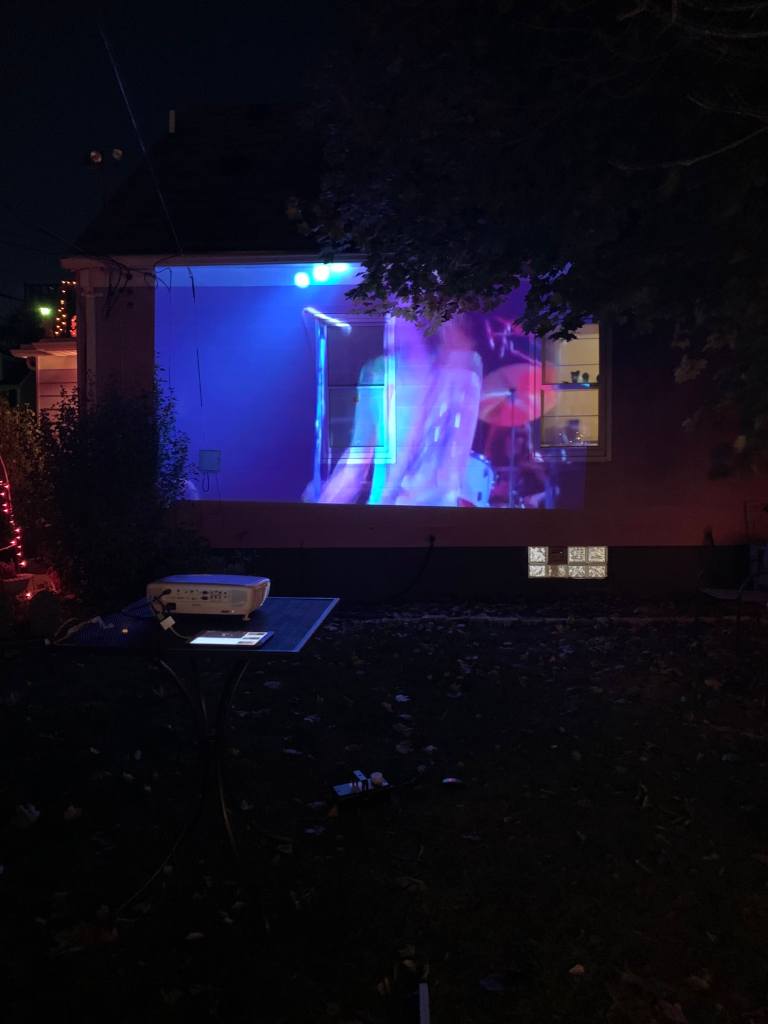
CONCERT: We were trying to emulate a Halloween event we attend every year that has cover bands. We made a schedule and played bands up on our projector throughout the night. I left an area for people to stand and put some chairs around too.
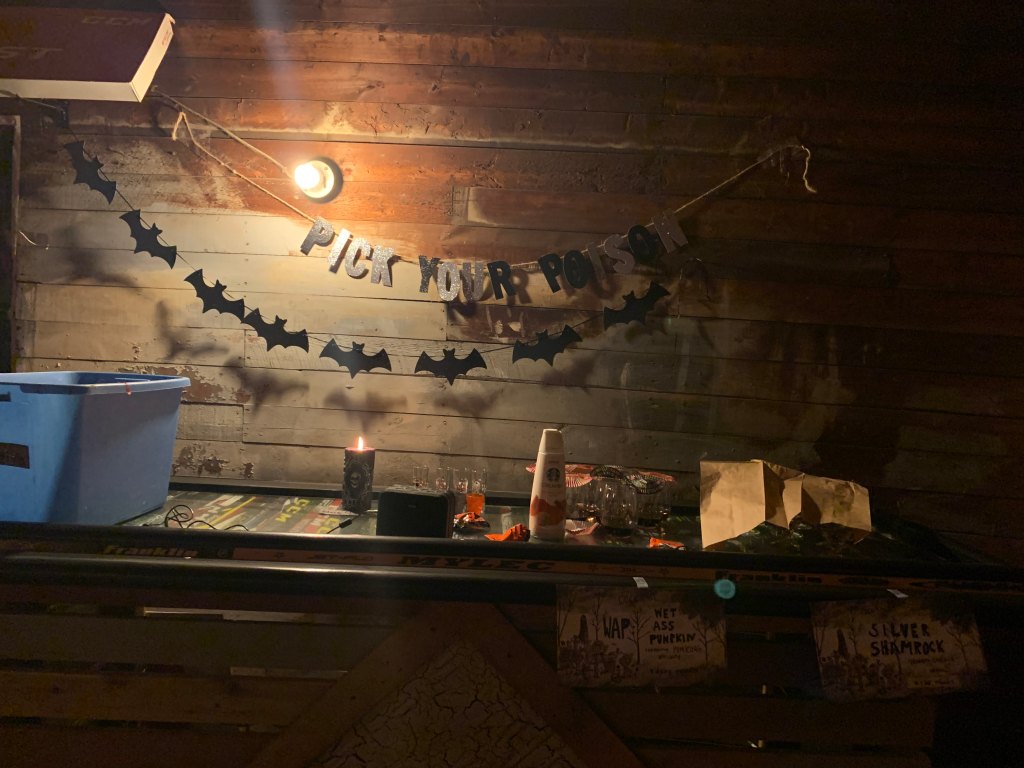
GARAGE: We set up a little cocktail bar in here with a “Pick Your Poison” banner. We put glasses out with cocktails already poured so people didn’t have to touch things to pour them up. One cocktail was based around Pumking whiskey with pumpkin spice creamer. The other was vodka based with egg whites, lemon and cinnamon. We also put out some pre-made whiskey and cider shots. We provided a bin for people to place dirty glasses.
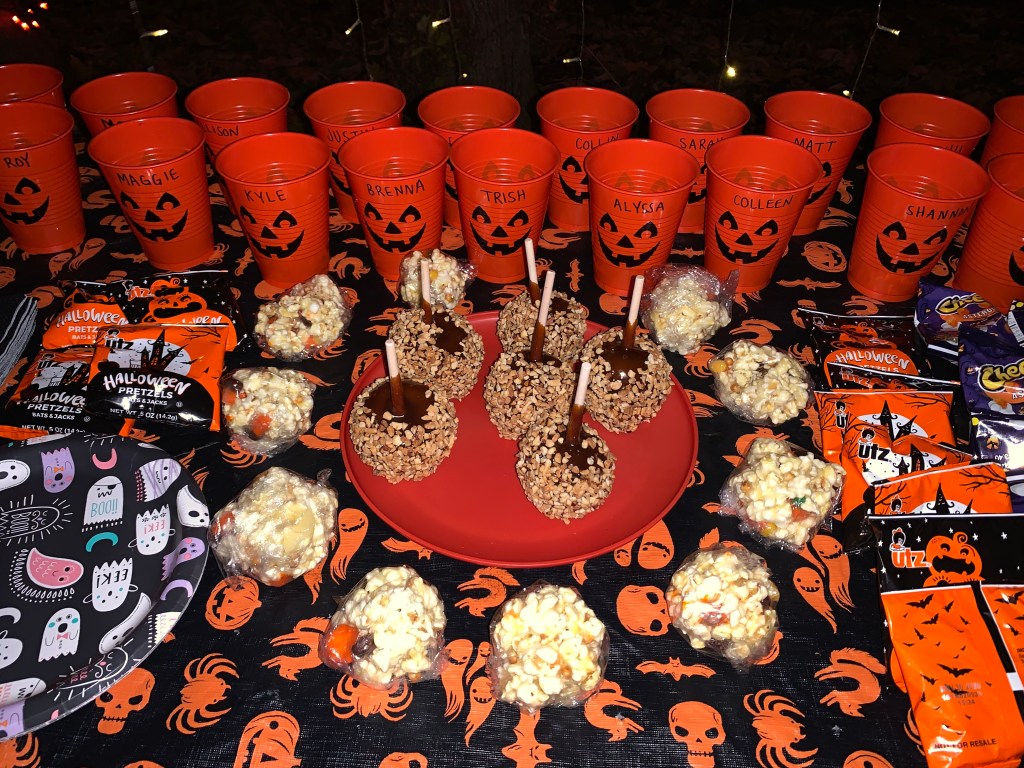
I then set up a COVID safe game area. We had a large table with plastic cups. Everyone received their own cup with their name on it. We put out clean ping pong balls with a place to put dirty ones. We left out hand sanitizer and wipes to disinfect anything that was used.
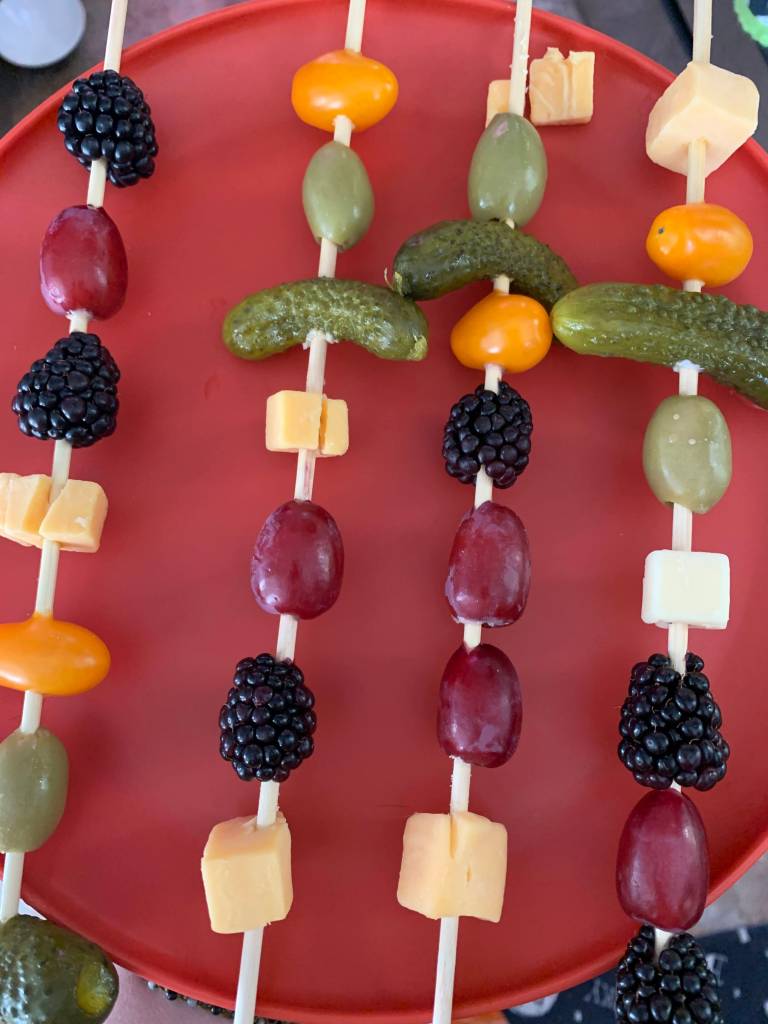
For food, we put a spooky charcuterie board on sticks that were wrapped in plastic wrap. I chose darker foods and orange stuff – cheddar cheese, pickles, purple grapes, blackberries, etc. We also madeeyeball deviled eggs and placed them in mini bowls wrapped in plastic wrap. Other individual desserts included caramel apples, popcorn balls and cupcakes. We got little bags of Halloween chips as well. We didn’t really need plates since everything was served individually. I did put out some napkins I had from last year that said “Boo!”
We played a cake walk game with alcohol. We put a bunch of different things in numbered paper bags – some were good (a whole bottle of spiced wine, good shots, pumpkin beers) and some were bad (gross beers, wine coolers, bad shots). We played the Monster Mash and everyone walked in a circle until the music turned off. Whatever bag you were in front of is what you had to drink.
We also had a costume contest. Everyone voted via their phone for the best costume. We then chose the other prizes like funniest, most creative and scariest costumes.
I got to plan a dream party combining my two favorite things – weddings and Halloween. This couple opted for a smaller home version of their wedding because of COVID. I set up a little dinner party in their living room.
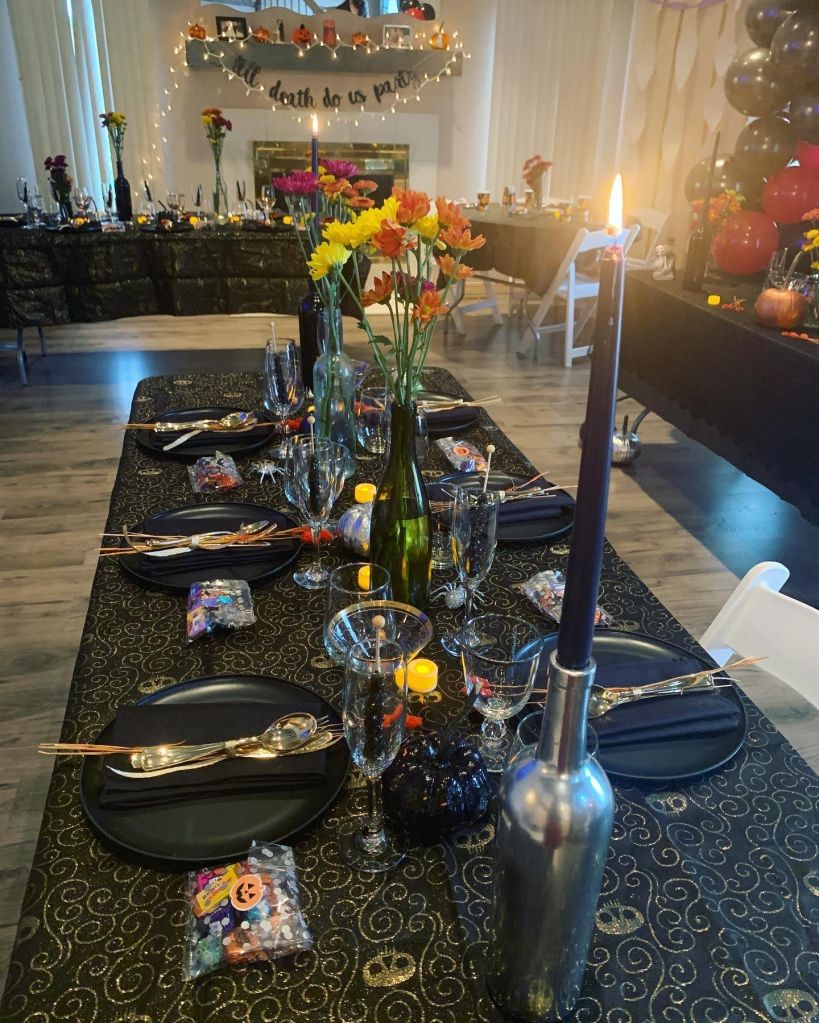
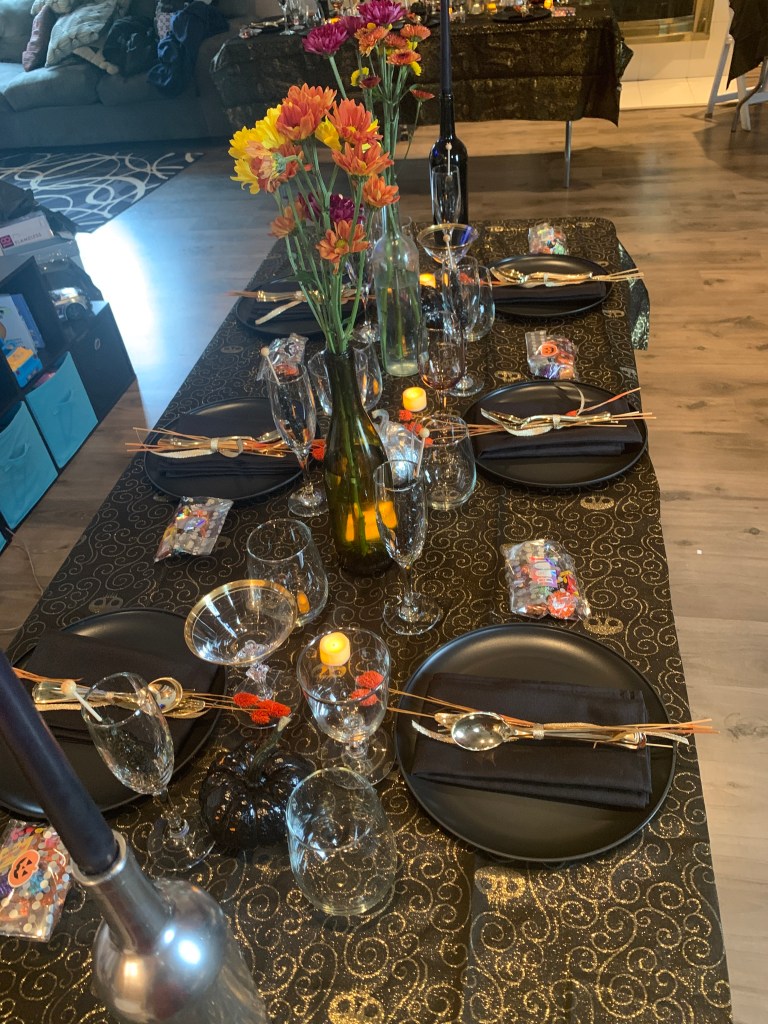
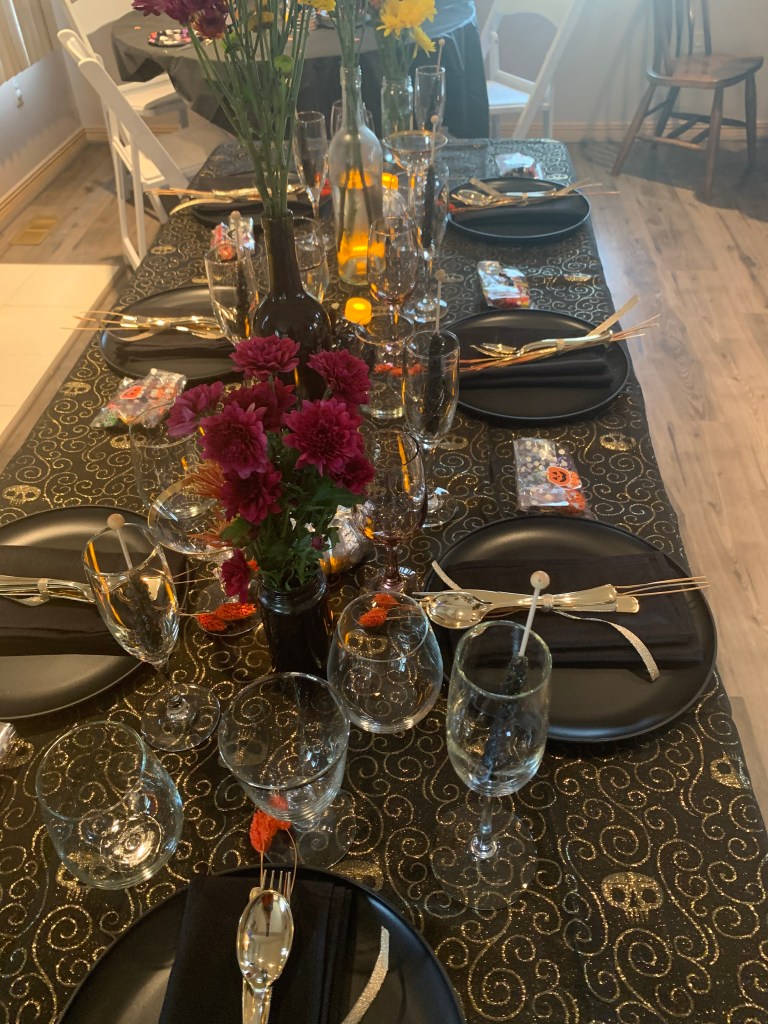
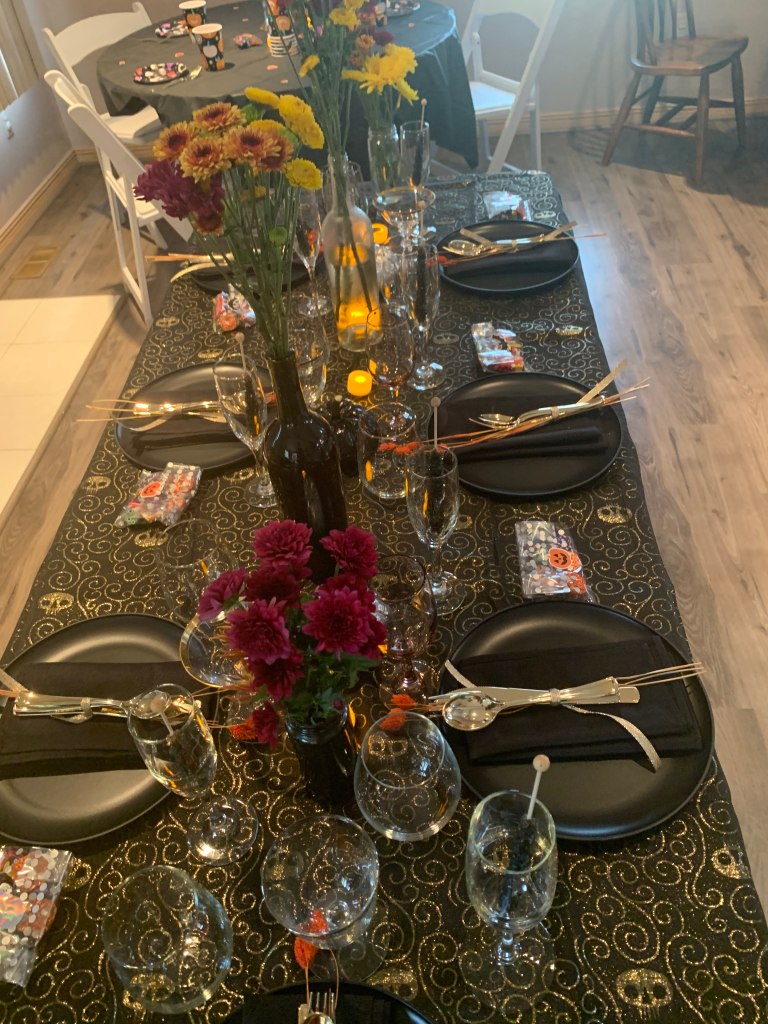
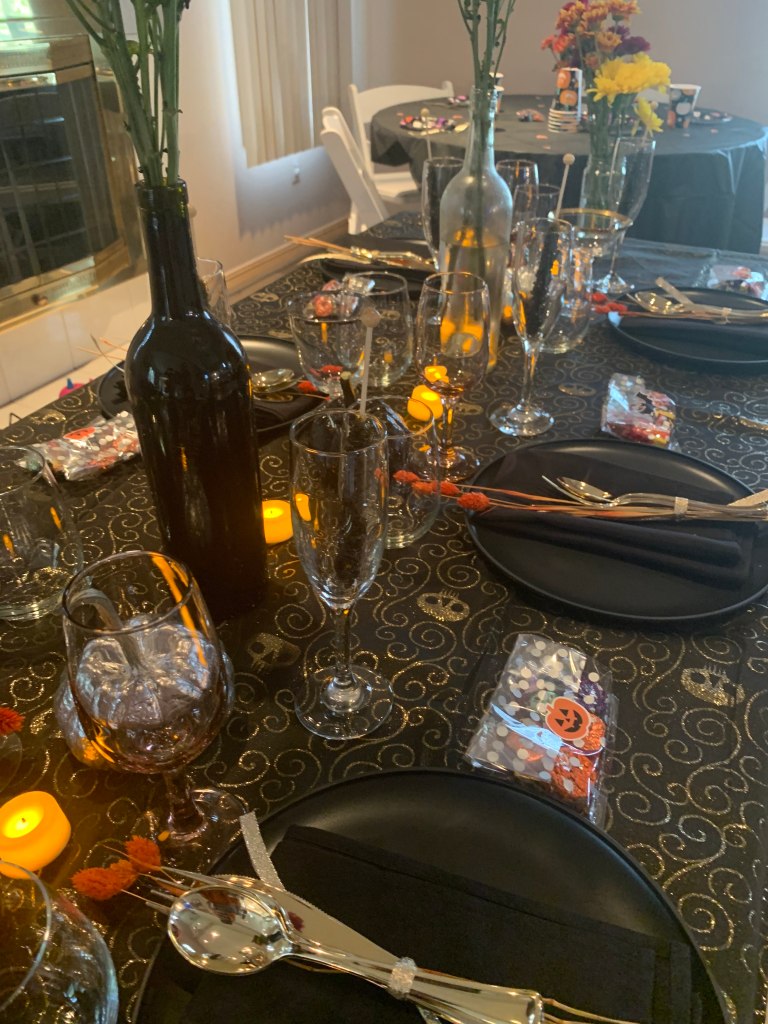
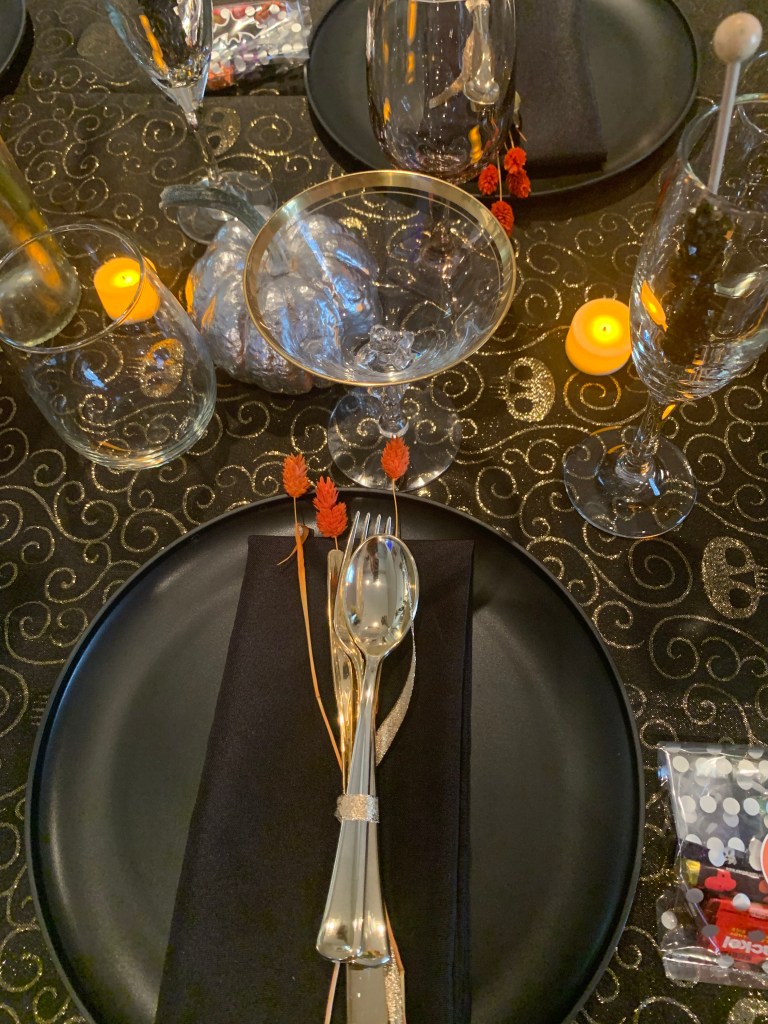
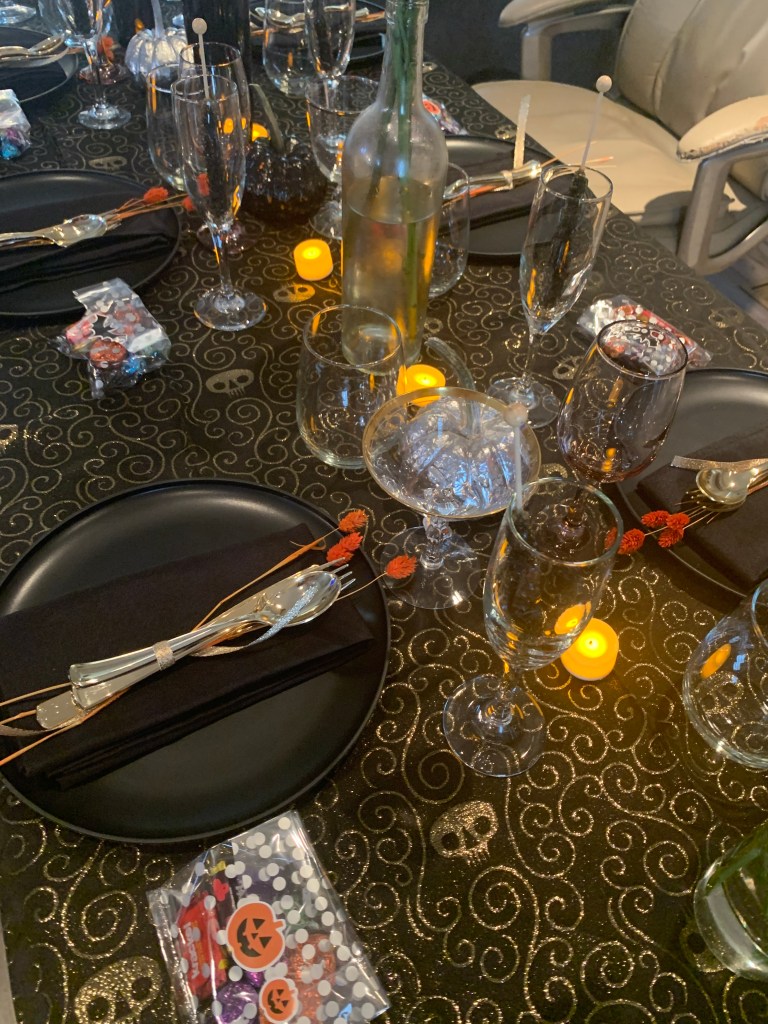
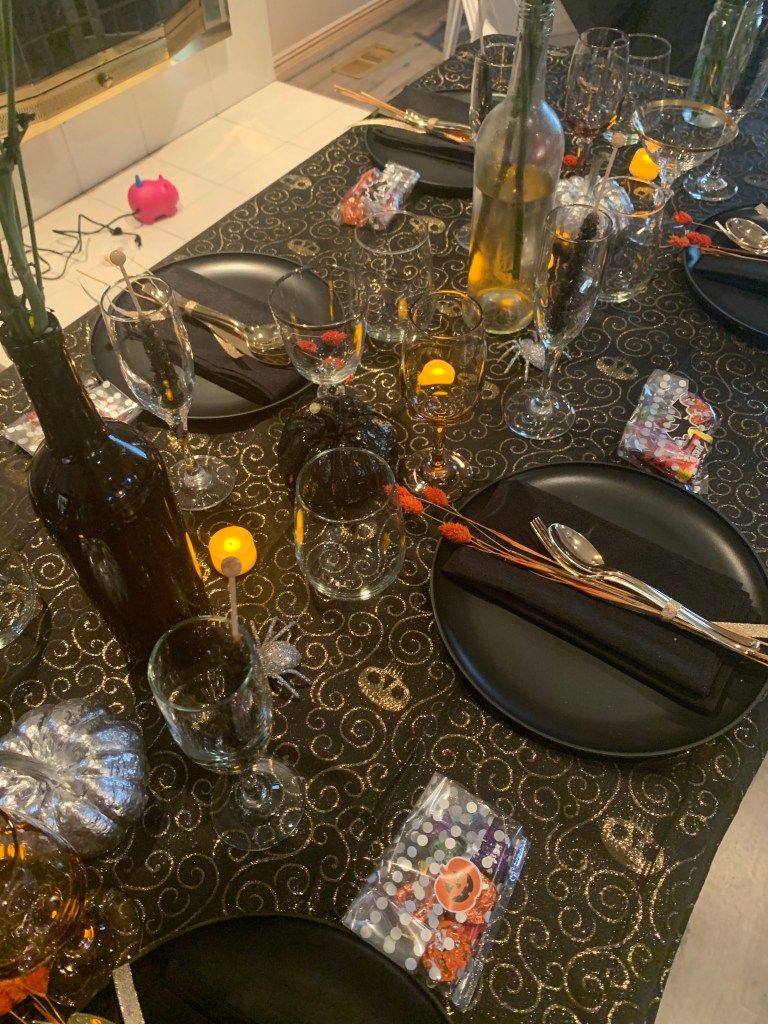
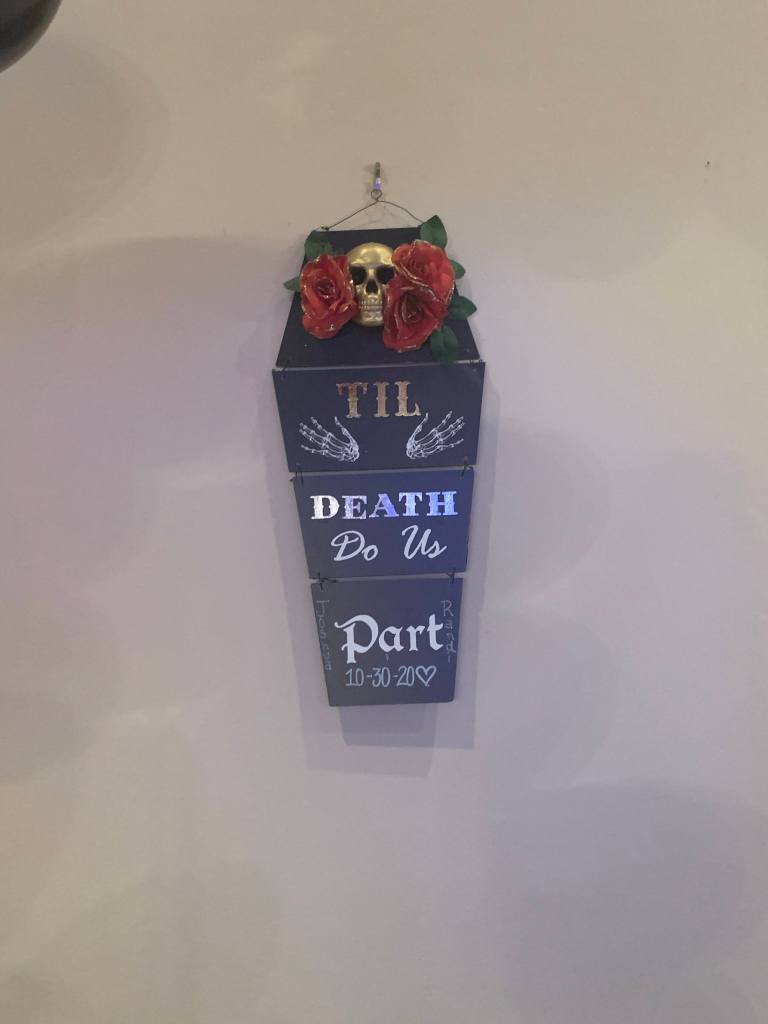
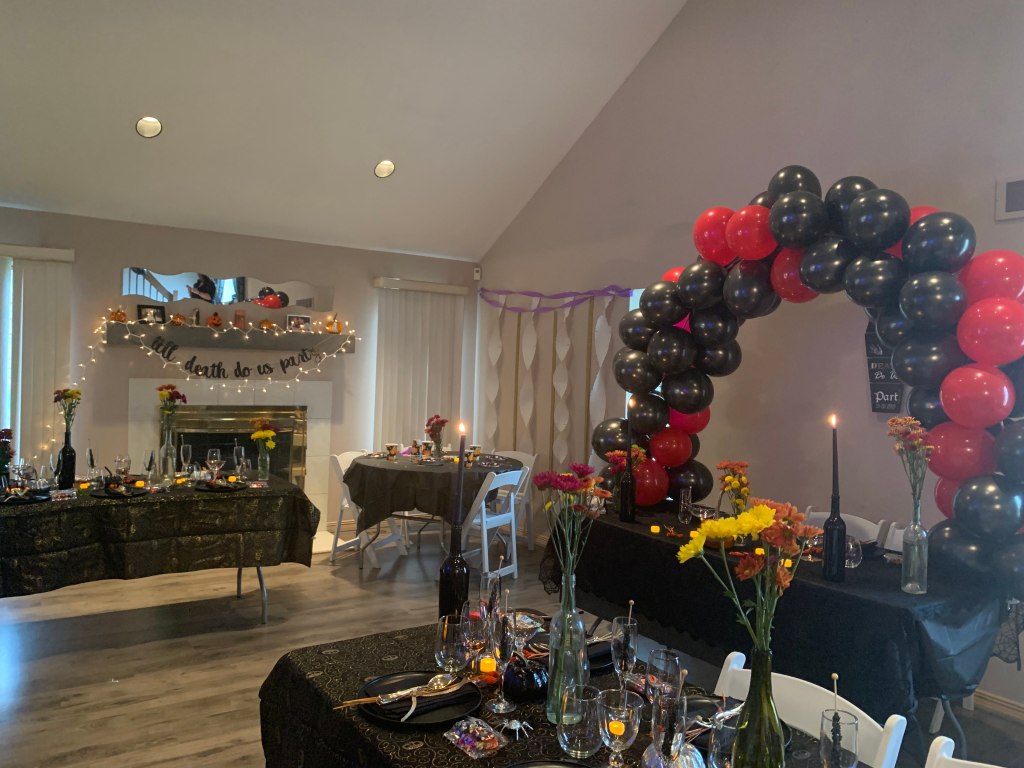
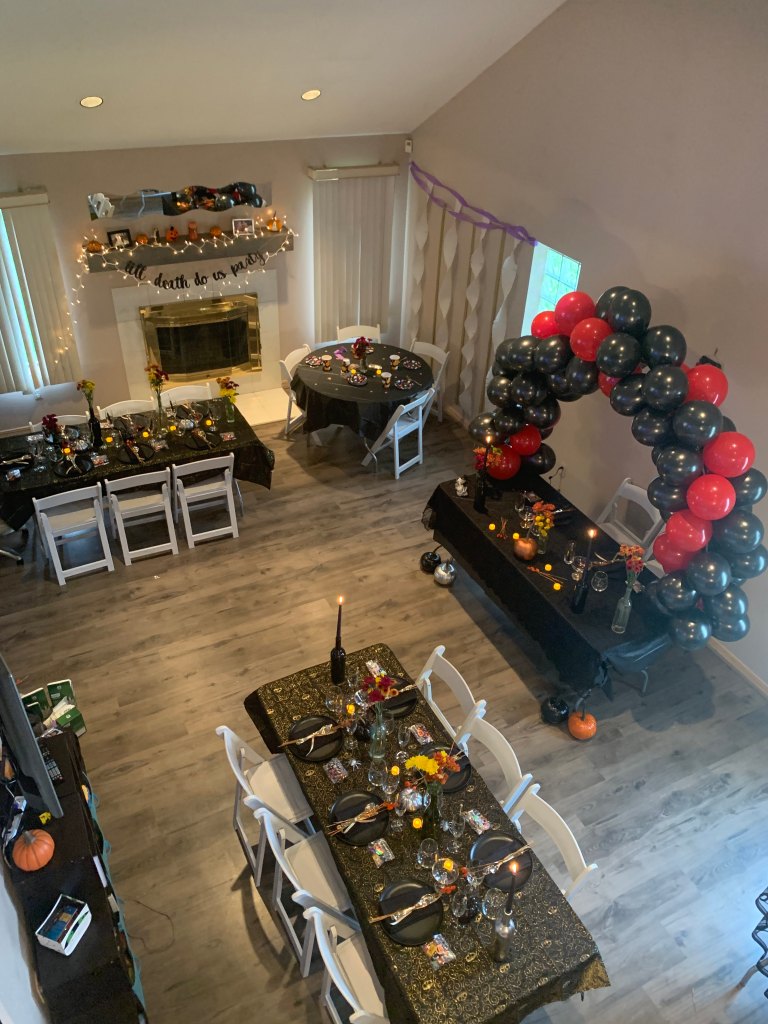
I wanted the overall vibe to be “elegant spooky” – I used the color palette of gold, silver and black. I threw in some purple, orange and red for good measure. The bride did want to include some traditional “cutesy” Halloween elements as well. The main theme was “Till Death Do Us Part.”
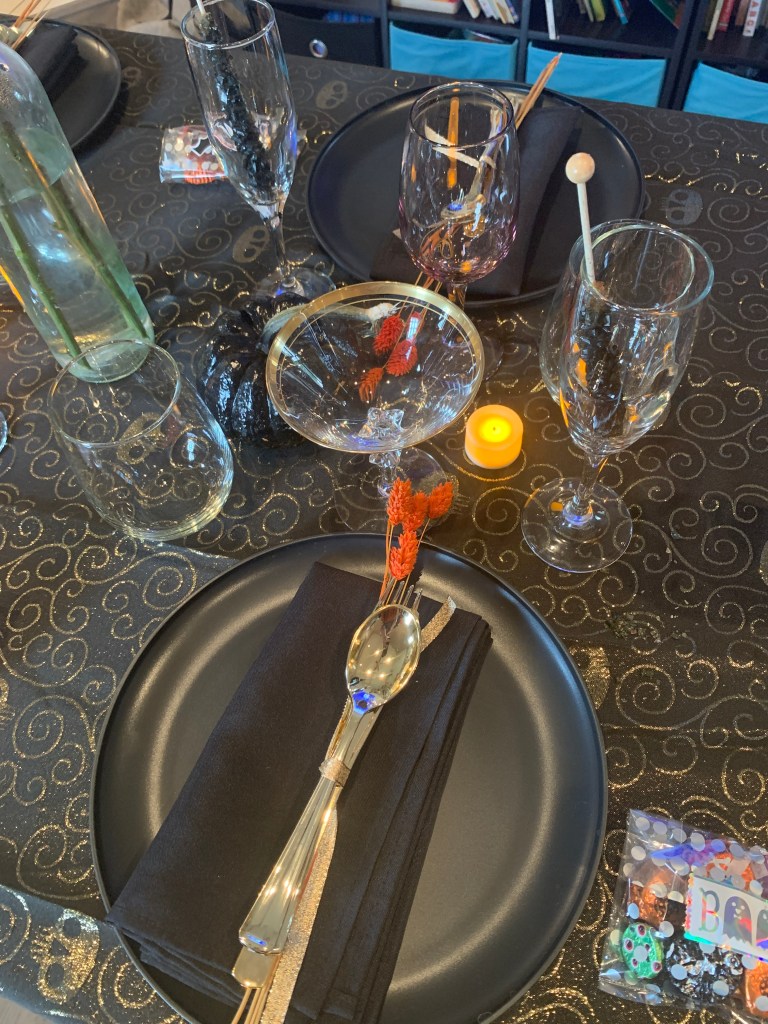
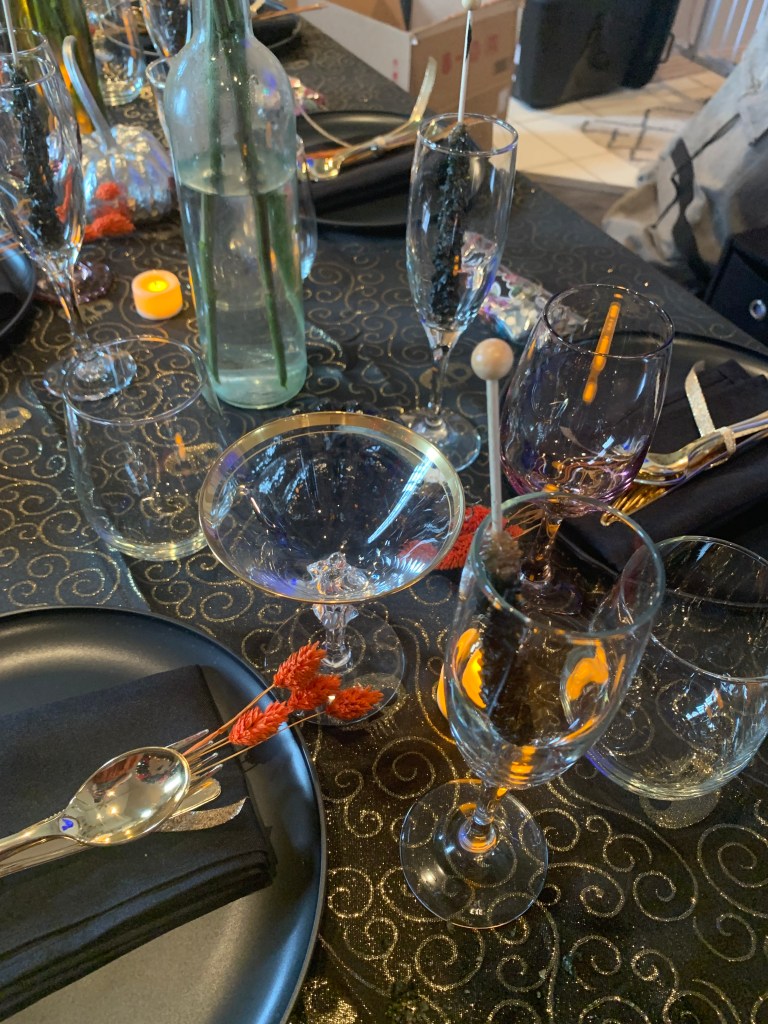
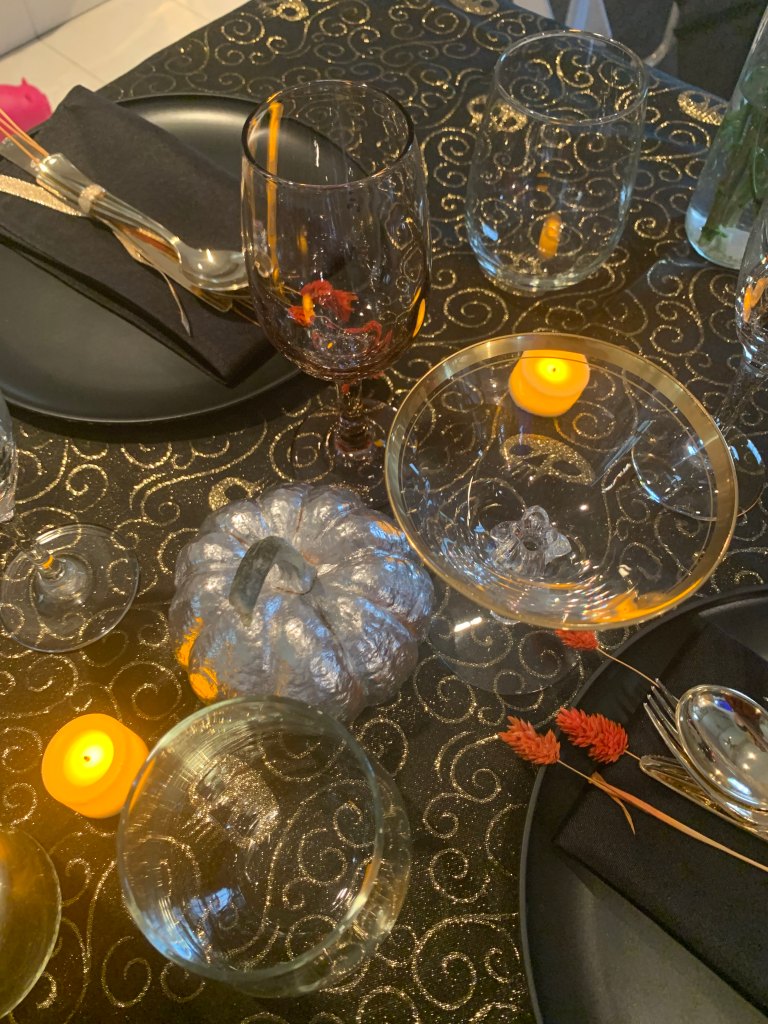
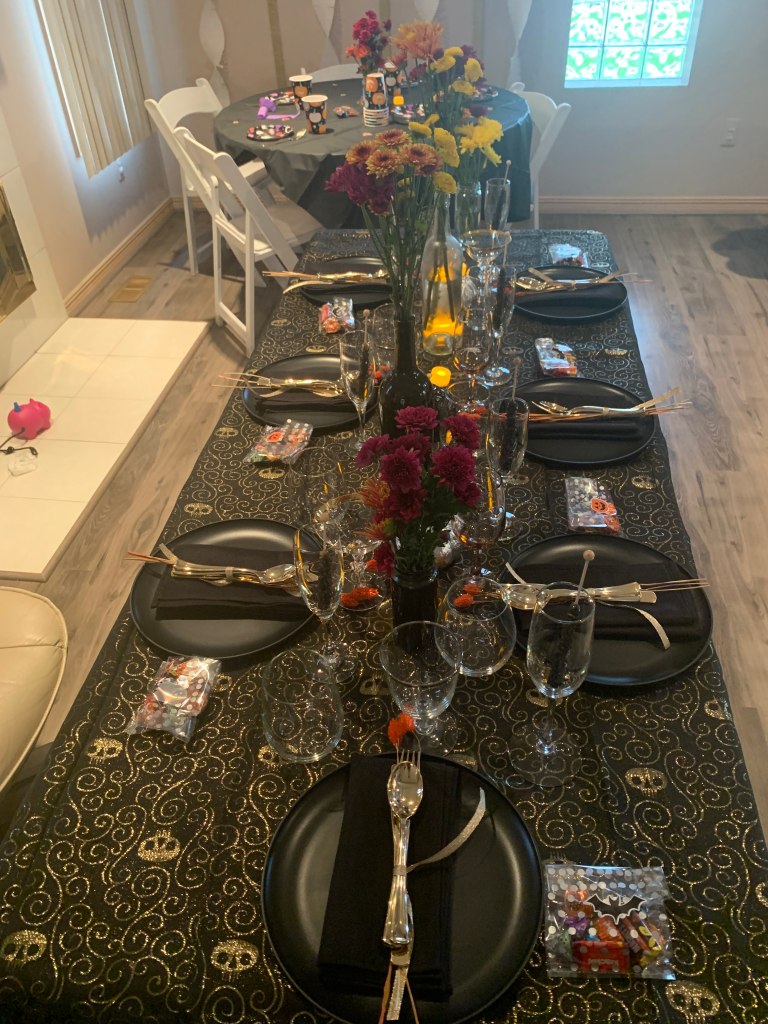
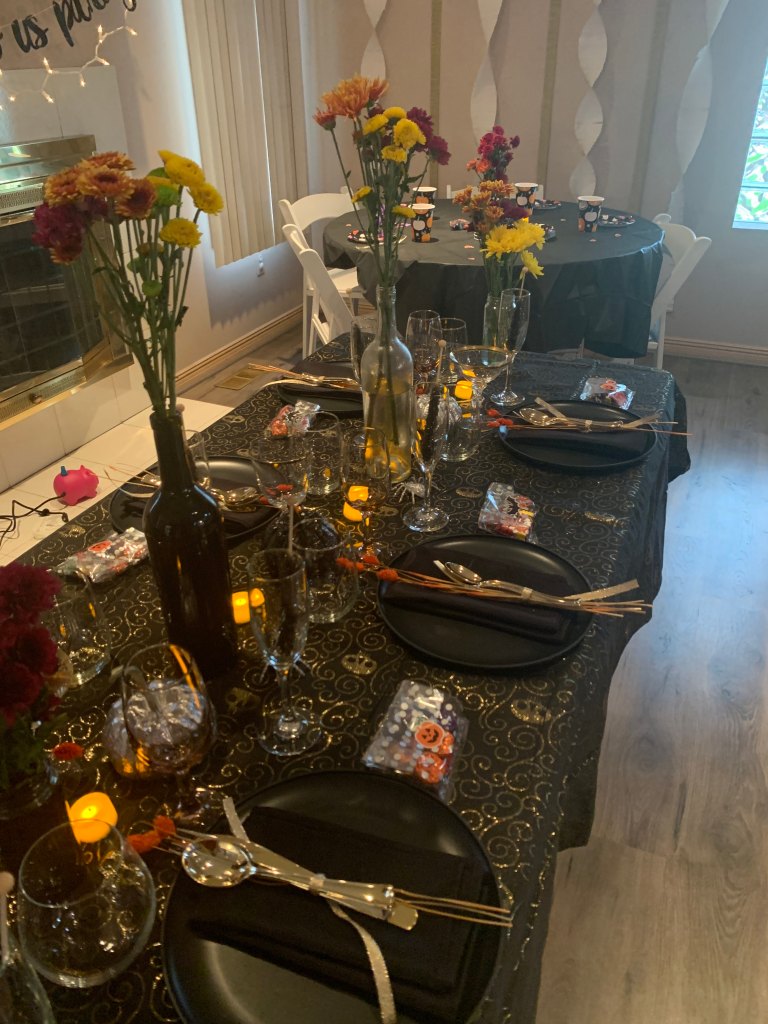
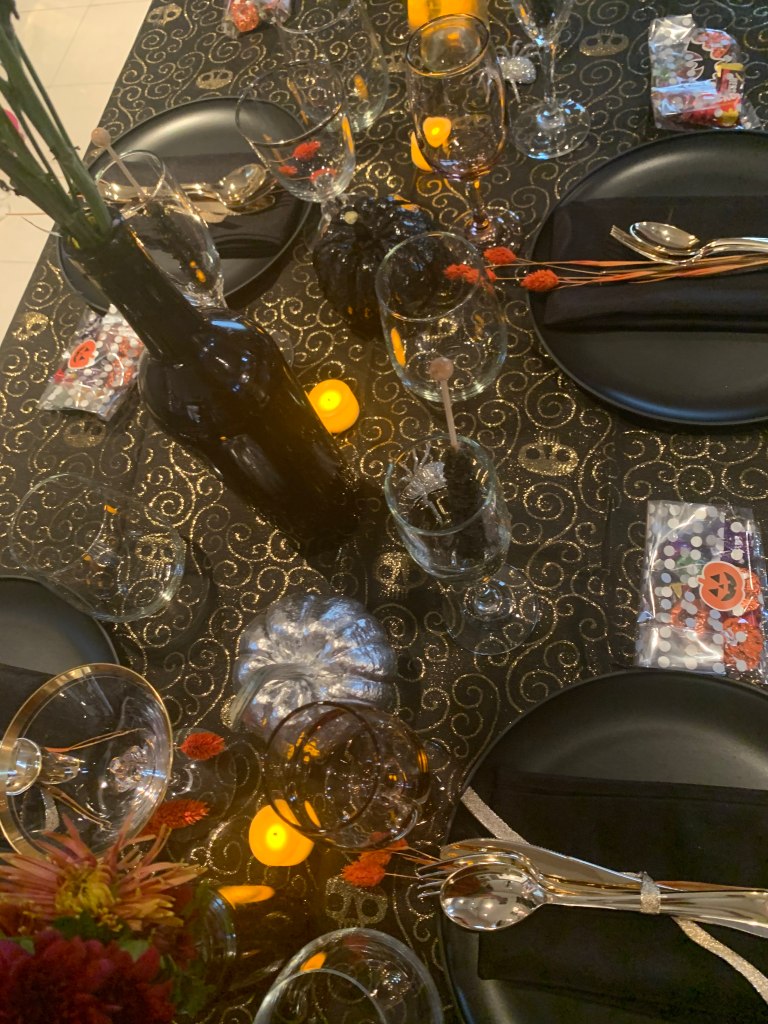
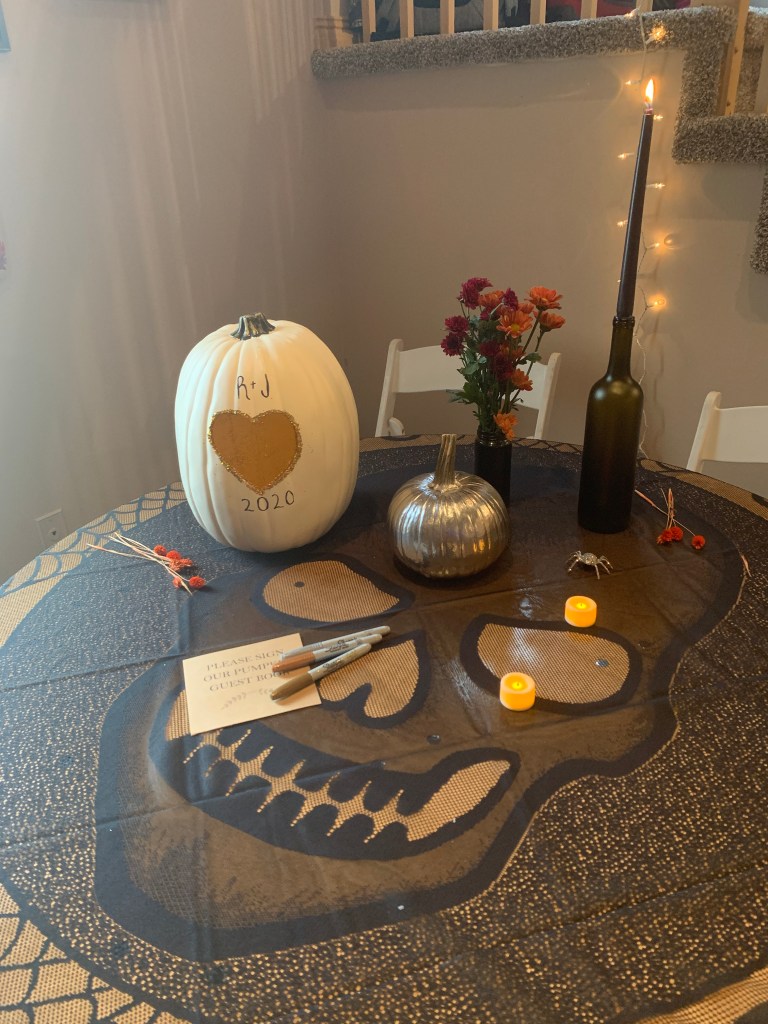
GUEST TABLES The main focal point of the party room! Each table got a black/gold skeleton table cloth topped with small silver/black spray painted pumpkins, fall flowers and tea light candles andblack taper candles. I spray painted a bunch of wine bottles and jars (to save on costs) with silver and black paint. They were used to hold the flowers and candles.
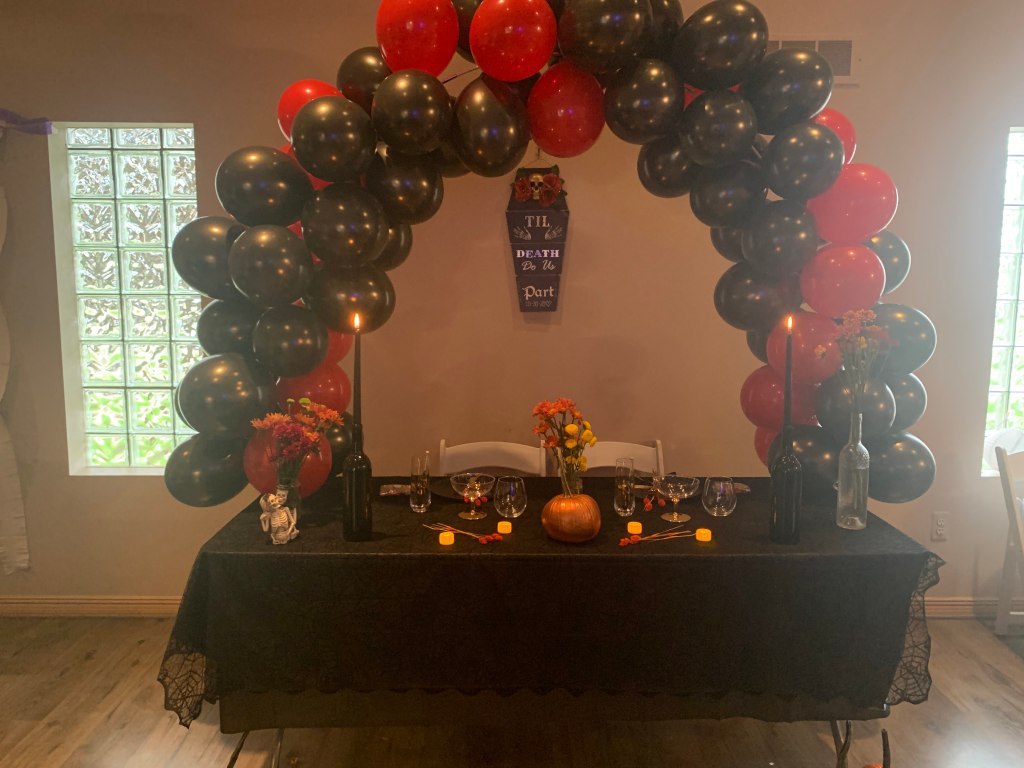
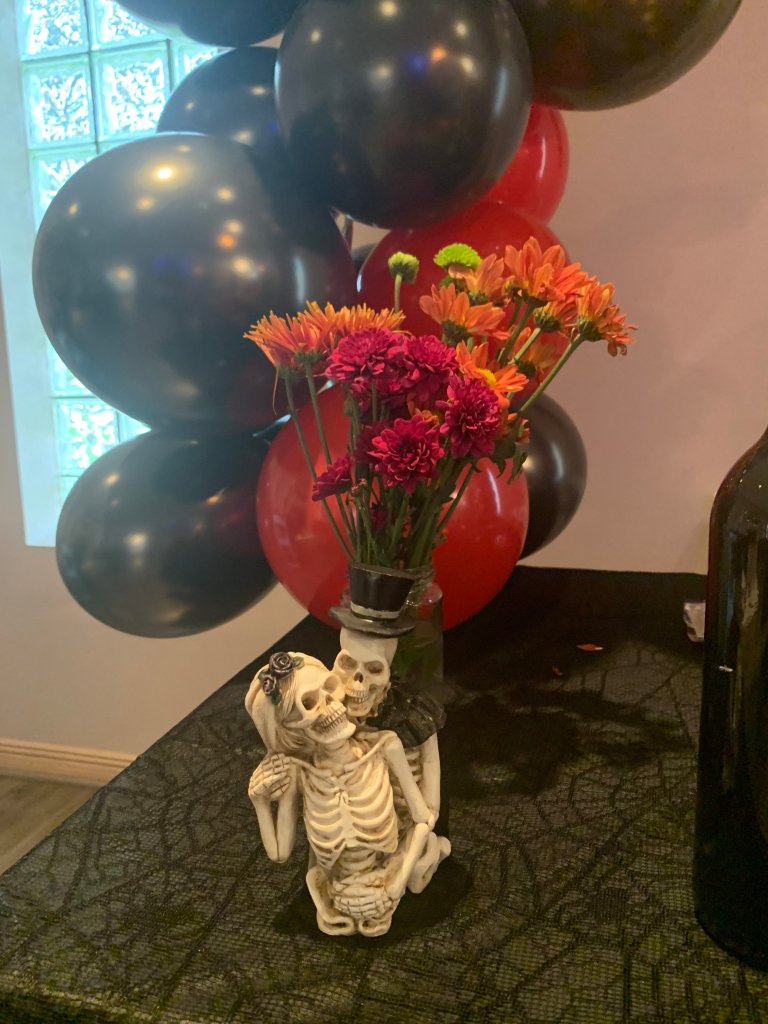
SWEETHEART TABLE The bride and groom got the same place settings with a few enhancements. I gave them the biggest cocktail glasses, special Mr. & Mrs. champagne glasses, a spiderweb table cloth and a skeleton couple statue. I put some flowers, taper candles and a bigger pumpkin on their table too. The groom made a red and black balloon arch to go over the table.
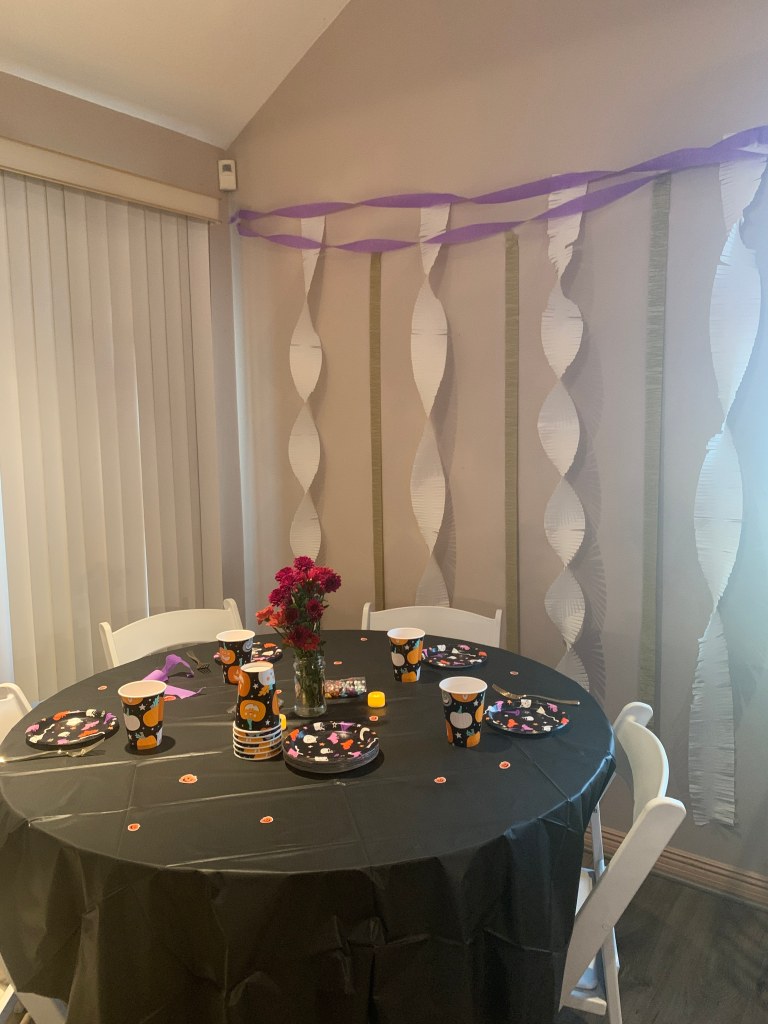
KIDS TABLE I wanted this to be more light-hearted, but still match the rest of the party. I got a black plastic table clothand stuck some Halloween stickers to it. I chose some paper platesand cupsto match the adult table colors as well.
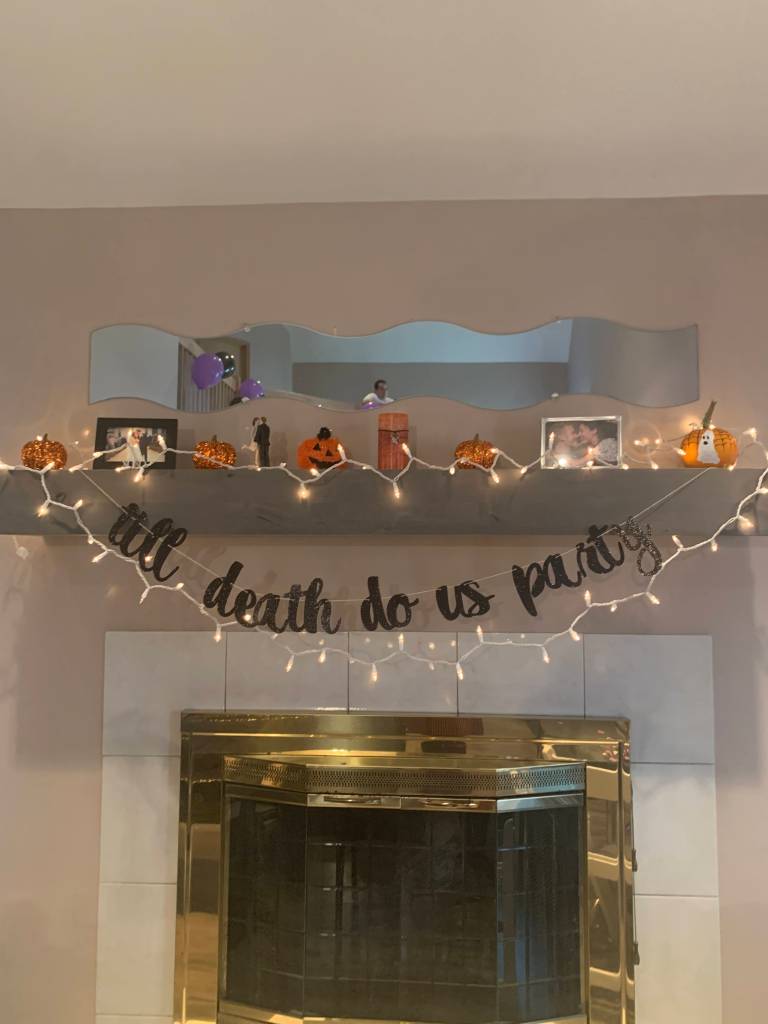
WALL DECOR + PHOTO BOOTH I got some crepe paper and made a little photo booth behind one of the couches. I hung white string lightsaround the room and put a “till death do us party” banneracross the fire place. I also made a little guest book table with a white pumpkin and markers for people to sign.
TO BUY: Table Top – Guest table cloths (2 x $15) – Pumpkins (Farmer’s Market) ($30) – Wine bottles/jars ($0) – Black taper candles ($8) – Tea light candles ($10) – Fall flowers (Farmer’s Market) ($25)
This birthday party works great for COVID times, but would also work during a normal year. The idea is that you take the birthday person to different stops – each one has some surprise guests! Below is the plan that I came up with to celebrate my sister’s birthday this year.
PICK UP: 1PM
STOP 1: LUNCH– 1:30-2:45PM The first stop was lunch with our other sisters. I had them waiting at the restaurant and they were able to get a table before we arrived. STOP 2: COFFEE DATE – 3-5PM Next, we went back to my house and sat in the backyard for some coffee! You could make this mimosas or if you’re able – just get drinks/coffee at an actual establishment. I asked these guests to arrive before 3pm and be waiting in the backyard. They brought the coffee with them. I set up chairs with little tables, a heater and music. I put some decorations in the trees above where we were sitting too.
STOP 3: BEER – 5-7PM My sister’s boyfriend showed up as a surprise to drive us to the next location. We headed over to B. Nektar (a meadery) and had a new group waiting for us to arrive. We got lots of beers.
STOP 4: BONFIRE – 7PM-?? Lastly, we walked back to my sister’s house for a bonfire. I dropped off decorations earlier in the day for her boyfriend to put up. This is where I put the most decorating energy since we’d be spending the most time here. A fourth group of people was waiting around the bonfire for her when she arrived. Ideally, it would be cool to have everyone join up at the last stop, but obviously we couldn’t do that with COVID restrictions.
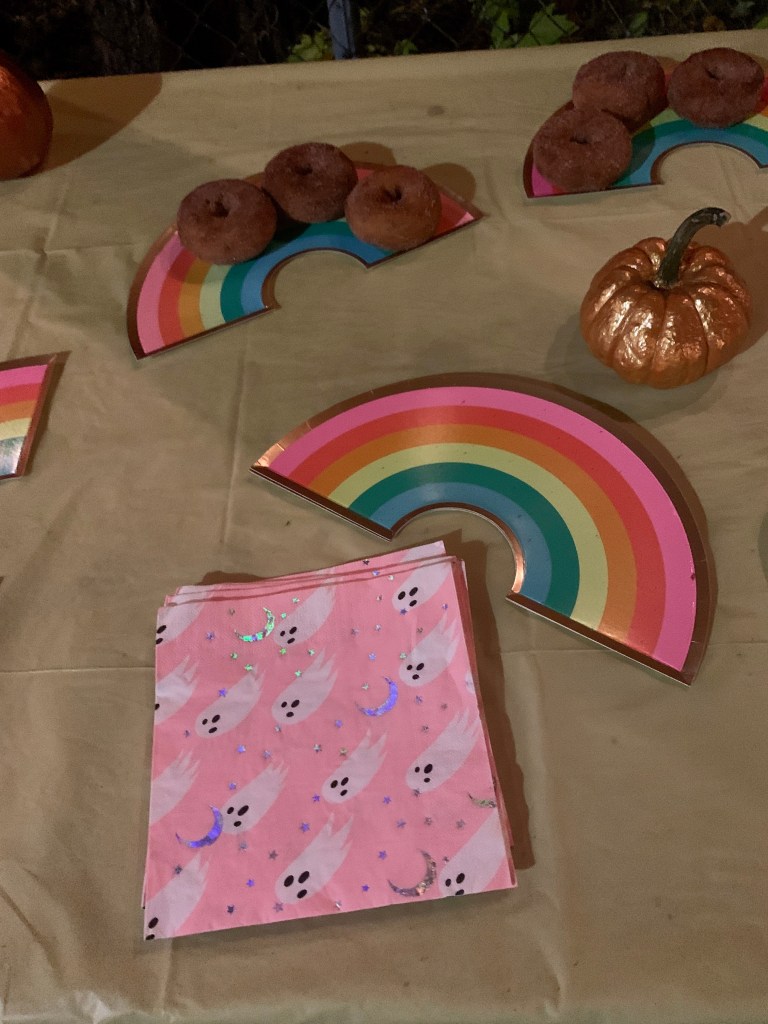
Here, we set up a table with cider, donuts and drinks. I was going for a cutesty Halloween theme so I mixed ghost napkins, rainbows and pumpkins – all in pastels and oranges. I think it worked out well! I painted some actual pumpkins and put a birthday message on one with stickers. We hung up 27 balloons, a happy birthday banner and crepe paper. I didn’t get great pics of anything since we were on the go so much that day and it was dark out.
The hardest part was coordinating with all the different groups of people. Try to have a point person for each group and make reservations ahead of time. Make sure you ask them all to get there early for the surprise. And make sure to leave enough time for walking/driving to each location.
Here are all the costumes my sister and I have done together.
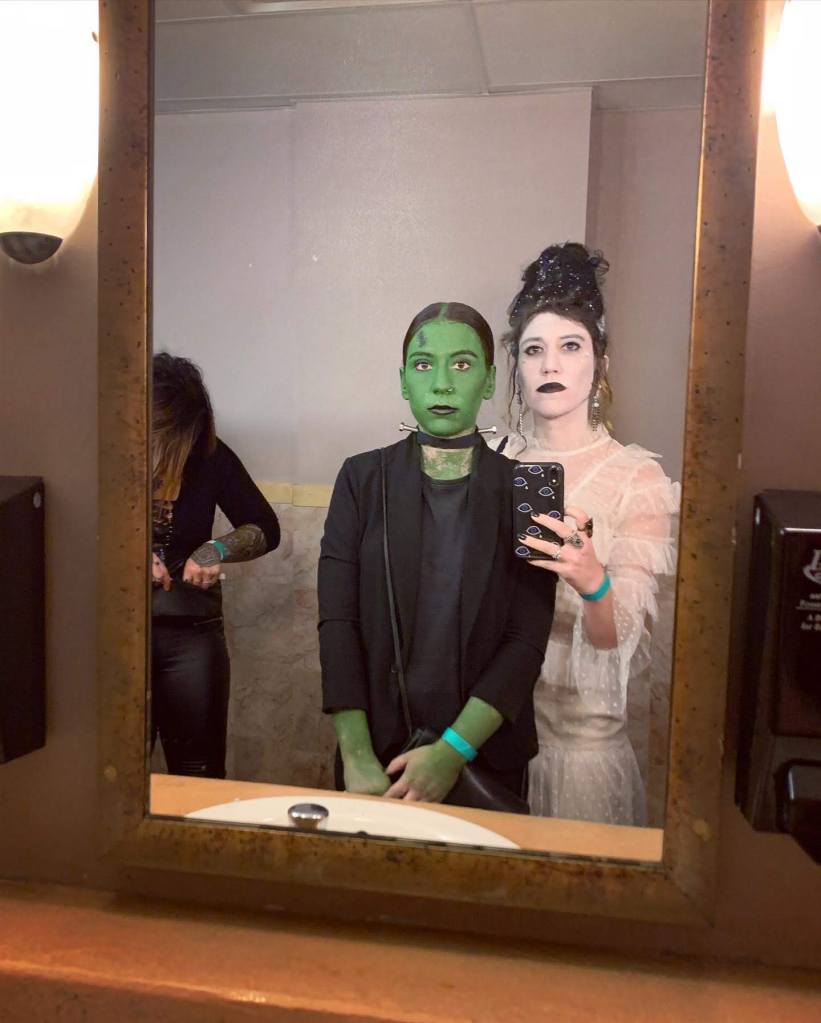
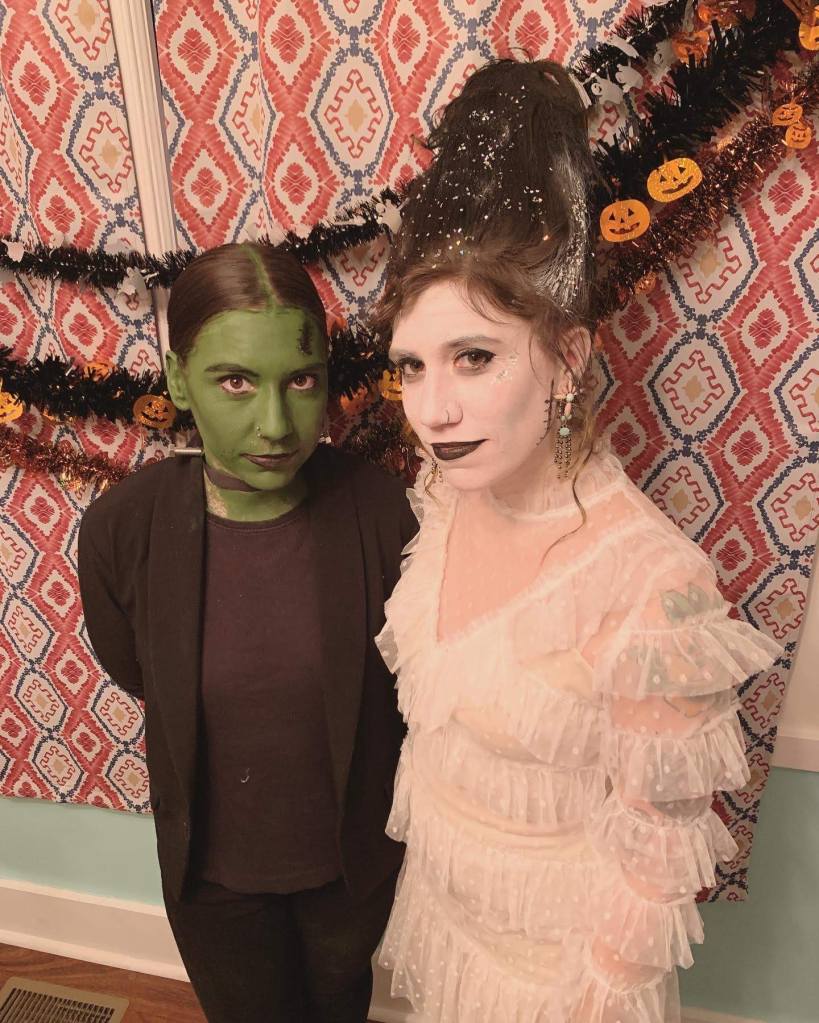
FRANKENSTEIN + BRIDE OF FRANKENSTEIN
Frankenstein: –Hair: She slicked back her hair into a low bun and used a toothbrush with hair spray to get down all the flyaways. –Makeup: We used this green face paint, but it peeled a little bit too much. I would get the same kind as the white paint below instead. She did thick black eyeliner, eyeliner stitches and black lipstick. –Outfit: We just got a black blazer from Salvation Army. Then wore a black t-shirt, black jeans and chunky black boots. So easy! –Necklace: She got a black ribbon and plastic bolts from Home Depot. She cut the plastic bolts down to size and spray painted them silver. Then hot glued them to the ribbon after cutting a hole through so they would fit. We safety pinned it in the back to hold it all together as a choker!
Bride of Frankenstein: –Hair: I got standard black/white color hair spray at the Halloween store. I used the bottle trick and this tutorial. I sprinkled silver and white glitter on top of the wet paint. –Makeup: I used white face make up, Mehron is my favorite brand. I put white face glitter on top of the paint and it wasn’t that noticeable. I would get something thicker next time. I did thick black eye liner with fake lashes. And used eye liner to make the stitch marks under the chin. Don’t forget black lipstick! –Outfit: I wanted something more “modern” with long sleeves. I liked how this dress was short and had ruffles. A similar dress can be found here. I also like the more traditional look – like this dress. I wore black fishnet tights and got clunky white boots on Poshmark. I wore big black rings and dressy earrings.
DAY + NIGHT GODDESSES
Night: –Hair: I got cheap black extensions and placed these star clips throughout the curls. –Makeup: I got Mehron black and gold paint and drew a moon on one side of my face. And then i used a star stencil to do stars on my face and arms. I wore fake lashes and black lipstick! –Outfit: I had this long mesh cutout black dress laying around for a while and it was perfect for this costume. I used the same star stencil and spray painted gold stars all over. You can use any long black dress – here’s a similar one. –Crown: We tried two different ways to make our crowns – mine is made from zip ties. I bought a plastic headband, and zip tied them around. I cut them to be different lengths and then spray painted the whole thing gold. I then added gold star stickers. Glitter didn’t stick that well for me so I skipped that step. Here’s a helpful tutorial. This crown held up throughout the night and was comfortable.
Day: –Hair: It would be cool if you had lighter hair or got yellow/orange extensions. –Makeup: We got a bunch of gold tattoos and used the same gold face paint above. She did fake lashes, lots of glitter and a fun lipstick color. –Outfit: We got a simple long white dress – we wanted something long and beachy. It would be cool to stencil something on this too. We tried and the material was too thin :(. We found a big chunky gold necklace that reminded us of the sun. –Crown: This crown was built using lots of hot glue! She cut out the shapes from cardboard and put little stones on top for dimension. She hot glued those to the headband and then got wood skewers from the grocery store and cut them down to size. Then hot glued those to the shapes. THEN spray painted it gold and added 9 layers of gold glitter. This one did not hold up throughout the night and the skewers kept falling off the headband.
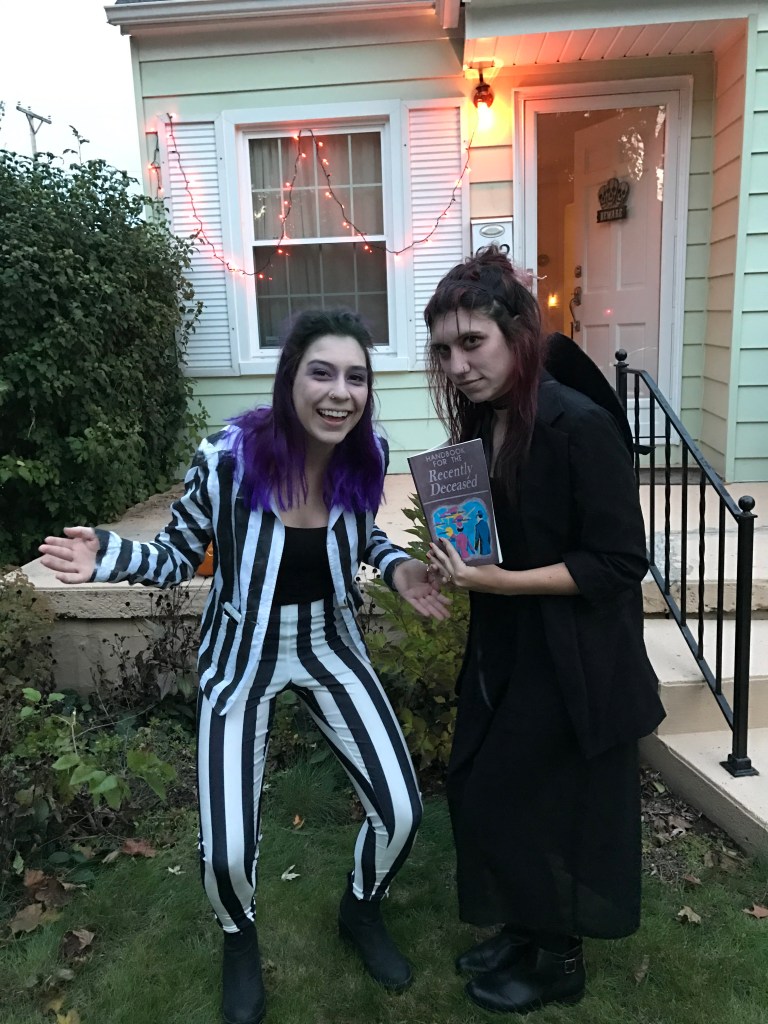
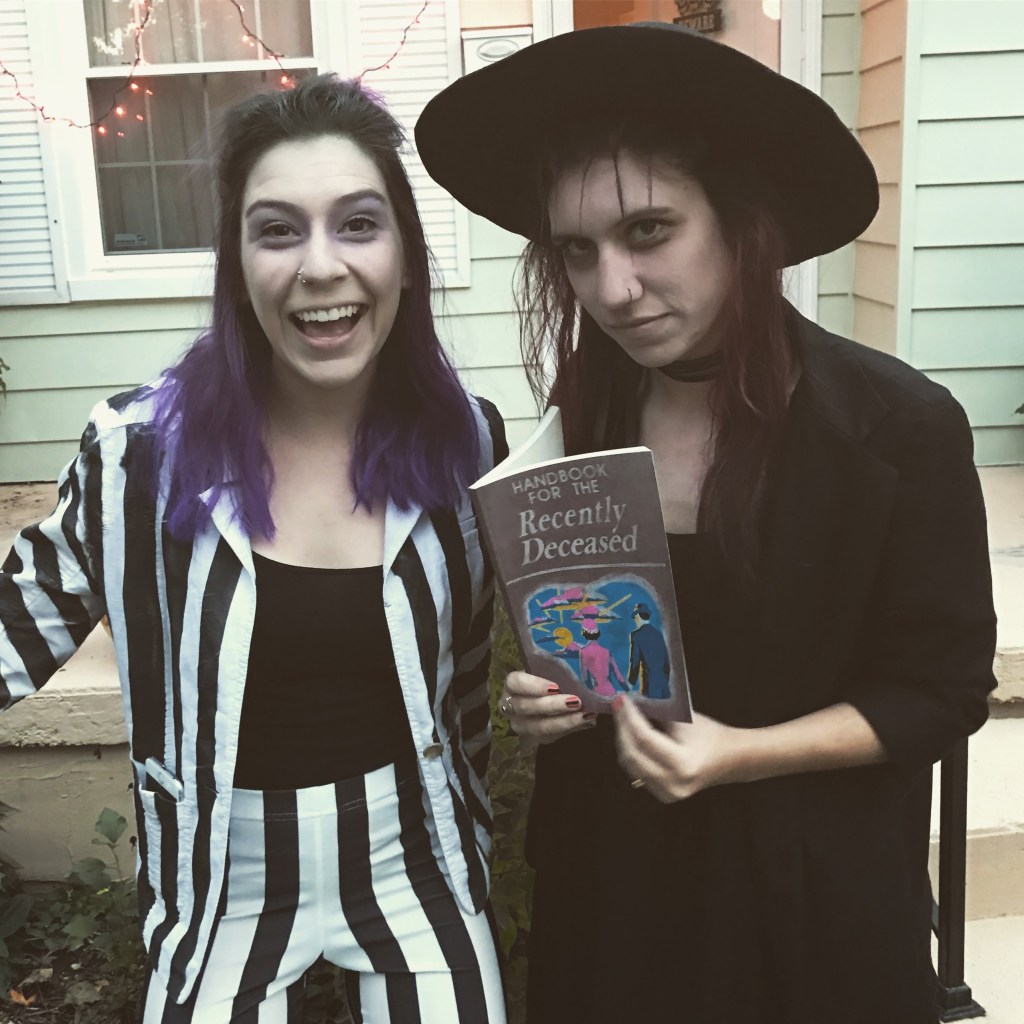
BEETLE JUICE + LYDIA
Beetle Juice: –Makeup: We both used Manic Panic Goth White powder. It goes on smooth and isn’t cakey. It gives you a slightly whiter look. We added some purple, green and brown around her eyes. You could get grosser and do something with your teeth or around the mouth. –Outfit: We got these Hot Topic leggings, found the blazer at Salvation Army and paired them with a black tank top and chunky black boots.
Lydia: –Hair: I didn’t have bangs so I put my hair into a half pony and pulled the pony forward to cover my forehead. I hair sprayed them into little spikes. And then put a headband over the hair so you couldn’t tell that it was pulled forward. Here’s a tutorialthat explains it better! –Makeup: I used the Manic Panic Goth above for my face with black powder under my eyes. –Outfit: This was super easy and built from clothes I already had. I just wore a long black dress, a longer black blazer and boots! You need a big black hat – I like felt ones better, but there are lots of straw ones. If you need the brim to stick out more you can spray it with fabric stiffener. I added ribbon to the hat so I could wear it around my neck. Top it off with the Handbook for the Recently Deceased book – you can use it as a notebook after! You could also wear a camera if you want another prop.
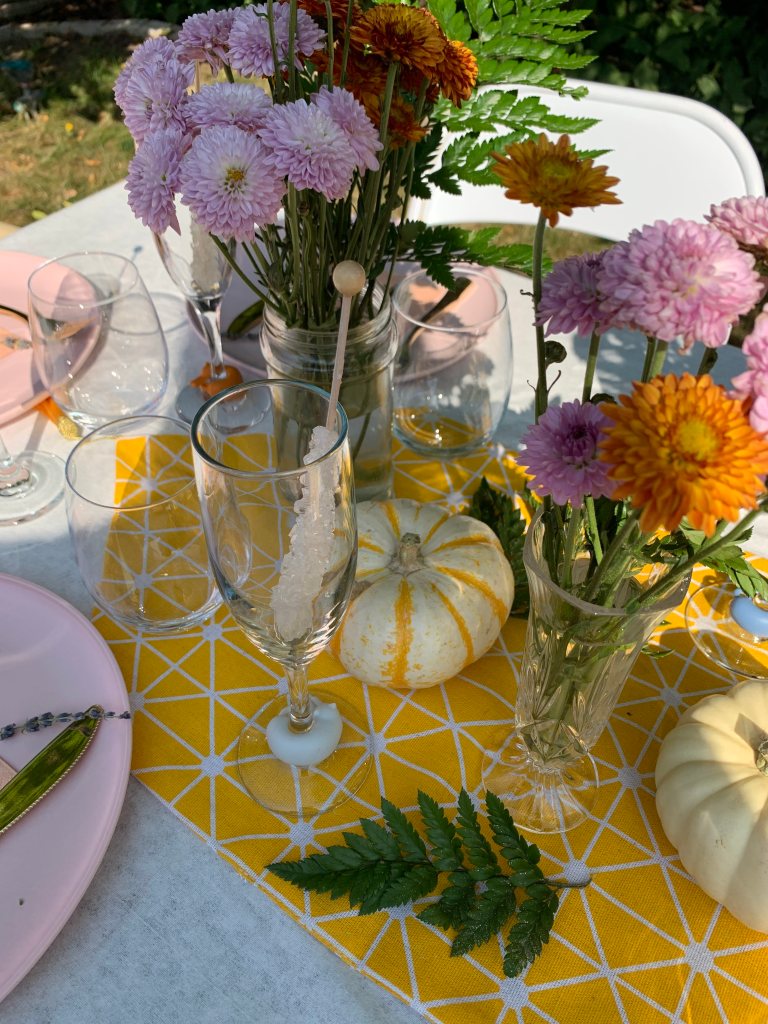
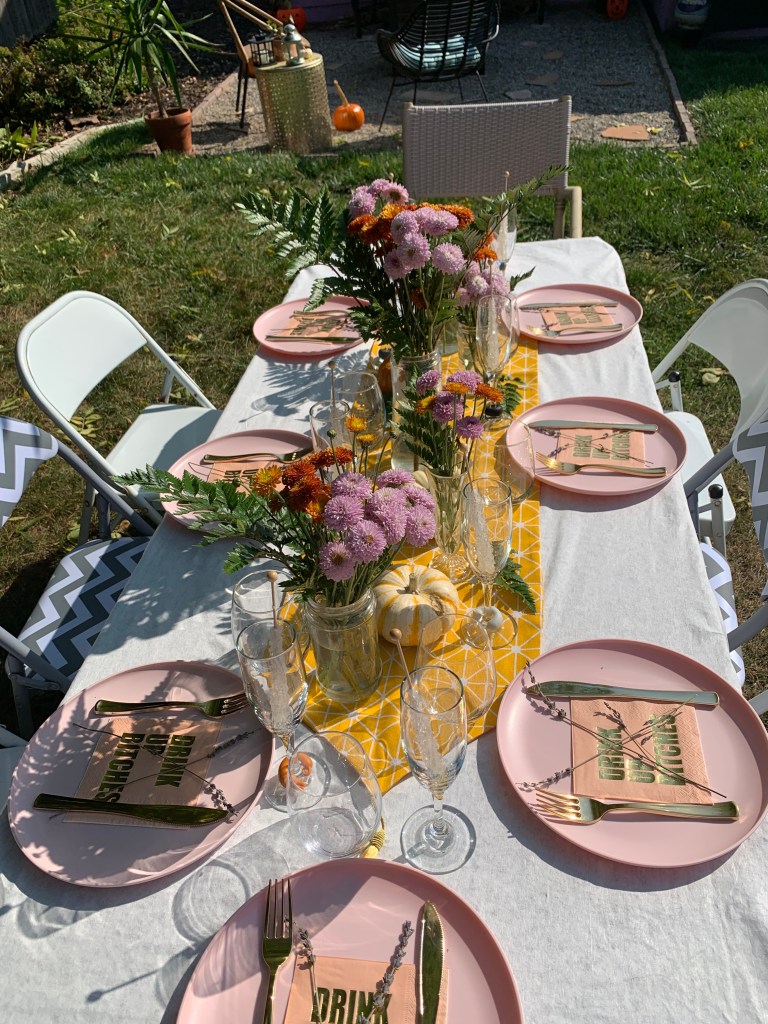
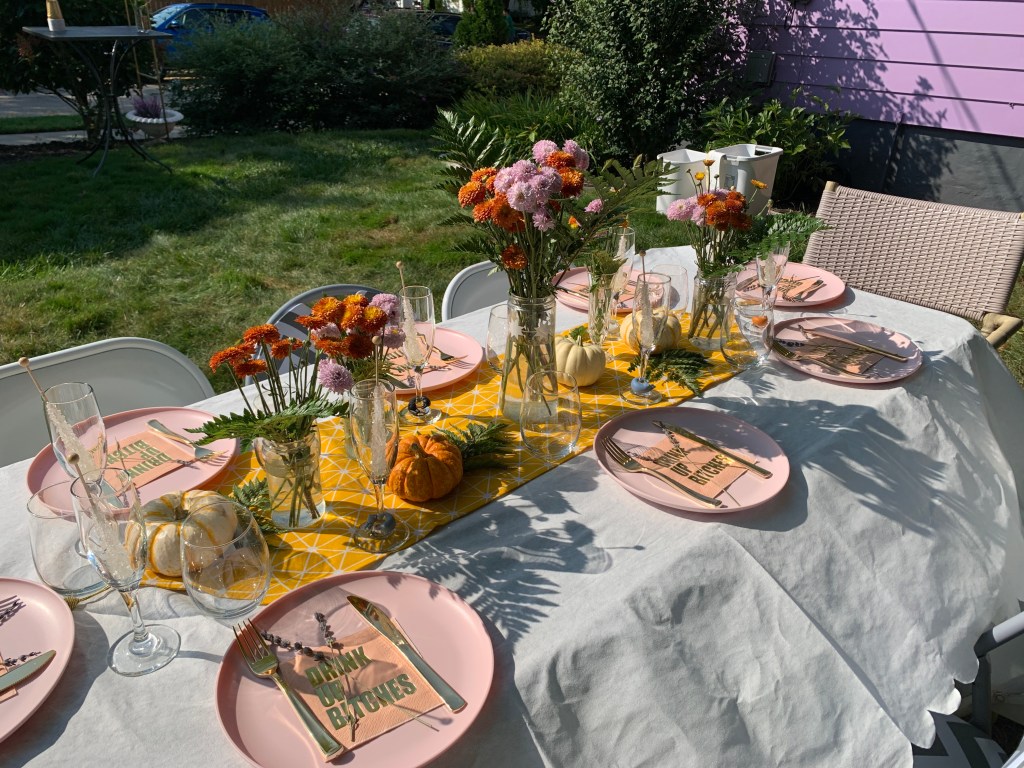
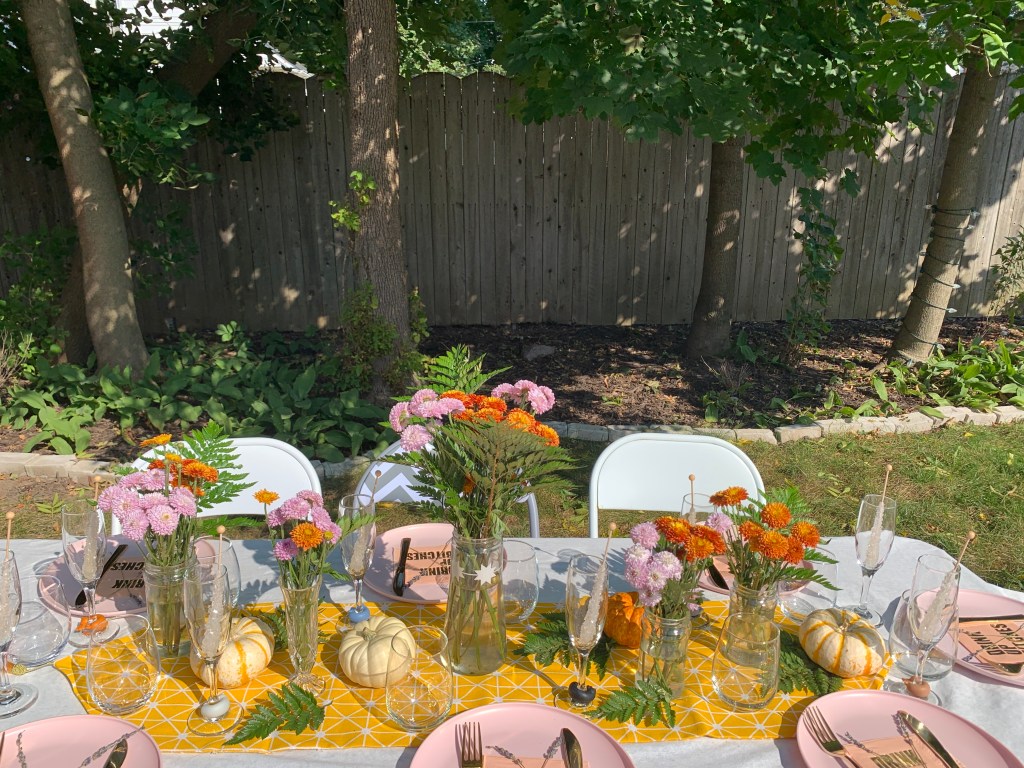
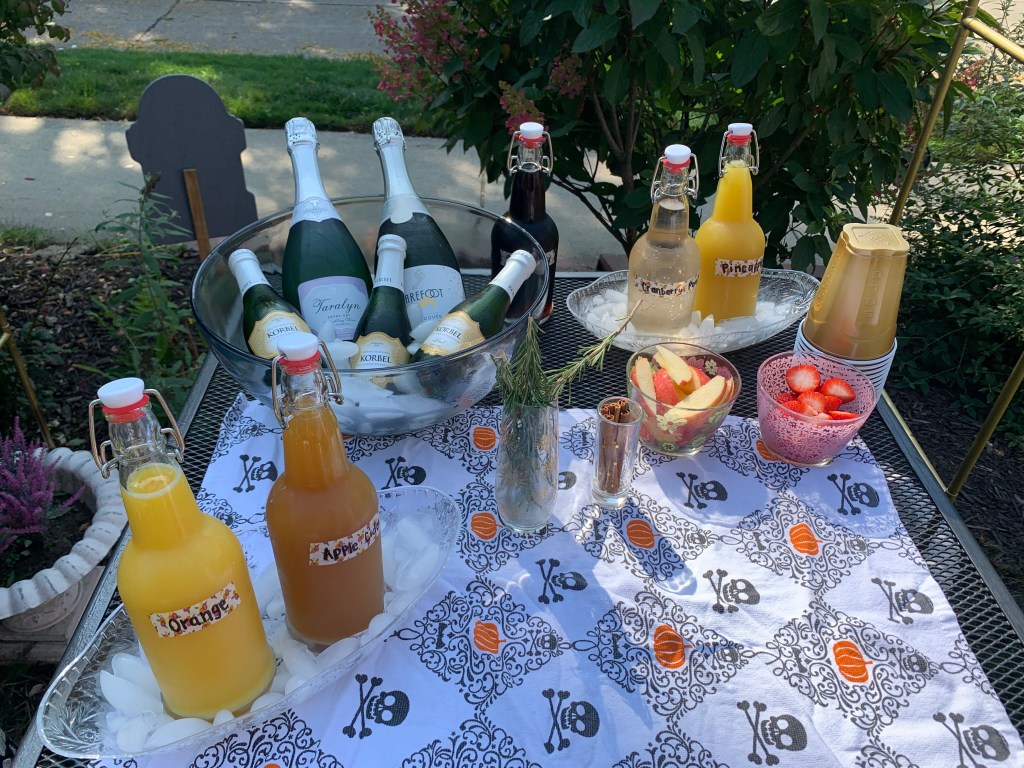
I wanted my color palette/theme to be autumnal, but also have a girly vibe as well. I chose to stick with the colors pink, orange and yellow. I had 7 guests (so 8 people total) and had one dining table, a small mimosa bar table and larger food/bagel bar table. For the dining table, I used my usual white table cloth, a yellow table runner and topped it with purple/orange mums in jars and mini pumpkins in different colors. I got some greenery and spray painted them with gold sparkles to add to the vases and around the table too.
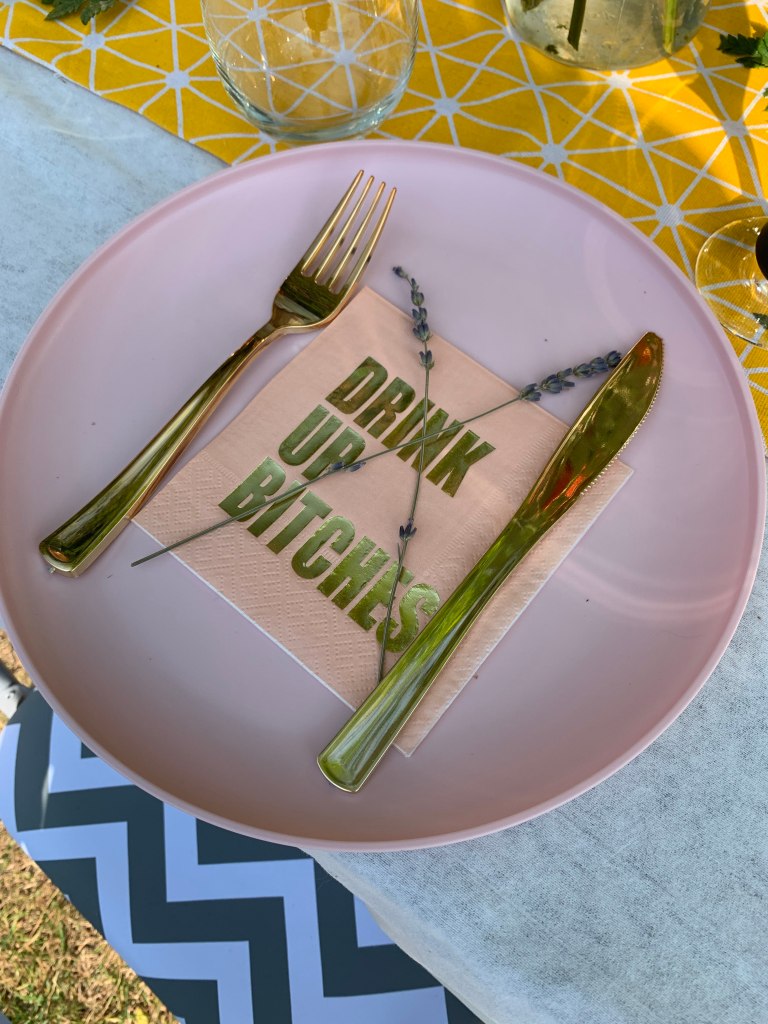
For each place setting, I used (again, my typical) pink plates, gold plasticware and some leftover bachelorette napkins. I placed the napkin in the middle of the plate, a fork and knife on either side and then did a little X on top with dried lavender stalks. Each person got a champagne glass (with a cat glass charm) and stemless wine glass for water. I put a rock candy stick in each champagne glass – they really fizz when you add champagne!
A girls brunch needs mimosas and I love the idea of making your own! I created a mimosa bar by providing different juice and topping options, along with champagne obviously. I got these glass bottles and filled/labeled them with orange juice, pineapple juice, apple cider, cranberry peach juice and cold brew. For the labels I used cute floral washi tape. I placed the bottles in shallow oval bowls filled with ice and then put extra juice in a cooler nearby. I used a large punch bowl filled with ice for the champagne – I put a few big bottles and then some small ones in there as well. For toppings, I put out little bowls of cinnamon sticks, apples, strawberries and rosemary. I also mixed some edible shimmer dust into the apple cider to make it sparkle!
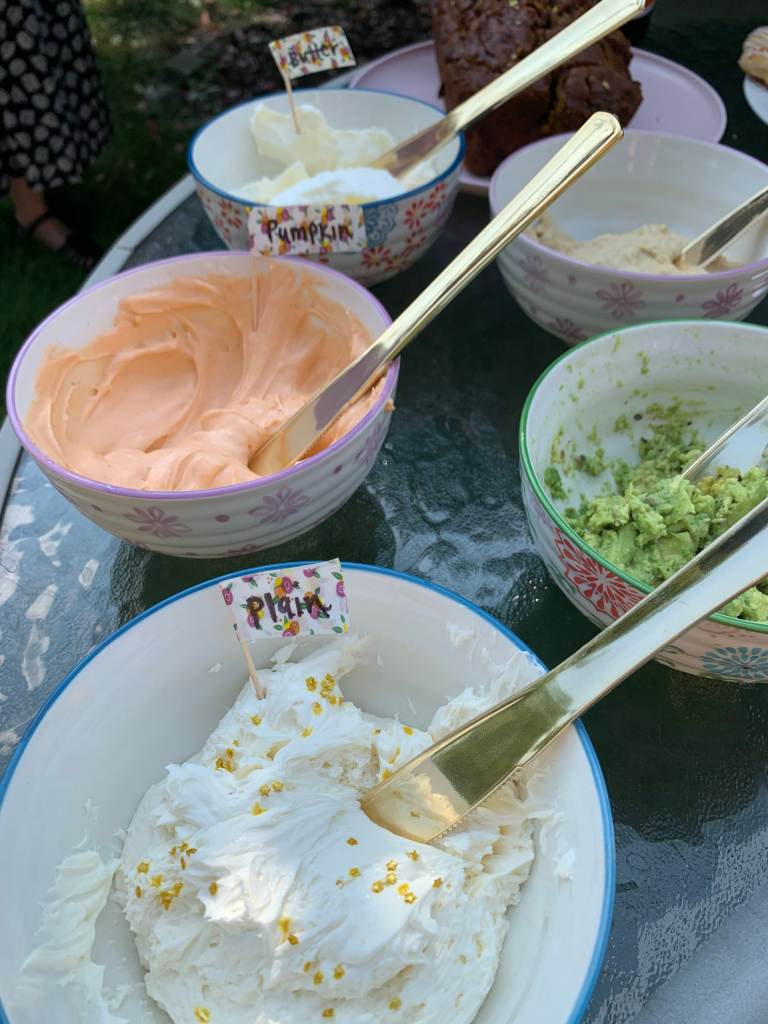
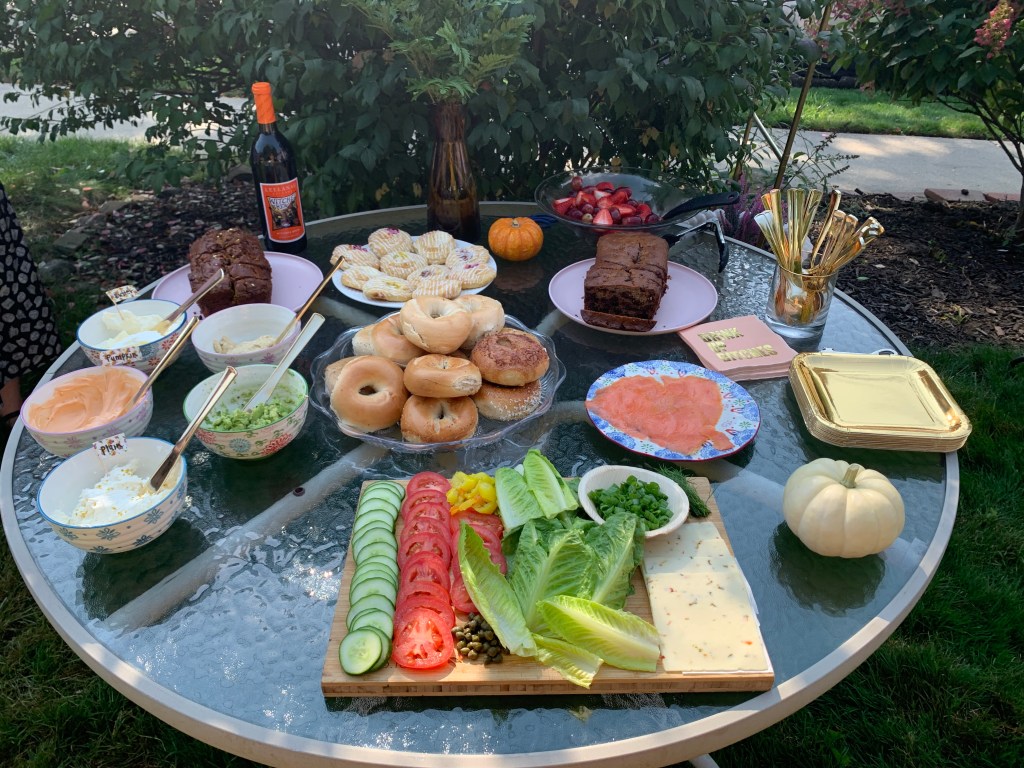
Next, I did a bagel bar. I got a variety of bagels and sliced them all beforehand. For toppings I wanted to have a variety of spreads and vegetables. I included plain cream cheese, pumpkin cream cheese, butter, avocado and hummus. For veggies, I did cucumber, tomato, lettuce, green onion and banana peppers. I put out some smoked salmon, capers and sliced cheese. I also made some pumpkin bread topped with edible star sparkles. Another fun edible thing was using dried flowers in a water pitcher. It added some girly garden vibes. Lastly, I got these food coversto help keep out any flies or bees – functional and cute!
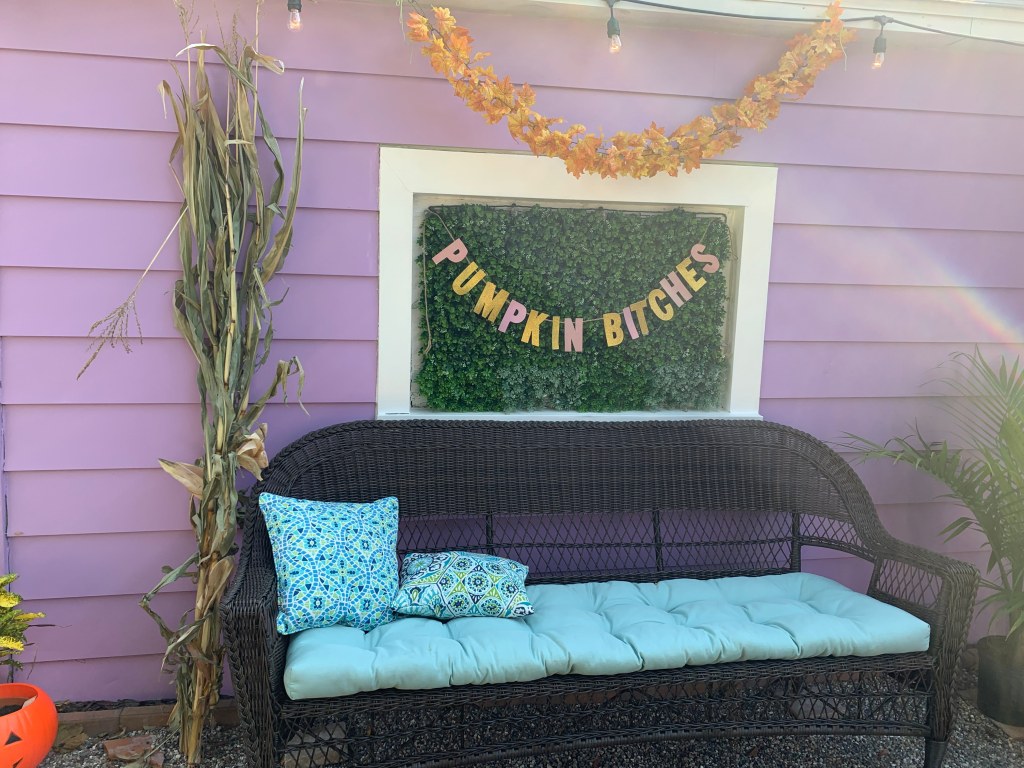
I put up “pumpkin bitches” garland, some leaf garland, corn stalk and pumpkins on my patio!
TABLE TOP: – White table cloth ($5) – Yellow table runner ($8) -Purple + orange mums (Farmer’s Market = $12) – Mini pumpkins (Farmer’s Market = $6)
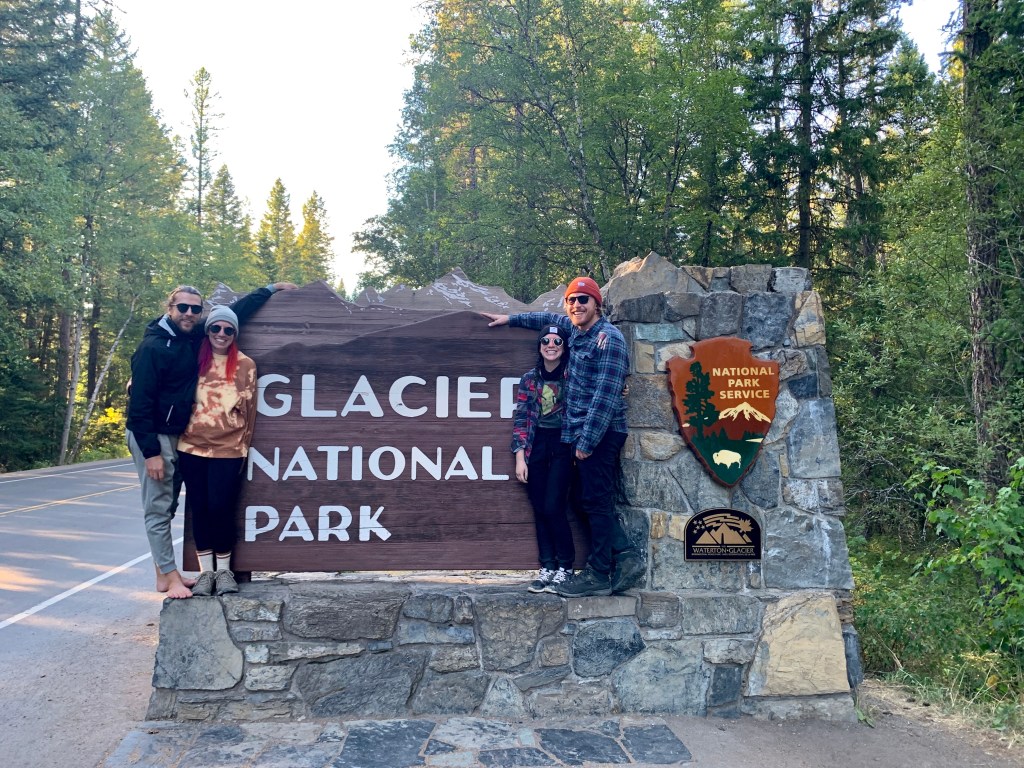
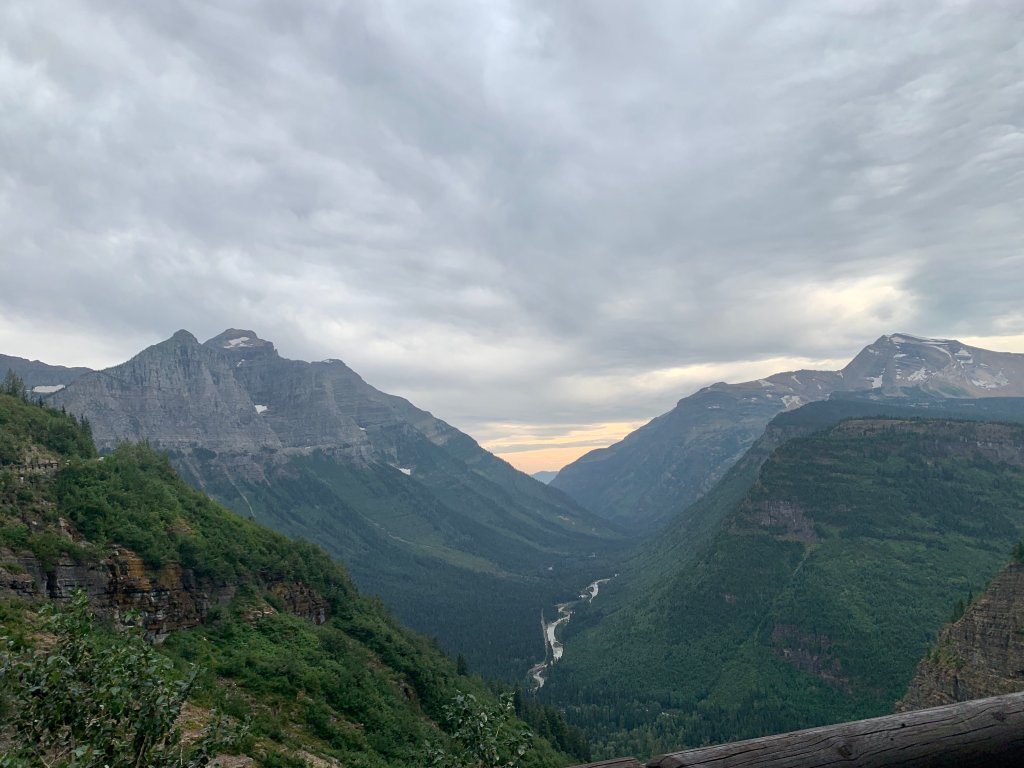
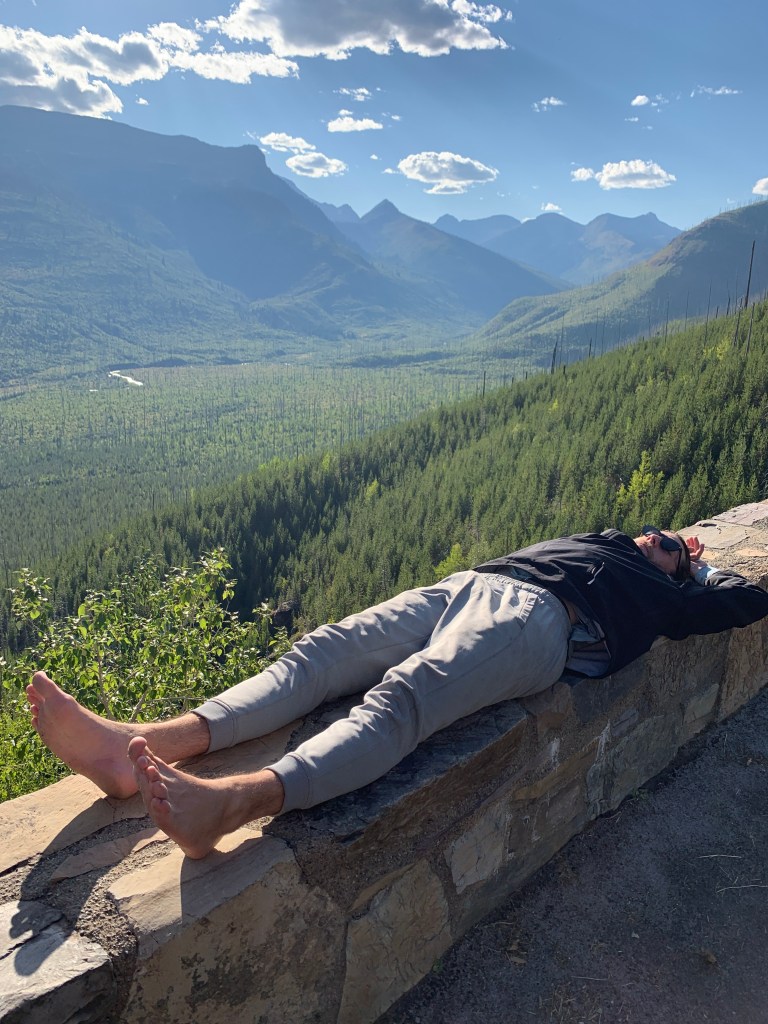
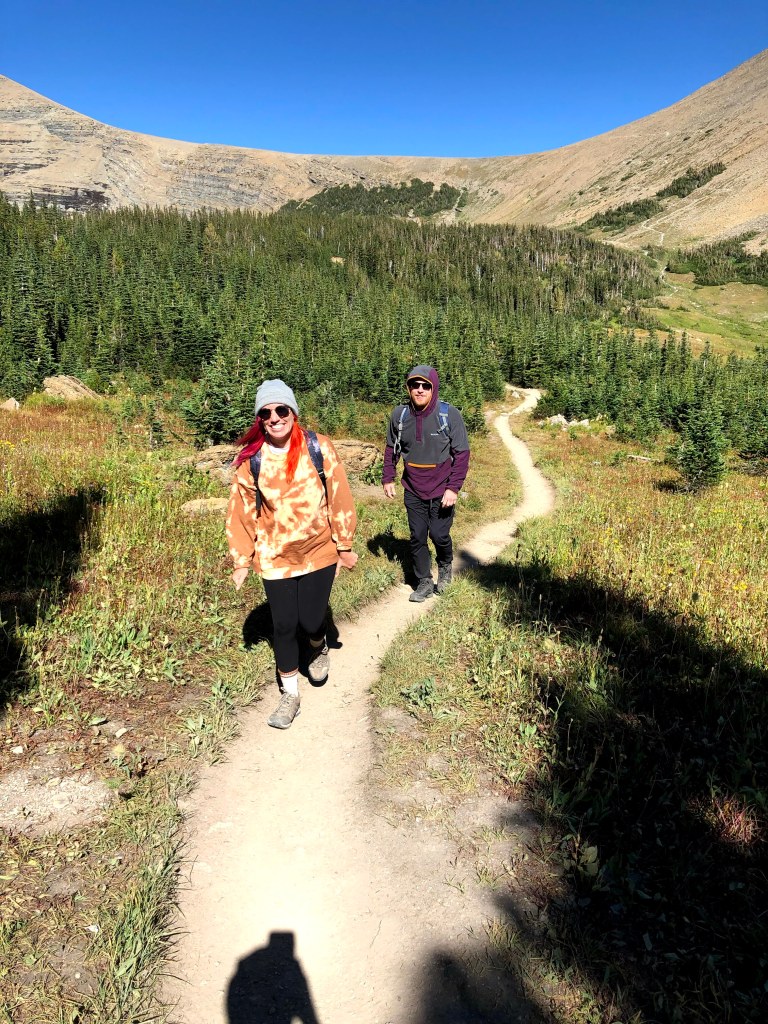
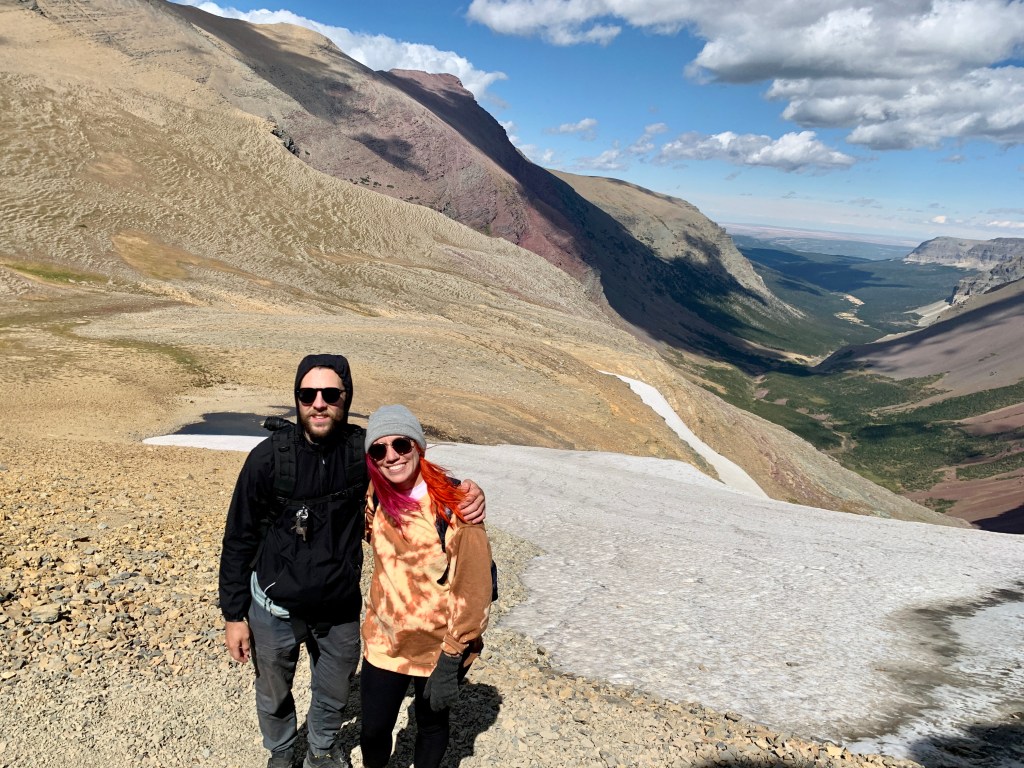
For the first leg of our National Park road trip, we spent a few days at Glacier National Park. It was definitely my favorite! Just driving in the park is almost enough – everywhere you look are crazy mountain views, waterfalls and animals. You are literally driving on the side of a mountain the whole time!
TRANSPORTATION: We rented an RV for this trip, but rented a separate smaller car when arriving in Montana to drive the winding roads throughout the park.
WEATHER: We went at the end of August and it was pretty warm the whole time. The only time we got chilly was climbing to the top of the mountain. The “normal” weather was like shorts/leggings and a long sleeve or warmer.
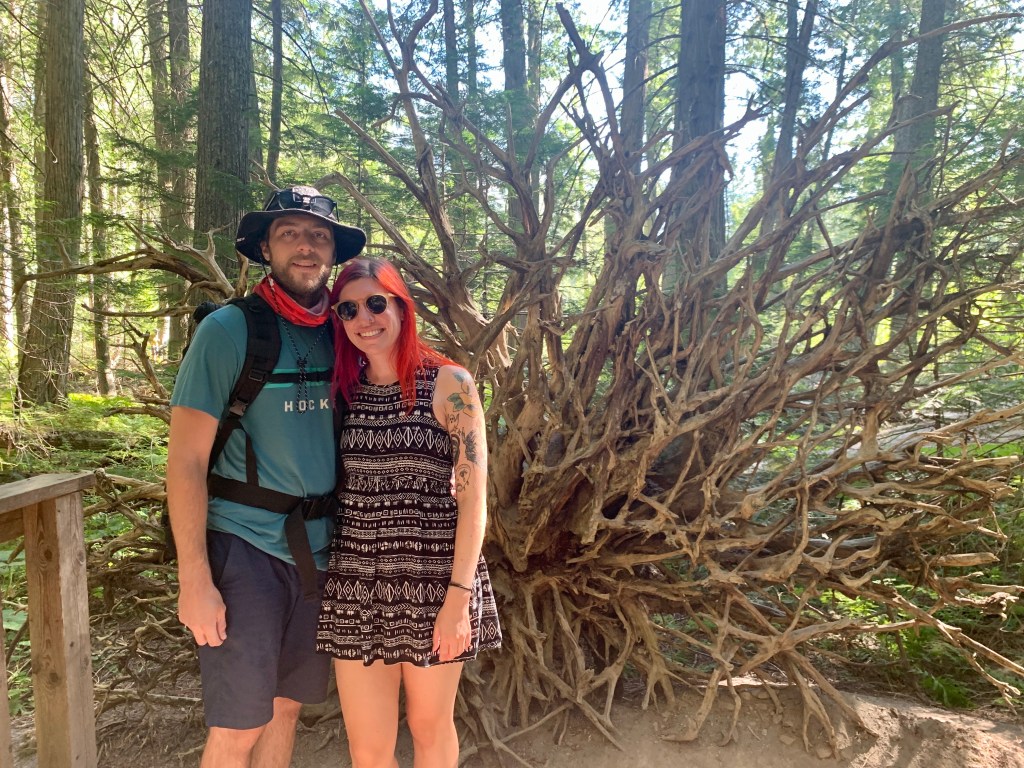
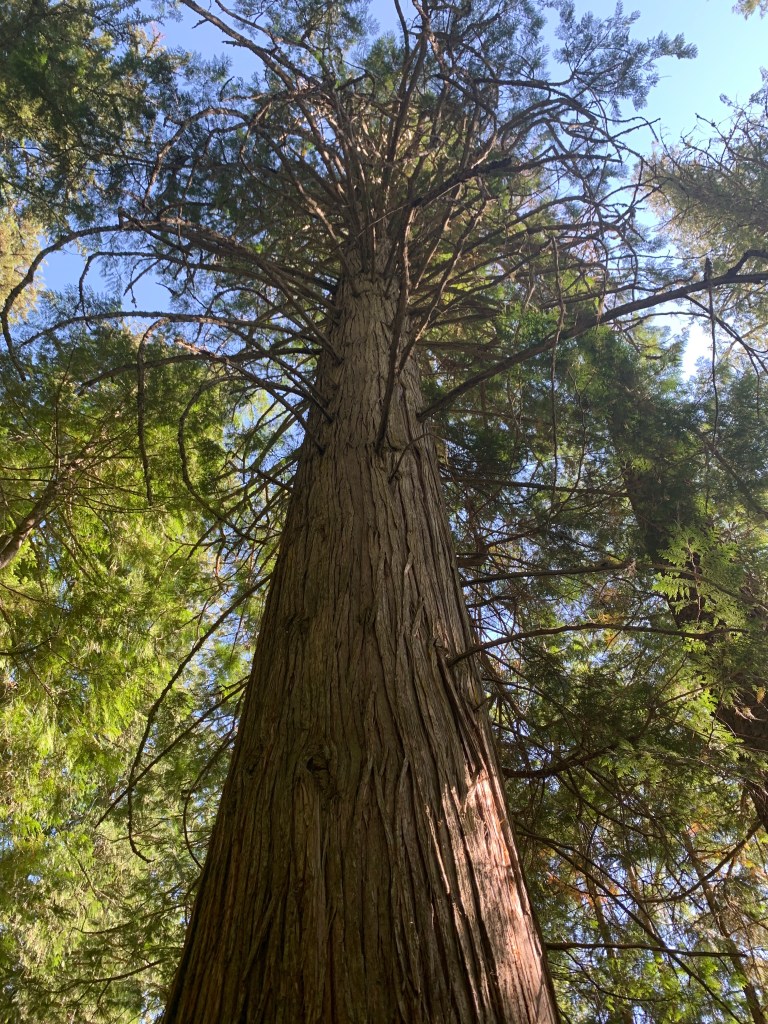
DAY 1: TRAIL OF THE CEDARS + AVALANCHE LAKE
We wanted to take our first day pretty easy so we went to the Trail of Cedars which is a short 0.5 mile hike through a bunch of cool trees and it’s on a wooden walkway which is nice. We opted to keep walking to Avalanche Lake which was definitely worth it. It’s a crystal clear lake with cool mountain reflections. The whole thing took us 2-3 hours and was pretty easy.
We then checked out West Glacier Village. They have a small restaurant (not the best looking food), an ice cream shop (really good!), souvenir stores and a mini grocery store. The grocery store has most staples, lots of alcohol and even some pre-made meals like sandwiches and salads.
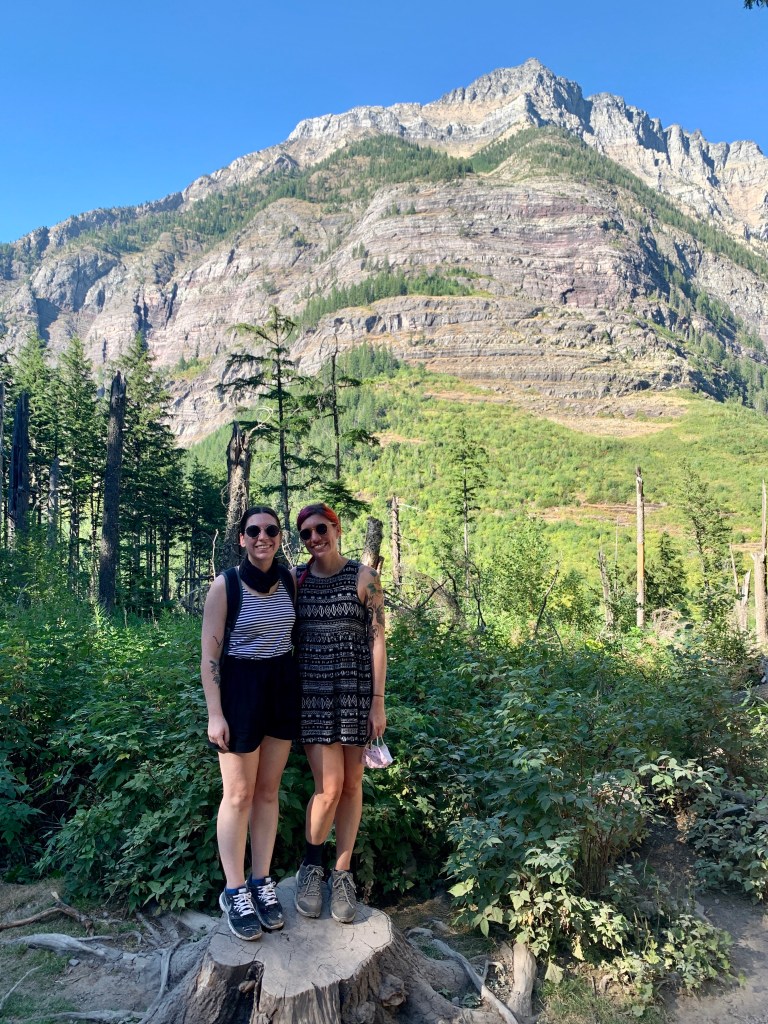
DAY 2: WHITEFISH, VORTEX + HIDDEN LAKE
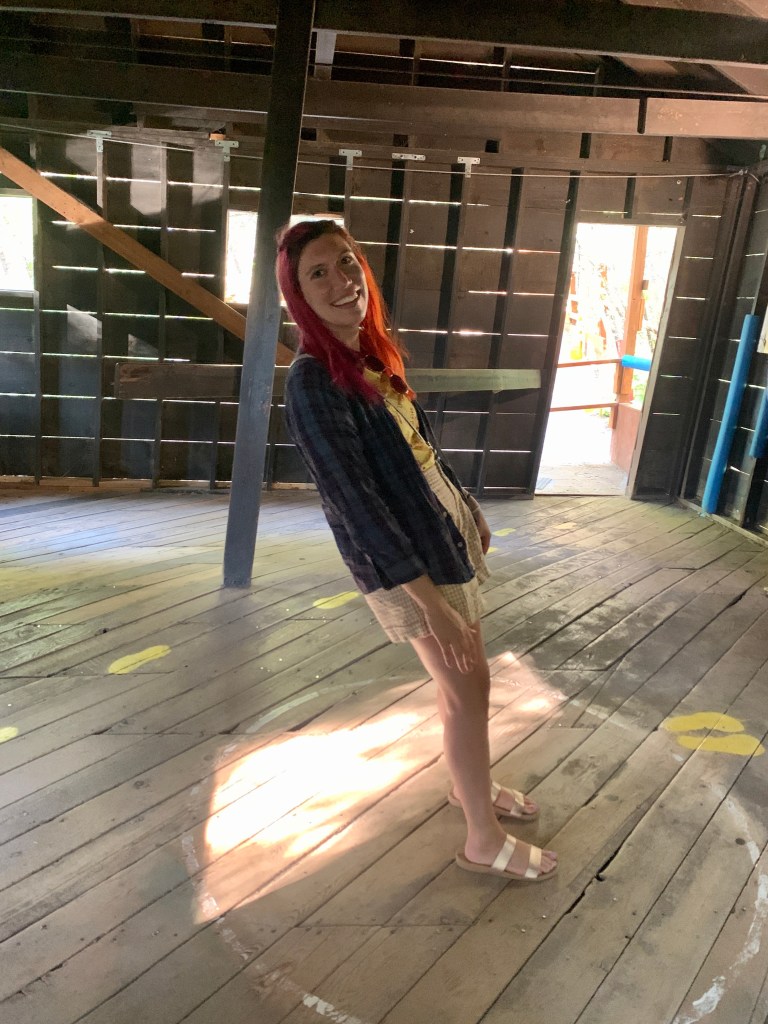
The guys decided to go white water rafting, so we planned a girls morning. First we stopped at the Montana Vortex and House of Mystery. It costs $12 and is worth it…maybe? The tour includes a tilted house and mysterious garden. It ended up taking over an hour which wasn’t great for us since we were trying to do a lot that morning. The tour guide was super nice and entertaining, but it ran a little too long for us. The tilted house was crazy and made us feel dizzy! The garden was only okay and the guide goes over the same things over and over again throughout the property.
Next, we drove to the small town of Whitefish. It was so cute! There a bunch of places to get coffee/tea, pastries or a full on meal. There are a bunch of cutesy shops and souvenir stores. My favorite was Mum’s Flowers. They had the prettiest flowers, pots, cute party supplies, cards and more.
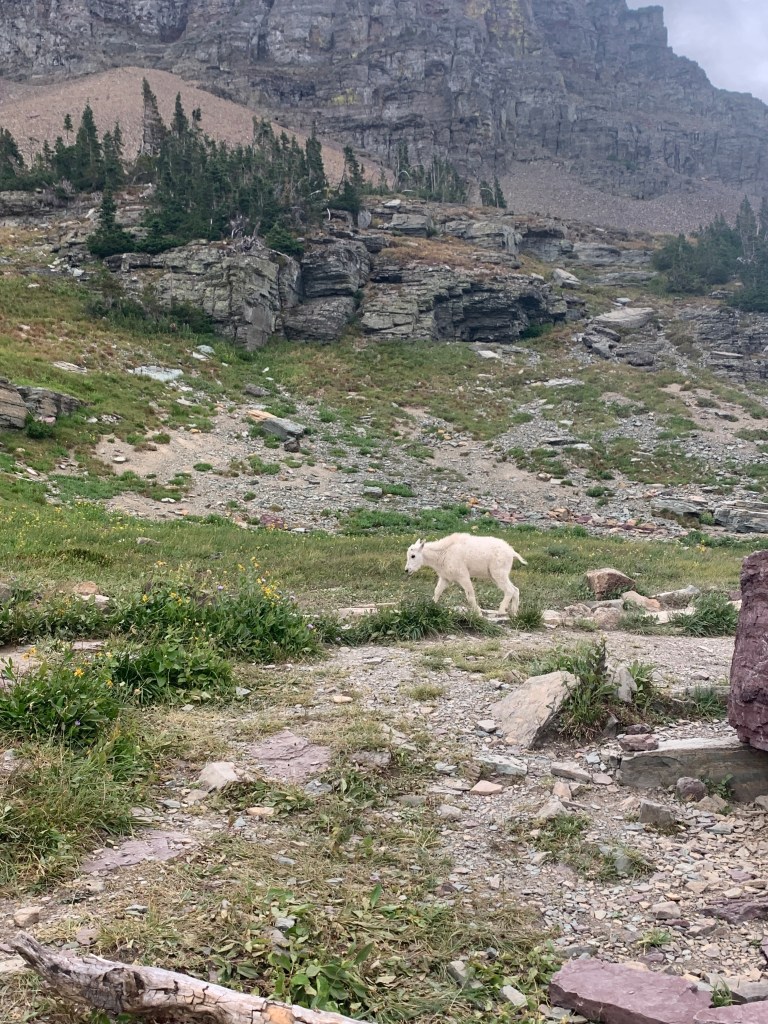
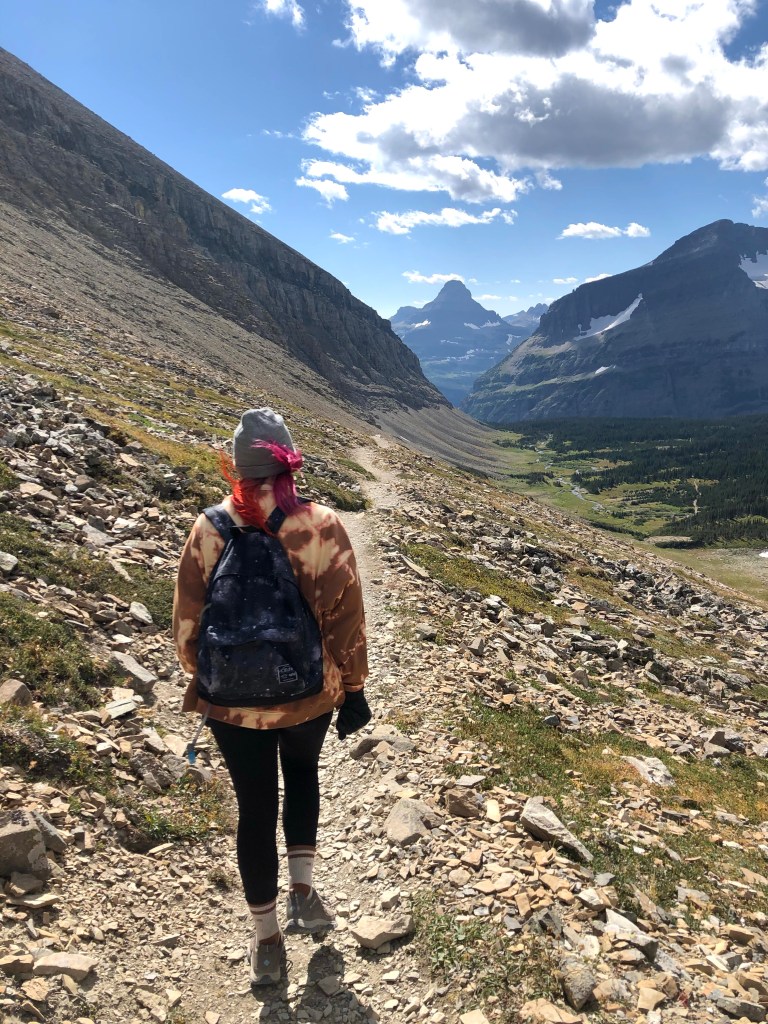
After regrouping back at the campground, we decided to do the Hidden Lake trail. It’s about 5 miles long and takes you to a lake (obviously). The trail was easy overall and a lot of it is on wooden walkways. We saw a bear from a long distance and got super close to mountain goats!
DAY 3: GOING THE SUN ROAD
Our last day was our big park day. Going the Sun Road is the main thing you’re supposed to do at Glacier. There are a ton of stops throughout the drive and the views are stunning. Here is what we did from the entrance of the park to as far as we could go towards St. Mary’s (a lot of the park was closed when we went).
Heaven’s Peak: a cool lookout (short stop for a photo)
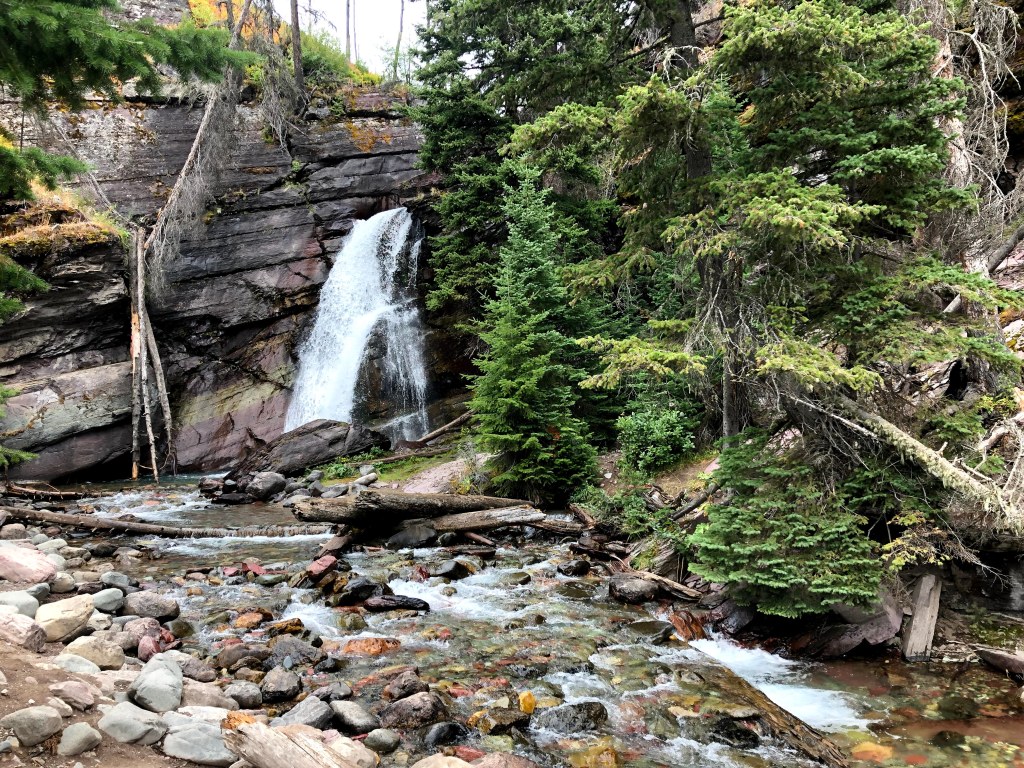
Weeping Wall: a waterfall down the side of the mountain (short stop for a photo)
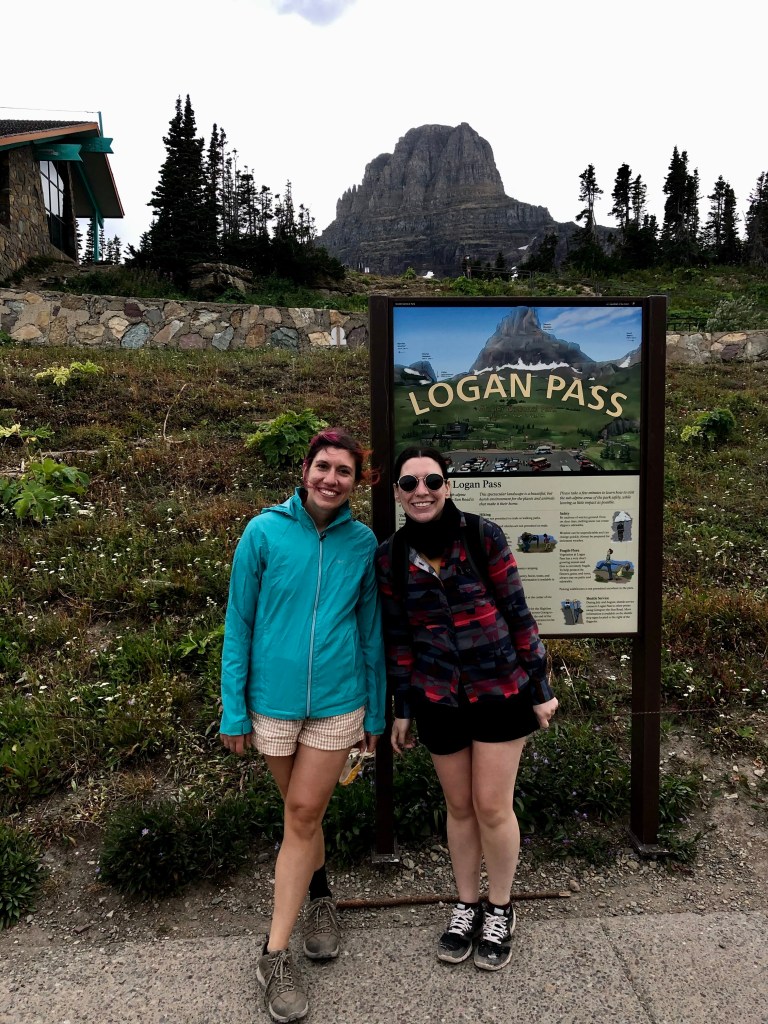
Logan Pass: this is the main parking area and the starting point for a lot of trails (including Hidden Lake), there is also a gift shop here. Make sure you get there early (or late) because it’s always pretty crowded.
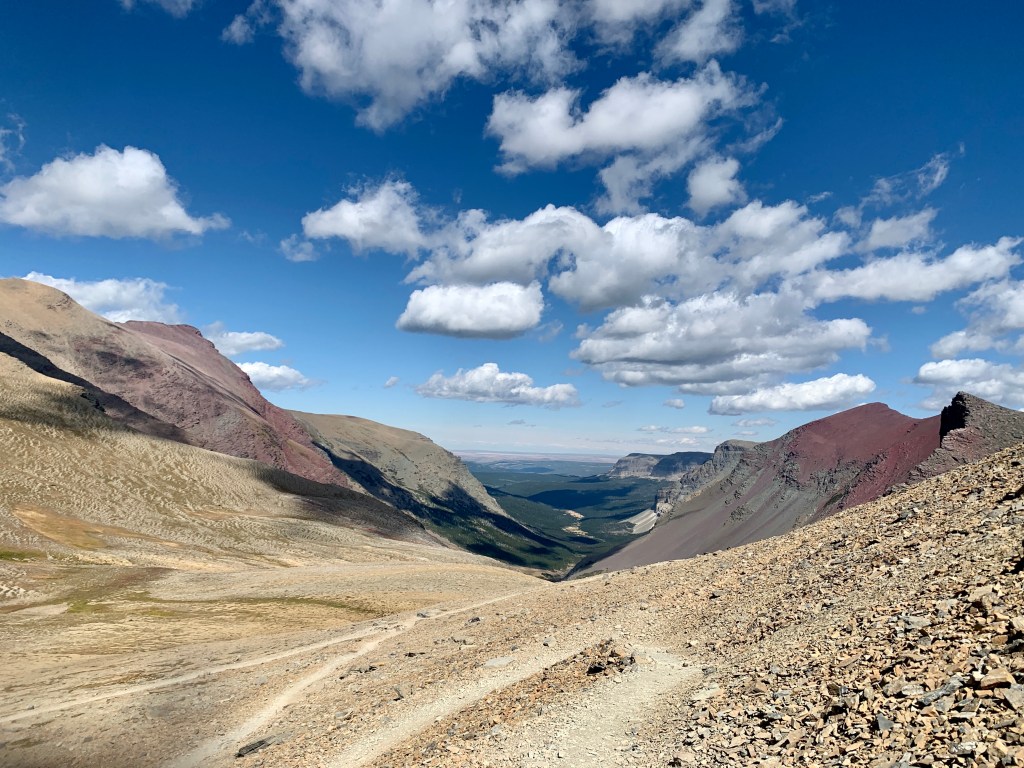
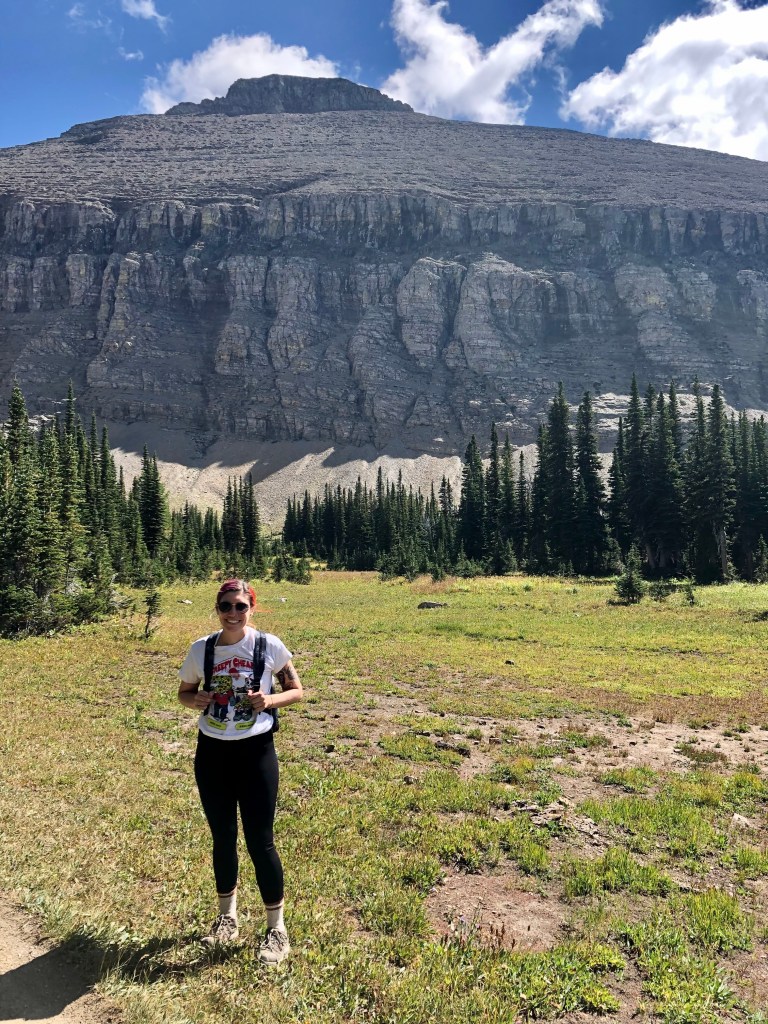
Siyeh Bend Trail: this is the big hike that we did! It was about 9 miles there and back. We got a spot right on the road near the trailhead, but you can park further away if needed. I would say the trail is moderate to hard (for a novice hiker like me). Some parts are easy and normal. Some are extremely uphill. The ending portion is very steep and up the side of a mountain. It got superrrr cold and windy. Definitely bring layers to take off/put on. I think the whole thing took us around 6 hours (including a lunch break).
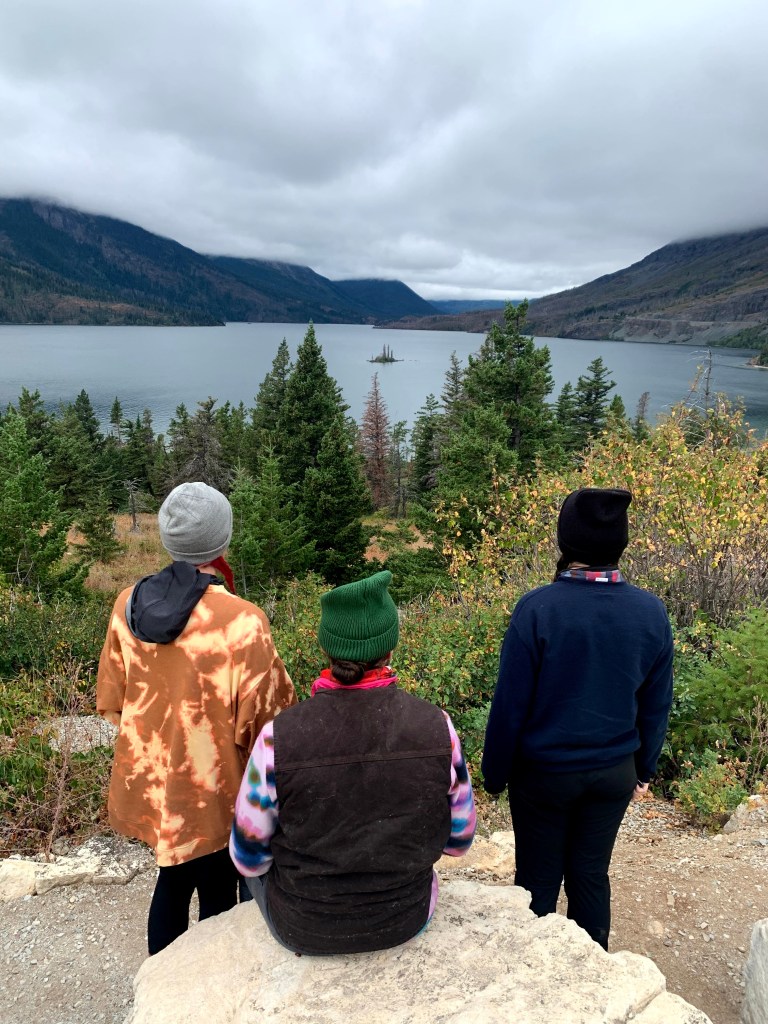
Sunrift Gorge: there are a bunch of trail options here – we just randomly walked around and did a shorter one.
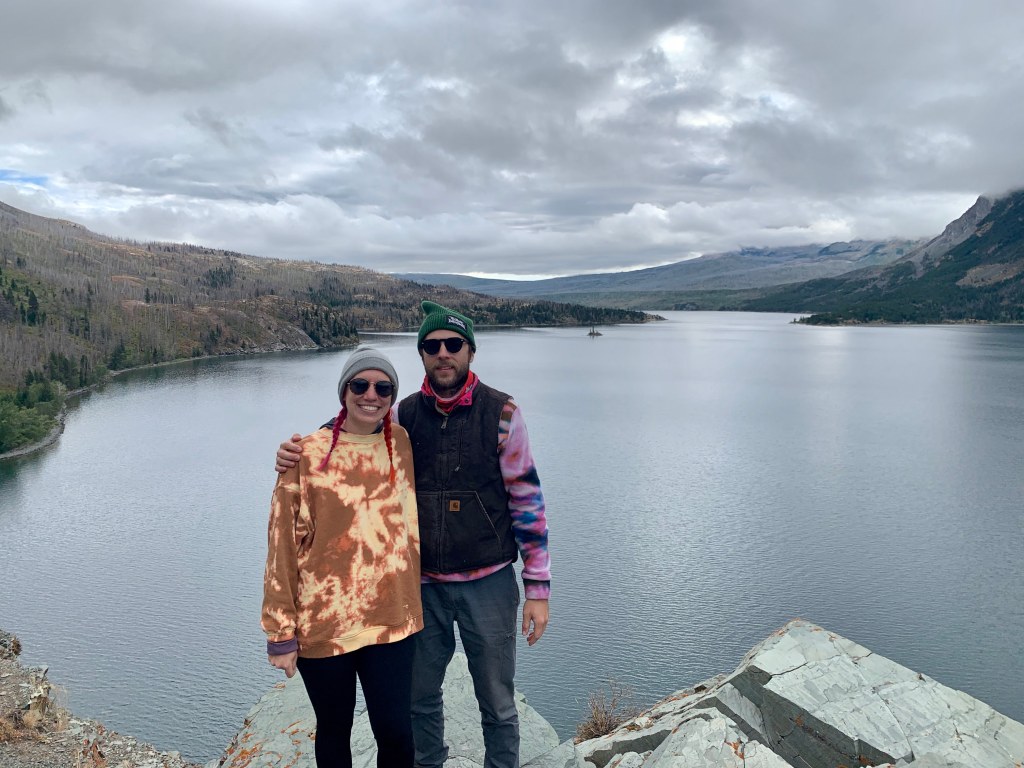
Wild Goose Island: where The Shining intro was shot!
The actual drive through isn’t long, so it’s just about how long you want to spend at each location and how many things you want to see.
Here are some tips on hosting a fall dinner party in an affordable way.
We did ours outside because there was more space and it felt more free. Decide where you’re hosting and how many guests you want to serve. We had 8 including the hosts. I feel like this is the perfect amount – it feels full, but you’re not making 100 pounds of food.
We wanted a menu that was fall-ish obviously, but it had to also be easy to cook while hosting and accommodate different dietary restrictions. We chose:
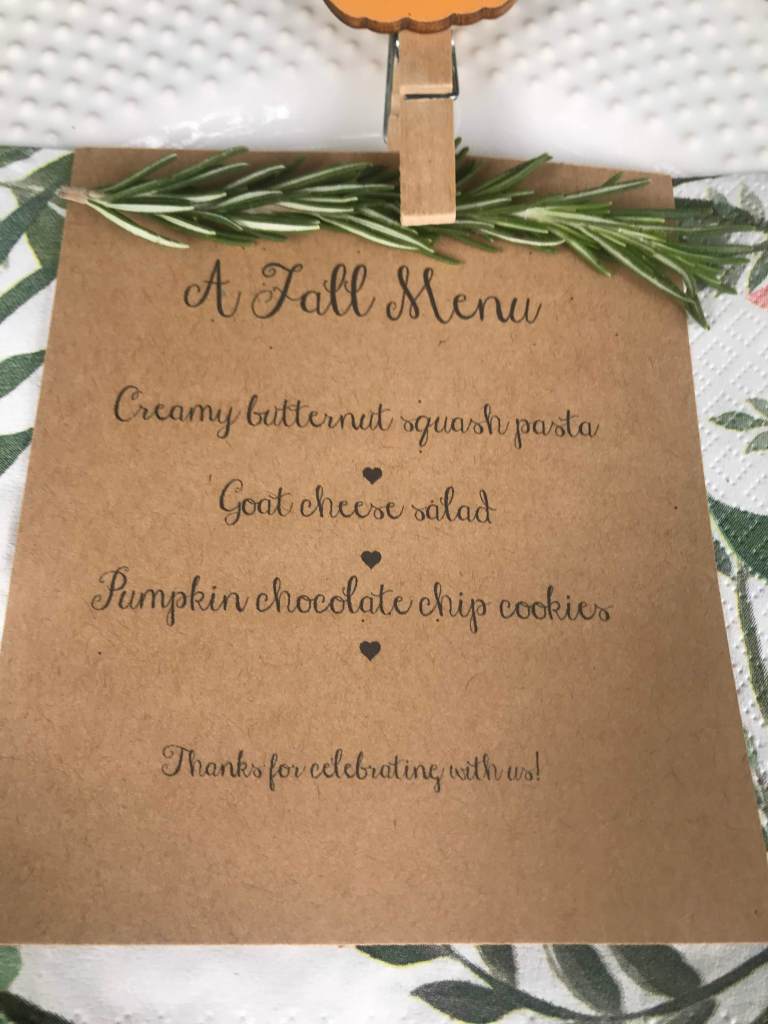
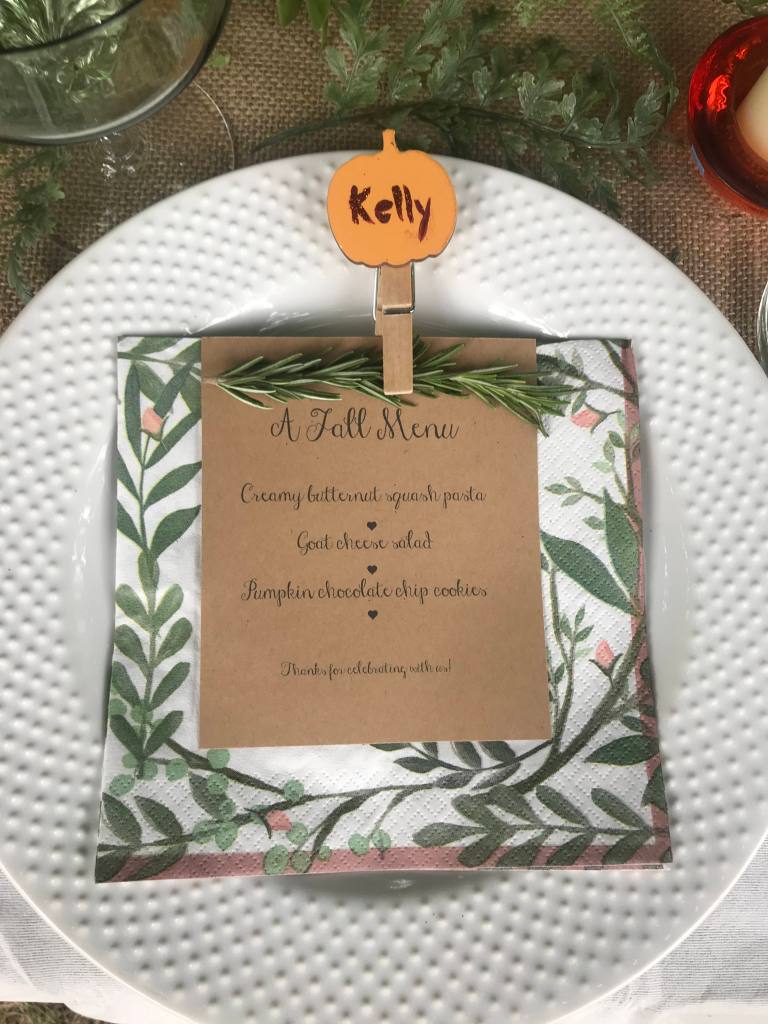
–Creamy butternut squash pasta (cheese optional) –Goat cheese salad (cheese optional – just a simple salad with lettuce, balsamic dressing, kalamata olives, tomatoes and cucumbers) –Pumpkin chocolate chip cookies (paired with optional pumpkin ice cream and hot fudge)
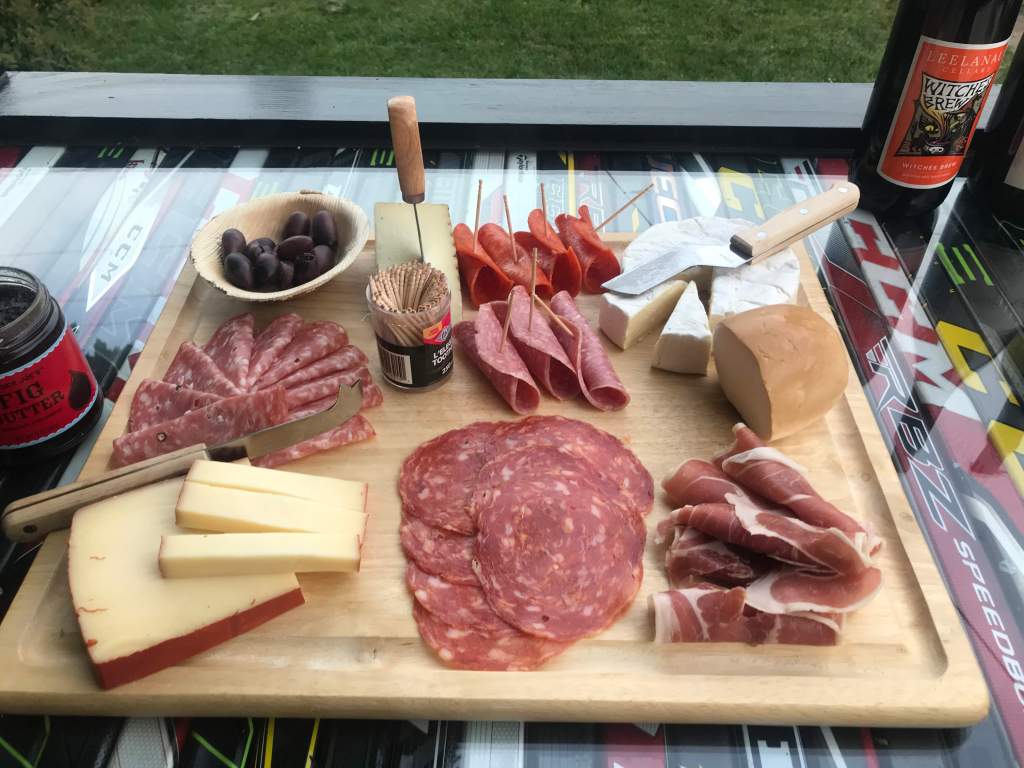
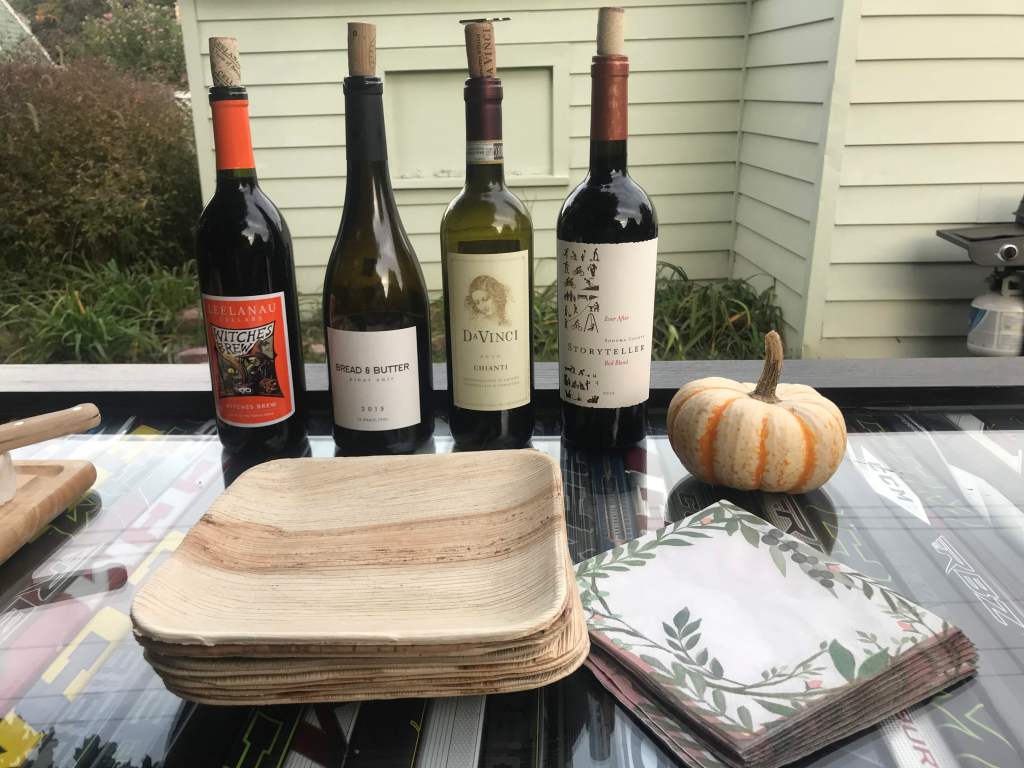
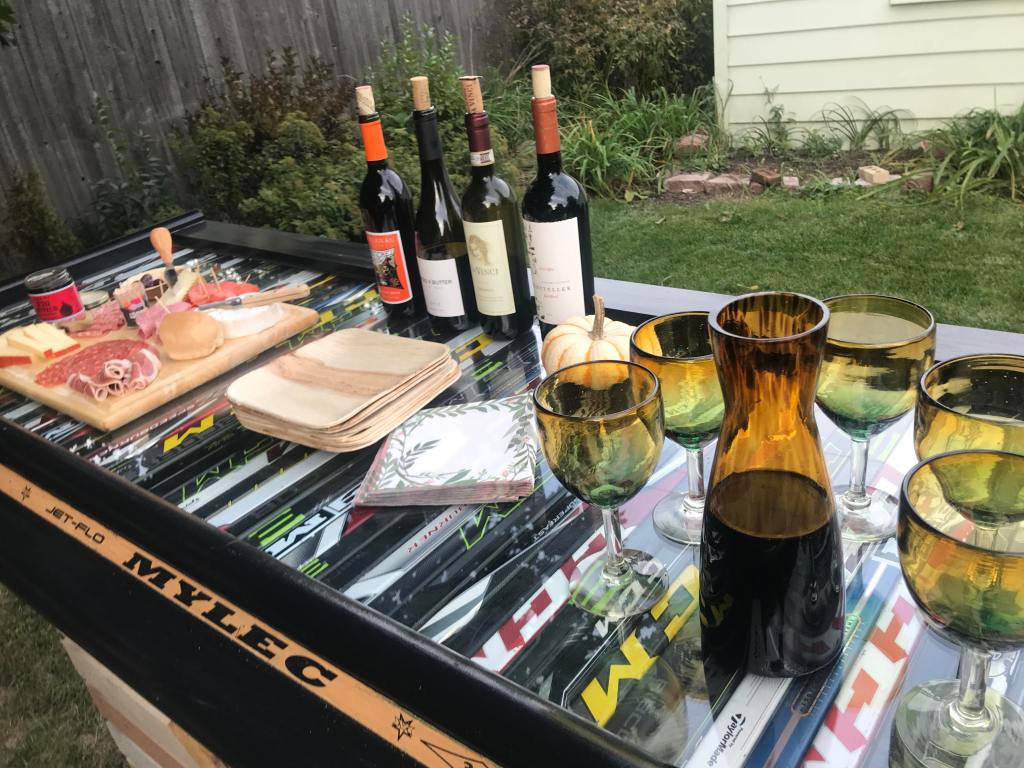
We put out a cheese and meat board appetizer with wine to start the party.
We made the salad and cookies before guests arrived. We cooked the pasta/mingled while the appetizer was out. We served the pasta on individual plates and let guests add their own cheese. We put the salad out in a bowl for people to serve themselves. After dinner, we cleared the table and brought out the cookies and ice cream on bamboo dessert plates.
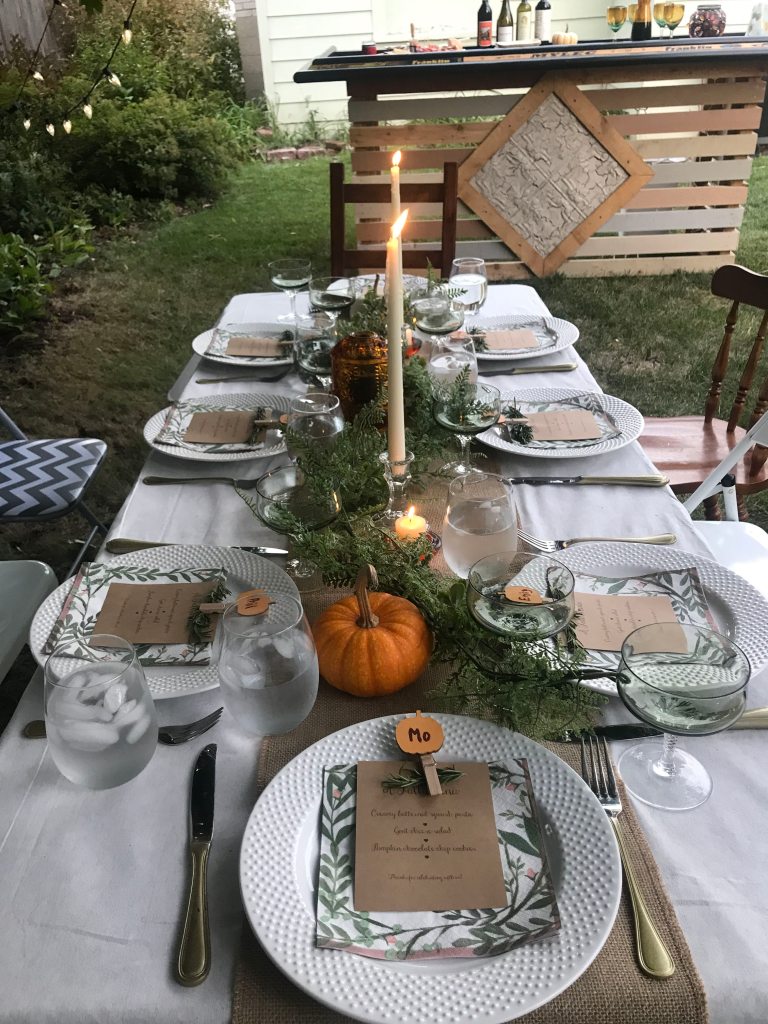
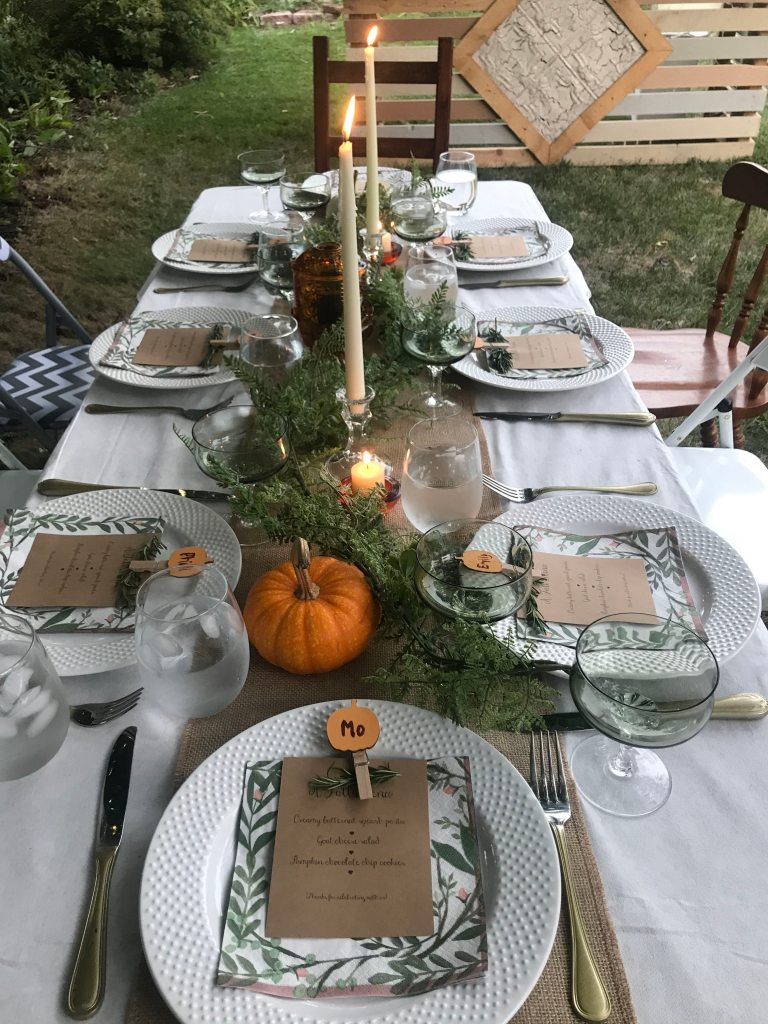
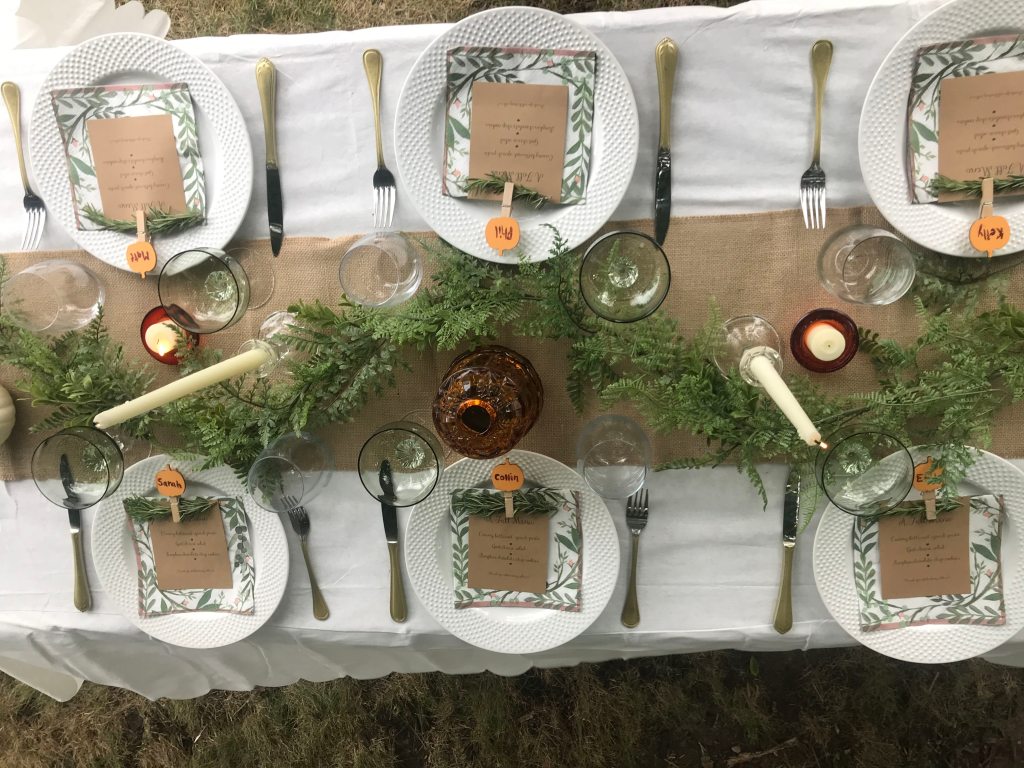
Now the fun part – setting the table! I wanted a fall, outdoorsy, greenery vibe.
TABLE: White table cloth ($5) – This is my go to party table cloth. It comes in pink, green or white and is disposable. It’s made from a thicker paper material and looks much nicer than a plastic table cloth. I think you can recycle any clean parts of the cloth and reuse it if it doesn’t get dirty. And the bottoms are scalloped!
Burlap table runner ($8) – I use this for a ton of different parties and themes – it’s very versatile.
Greenery garland($10-$20) – Michael’s has a ton of these with different greenery options. They usually have a 50% off coupon that you can use too. I chose to do a plastic garland so I could re-use it again (another example with succulents added). I placed this along the center of the table on top of the table runner.
Candle holders + candles ($2 total each) – I went to Salvation army and got two clear taper candle holders, two small orange tea candle holders and I found a bigger orange holder to be the center piece. You can get taper and tea light candles at Michael’s for really cheap, use their coupons! I placed these on top of the runner mixed in with the greenery.
Pumpkins ($1 each) – I got mini pumpkins at the Farmers market – orange, white and a combo.
PLACE SETTINGS Plates (Free) – We used our normal dishes that were just plain white. I think any white plate would work for this.
I put out bamboo plates for appetizers and served dessert on them as well.
Napkins ($2.50) – I love the greenery feel of these! They have matching plates and other accessories if you want more. Place this on top of each person’s plate.
Menu (Free) – I made the menu in InDesign and printed it out on brown kraft paper. You can obviously print it on any paper! Put a menu on top of each person’s napkin.
Place settings ($6) – I got little pumpkin clips from the Target dollar section and wrote each person’s name on them. I like how they clipped the napkin and menu together. You could DIY these with any clip or seasonal item. You can also paint over the names if you want to use for something else/another party. OR give them away to each guest at the end of the night.
I clipped a fresh sprig of rosemary in there above the menu as well.
Glasses ($12) – I found green cocktail glasses at Salvation Army – a set for $12. I love vintage colored glassware – you could do brown, black, orange, any other fall color. I put these out as dinner cocktail/wine glasses. I then used our standard clear stemless wine glasses for water.
I put out a separate set of wine glasses (orange and green duh) and a carafe for drinking with the appetizers.
Flatware (Free) – I had a box of old silverware and I spray painted the ends of it gold. Obviously you can just use whatever you have at your house. Or there probably is cool gold flatware at Salvation Army for pretty cheap.
I hung up string lights above the table for when it started to get dark. That with the candlelight really created a vibe!
I think this party cost me a total of less than $150! You can obviously upgrade anything or use more of things you already own. I’d like to do more seasonal or themed dinner parties – they are so fun, easy and intimate.